
How to Replace Door Weatherstrip Seal 1982-92 Chevy Camaro
Created on: 2011-07-14
How to repair, install, fix, change or replace a weather strip that is falling down, coming apart, or the adhesive is failing on 82, 83, 84, 85, 86, 87, 88, 89, 90, 91, 92 Chevy Camaro Iroc-Z and Pontiac Trans Am models.
-
step 1 :Disconnecting the Battery
- Disconnect the negative battery cable with an 8mm wrench
-
step 2 :Removing the Door Panel
- Remove the bolts from the door pull
- Pull off the door pull
- Remove the screws from the door handle bezel
- Pull out the window switch
- Disconnect the window switch wiring harness
- Pull out the door lock switch
- Disconnect the door lock wiring harness
- Pull off the door handle bezel
- Pull out the door handle trim piece
- Pry out the door panel with a putty knife
- Pull off the door panel
- Pull off the door ledge trim piece
- For more detailed instructions, please see the 1986 Camaro door panel replacement video
-
step 3 :Removing the Weather Strip
- Remove the four Phillips screws from the top corners of the door
- Peel back the weather strip at the top corners of the door
- Pull off the weather strip
- Pull out the weather strip pins with needle nose pliers
-
step 4 :Cleaning off the Glue
- Heat the glue with a heat gun
- Scrape the glue off with a putty knife
- Continue heating the glue
- Clean the residue with a wire brush
- Clean the remaining residue with mineral spirits
- Repeat this step for all of the glue spots
Tools needed
-
Putty Knife
8mm Wrench
T10 Torx Driver
Flat Blade Screwdriver
T27 Torx Driver
Phillips Head Screwdriver
Heat Gun
8mm Socket
Mineral Spirits
Ratchet
Wire Brush
Cloth Rags
Needle nose pliers
Brought to you by 1AAuto.com, your source for quality replacement parts and the best service on the Internet.
In this video, we are going to show you how to remove the door weather strip from the door of this 1986 Camaro IROC-Z. This is the same for any '82 to '92 Camaro IROC-Z and Z28, as well as the Firebird Trans-Am and Formula. The tools you'll need are 8mm wrench or socket and ratchet to disconnect your battery . I will say that now, you do disconnect your battery, just so you don't run down the battery with the interior lights, and also to avoid shock when you are disconnecting the power door locks ., T10 and T27 Torx driver, flat and Phillips screwdrivers, a heat gun, a putty knife, wire brush and mineral spirits or some other type of cleaner to clean off some of the residue of the glue.
We'll start out here in a little bit of fast-forward. You do need to remove your door panel and the upper ledge molding to get to a couple of screws that hold the ends of the weather strip. So I'll show you that. This is in fast motion. If you want to see this in regular speed, just check out our other videos for the Camaro door panel removal, and you can see it there.
There are two Phillips screws to remove so you can pull back the top of the weather strip up here. Then, right into here, you'll see there is a hole in the weather strip. Remove the screw, and you peel that back. I'll pull the screw out here so I don't lose it. Remove the two screws at this end of the weather strip. There's one there and then there is one here. You can see how rough shape the weather strip is in. Once you remove those screws, you'll see the weather strip starts to come off. It is glued there, but the thing is so old, it just came apart. I didn't even force that. Then there is a series of pins. You can probably just pull it right off. We are going to pull these pins out with needle nose pliers. Do the same thing over here. Now take a pair of needle nose pliers and you can see you can just force the pliers right in behind those clips and pry them right out. Just so you can see, a total of about twenty clips come out.
If you're doing this stuff yourself, a great investment, again, is a heat gun. This is just a middle price model from a home improvement store. Just take it, heat it up, which releases the glue. I'm going to really heat this up. I can smell it burning, now. Then I'll fast-forward through this. You just basically use the heat gun, heat up with those spots where it's been glued, and the heat releases the glue and it makes it easier to get it off nice and clean. Once you are finished with the putty knife, and then use your heat gun and heat up the remaining residue. Then, you can see I have a little wire brush. Just use the wire brush to get the remaining weather strip and glue off. Then, once you're done with that, I've get some mineral spirits on that paper towel, just remove the remaining residue. You want to make sure this is nice and clean, so that if you hit it with some paint, the paint sticks to it, or if you are just gluing on new weather strips, they have a good clean surface to stick to. Then, we'll go on very high speed, here, and you want to just repeat that process for the spot up near the front where they glued it on at the factory. Remove as much of that residue as possible. Get a nice clean surface for either your paint and/or your new weather strip to stick onto.
We hope this video helps you out. Brought to you by www.1AAuto.com, your source for quality replacement parts and the best service on the Internet. Please feel free to call us toll-free, 888-844-3393. We're the company that's here for you on the Internet and in person.
Shop Products


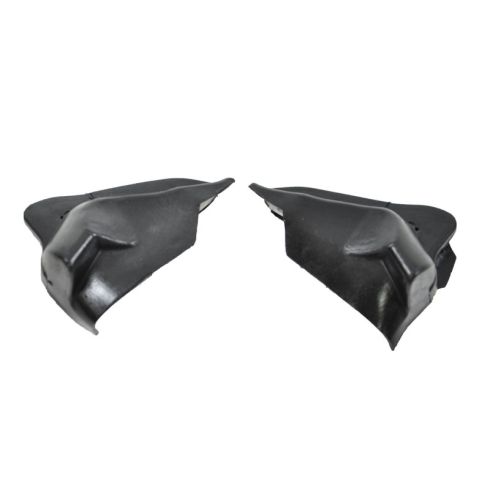
1987-92 Chevrolet Camaro Pontiac Firebird Lock Pillar U Jamb Weatherstrip Seal 2 Piece Set Metro Moulded Parts ALP 11-C
- 2 Piece Set

How To Replace Door Weatherstrip Seal 1999-2004 Jeep Grand Cherokee
If your 99-04 Jeep Grand Cherokee is leaking around the door, watch this video and learn how to replace the weather strip seal!

