How to Replace Distributor Cap 1999-2000 Chevy Tahoe
Created on: 2021-01-18
This video shows you how to install a new distributor cap in your 1992-2000 Chevy Tahoe.
Tools needed
-
Dielectric Grease
Torque Wrench
Drill
10mm Socket
Ratchet
Marker / Writing Utensil
5.5mm socket
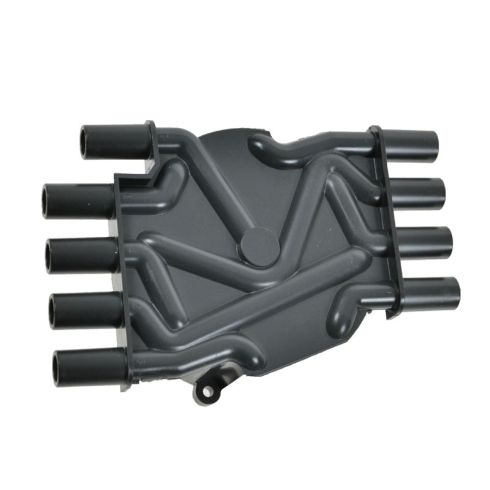
All right, friends. To get started, we need to obviously access the rear area of the engine. To get to that, let's get this right out of the way. There's going to be a 10-millimeter headed bolt straight down right here. Go ahead and remove that. Ours is broken. So, we're not necessarily worried about it. After that, we're gonna loosen up this clamp and get this right off. Set this aside. Now that that's out of the way, we have a nice, clear view of our distributor. That's located right here.
You're gonna see that you have eight spark plug wires going to it. And then, you're gonna have one coil wire that goes to it as well. We need to make sure that we mark those wires so we can remember exactly where they go to on the distributor. They don't necessarily have to be in any particular order, in exception of just however you can remember. So, I'm just gonna go ahead and mark this one with a one, or at least one line. The next one, two lines. Next one, three lines. And like I said, This isn't the firing order. This is just so I can remember where to put them back.
Now that we have all our wires clearly marked, let's go ahead and start pulling them off of here. There's going to be two mounting bolts on this, one on the forward end and one on the back right there. Let's go ahead and loosen those up, and we'll get this cover off of here. Okay, let's carefully lift this up. Okay, friends. Now, it's gonna be time to get our brand new cap on here. We want to make sure we have both of our small mounting bolts.
When we put on the cap, we want to make sure that we have the area that has the coil wire facing towards the passenger side. Now carefully set this on here. We want to make sure that the bolt holes line up. We'll start in both of the bolts and then, we'll snug them up. All right. So once you have these things so they're bottomed out, you just want to go ahead and torque them down to 21-inch-pounds. Now the next thing we need to do is use a little bit of dielectric grease. And you can either use this on the wires directly, or you can go right along the cap right here.
Essentially, what we want to do is just get it so it's along the electrode and along the outside of the prongs, all the way along the cap. We're gonna do all these areas. And then, we'll continue. Now it's gonna be time to get the wires back on here. We wanna make sure that we install these in the same order as we removed them. Make sure they're all the way on. So for the passenger side, I'm gonna start with the coil wire. That one's very different from all the rest. Just kinda slide that on there.
After that, I'll continue on with the rest of the wires. Making sure that I put them on in the same order that I removed them. Okay, friends. Now it's time to get this back on here. Just something I'm gonna mention real quick is you're gonna have your clamp. And then, over on this side, you should have that mounting bolt. Ours was broken. So, I don't necessarily have the bolt. But I'm just gonna go ahead and slide this on here. Line it up so the mounting bolt's here. Go ahead and start that in. We're gonna move along to snugging this up.
Shop Products
How to Replace Distributor 1988-2002 GMC Sierra 1500
This video shows you how to install a new distributor in your 1988-02 GMC Sierra.
