How to Replace CV Axle Shaft 1999-2004 Honda Odyssey
Created on: 2013-02-19
If your axle is vibrating, worn, stripped, or groaning, the 1A Auto mechanics will show you how to remove and replace the front CV axle half shaft
-
step 1 :Removing the Wheel
- Loosen the lug nuts with the vehicle on the ground
- Raise the vehicle with a floor jack
- Secure the vehicle on jack stands
- Remove the lug nuts
- Pull off the wheel
- Kick the tire to loosen the wheel, if necessary
-
step 2 :Removing the Axle Shaft
- Straighten the axle nut dimple with a hammer and a punch
- Have an assistant press the brake pedal
- Remove the 36mm hub nut
- Remove the cotter pin from the ball joint nut with a pick and needle nose pliers
- Remove the 17mm nut from the ball joint
- Thread the 17mm nut partially on
- Separate the ball joint from the steering knuckle with a pickle fork and a hammer
- Remove the 17mm bolt from the ball joint
- Pry down on the lower control arm with a pry bar
- Pull the ball joint out of the steering knuckle
- Push the axle out of the hub with a flat blade screwdriver
- Push the axle away from the transmission with a pry bar and a hammer
- Pull the axle out through the wheel well
-
step 3 :Installing the New Axle Shaft
- Push the new axle shaft into the transmission
- Push the axle shaft into the hub
- Push the ball joint into the steering knuckle
- Put the 17mm nut onto the ball joint
- Turn the nut so that the cotter pin will fit through the castle nut
- Push the cotter pin into the ball joint nut
- Thread on the hub nut by hand
- Tighten the hub nut preliminarily
-
step 4 :Reattaching the Wheel
- Slide the wheel into place
- Start the lug nuts by hand
- Tighten the lug nuts preliminarily
- Lower the vehicle to the ground
- Tighten the lug nuts to between 95 - 100 foot-pounds of torque in a crossing or star pattern
- Tighten the hub nut to 180 foot-pounds
Tools needed
-
Torque Wrench
Hammer
Pry Bar
Jack Stands
19mm Socket
Pick
Pickle Fork
Flat Blade Screwdriver
Center Punch
Lug Wrench
Ratchet
Floor Jack
Assistant
Needle nose pliers
1/2 Inch Breaker Bar
36mm Socket
Brought to you by 1AAuto.com, your source for quality replacement parts and the best service on the Internet.
Hi, I'm Mike from 1A Auto. I hope this how-to video helps you out, and next time you need parts for your vehicle, think of 1AAuto.com. Thanks.
In this video, we're going to show you how to replace the front axle. We'll show you the passenger side; the driver's side is pretty much the same procedure. This is on a 2003 Honda Odyssey, same as any 1999 to 2004 Odyssey. You'll need a new axle from 1AAuto.com, jack and jack stands, 36mm socket with a breaker bar or ratchet and pipe . also an impact wrench would work if you have one of those, but most people don't have the impact stuff . , 19 mm socket or your lug wrench, 17-18mm wrenches, pliers, a pick or a small screwdriver, a hammer, and a large pry bar or something similar.
As you can see here, I've got the vehicle raised up and I'm removing the lug nuts with my impact wrench. If you don't have an impact wrench, you want to start with the vehicle on the ground, loosen the lug nuts with a 19mm socket and breaker bar or your tire iron, then raise and support the vehicle and remove the lug nuts and wheel the rest of the way. You can see here I'm kicking the tire. That's basically just a way, if your tire or your wheel is a little bit frozen on because of the aluminum . just give it some good kicks and break it loose and then you can remove the tire.
Use a hammer and a punch, or some other type of impact tool and try and straighten out the dimple that is in the axle nut. Now that we have removed the little dent in the nut, here, we need to get this nut off and you can do this a few different ways. The easiest way by far is with an air gun, but you can also have somebody sit in the car and hold the brakes and put a ratchet with a socket on there and loosen it with a big ratchet. Today, I'm going to be using an air gun.
Using pliers, and a small pick or screwdriver, I removed the pin that holds the ball joint nut. I'm going to attach two wrenches to there to get a little extra force on this. We're going to speed up a bit here as Jeremy takes that nut all the way off and that nut is generally a 17mm and it could be an18mm as well. As you can see, once the nut is off, I like to put it back on again a few threads, just because we're going to be breaking these two separate from each other and I don't like anything to happen too suddenly so if you keep the nut on there, it keeps anything from getting crazy over here. This is an air-activated pickle fork. They sell them to be used with a hammer as well. The hammer ones you just put right here and you hit on the end with a hammer. This one, like I said, is air activated so it's powered by air. Put it right in here and as you can see it separates the ball bearing. Now, I'll grab a pry bar, put in the lower control arm and pry down and take the nut off of the lower ball joint, and hopefully pry down enough to pull it out of the nut. Now use a screwdriver or some other narrow tool to push the axle through as you pull the steering knuckle out. Now, use a large pry bar or some other type of long tool to access the engine or transmission end of the axle and tap it out.
There's nothing wrong with our original axle, we're just doing this to show you. So, then, you put it back up into place and get it to lock in place. You can get the ball joint in here. You can put the nut on the ball joint now. So, we'll tighten this down and make sure that the pin will slide through the castle nut. I think we're pretty close. Now you just push the pin on and wiggle it. Make sure you're tight. Then put the nut back on and you can just kind of tighten it preliminarily. You do need to torque it once the vehicle is back down on the ground.
Put your wheel back on and start all your lug nuts just by hand first and then while the vehicle is still in the air, just kind of preliminary tighten them with your socket ratchet, or, as I'm doing, with my impact wrench. Now, again, use your torque wrench and you want to tighten your lug nuts between 95 and 100 foot pounds and use a star pattern as you tighten. We're going to torque this axle nut to 180 foot pounds now.
We hope this video helps you out. Brought to you by www.1AAuto.com, your source for quality replacement parts and the best service on the Internet. Please feel free to call us toll-free, 888-844-3393. We're the company that's here for you on the Internet and in person.
Shop Products


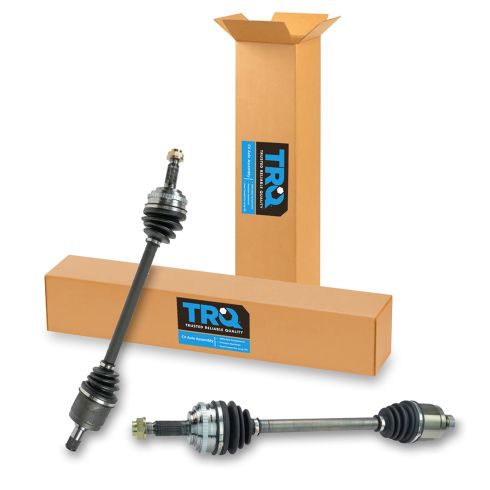
1999-04 Honda Odyssey Front Driver & Passenger Side 2 Piece CV Axle Assembly Set TRQ CSA82460
Part Details:
- 2 Piece
- (1) Front Passenger Side Outer CV Axle Assembly
- (1) Front Driver Side Outer CV Axle Assembly
How to Replace Front Passenger Side CV Axle 2003-07 Honda Accord
Watch this video to learn how to replace the passenger side CV axle on your 03-07 Honda Accord. The driver side is covered in another video!
