How to Replace CV Axle Shaft 2002-06 GMC Envoy XL
Created on: 2014-08-27
If your CV axle is groaning or failing, check out this video and learn how to replace it
-
step 1 :Removing the Wheel
- Pry off the hub cap with a flat blade screwdriver
- Loosen the 35mm hub nut with the vehicle on the ground
- Loosen the lug nuts
- Raise the vehicle with a floor jack
- Secure the vehicle on jack stands
- Remove the lug nuts
- Pull off the wheel
-
step 2 :Removing the Rotor
- Remove the 17mm bolts from the brake caliper while using an 18mm wrench to hold the inside nut
- Pry the brake pads into the caliper with a flat blade screwdriver to push in the pistons
- Pull the caliper aside
- Pry the brake pads off with a flat blade screwdriver
- Remove the 18mm bolts from the brake caliper bracket
- Pull off the brake caliper bracket
- Pull the rotor off
- If the rotor will not come off hit the rotor with a ball peen hammer
- If the rotor still won't come off, thread the bolts into the press holes and slide the rotor off
- Remove the center hub nut
-
step 3 :Removing the Axle
- Remove the 15mm bolts from the panel to access the driver side
- Remove the 15mm bolts from the control arm with a socket, ratchet, and wrench
- Hammer the upper control arm off the ball joint
- Pry open the clip and remove the brake line wiring harness
- Wire-tire the caliper onto the backing plate
- Remove the two 10mm bolts from the brake line bracket
- Pull the control arm back from the steering knuckle
- Place a pry bar onto the back of the axle where it connects to the transmission
- Hammer the pry bar to push the axle out
- Place a drip pan underneath the differential
- Maneuver the axle out of the differential
-
step 4 :Installing the Axle
- Fit the axle into the hub and then push it into place
- As you go, place the steering knuckle into the ball joint on the control arm
- Make sure the axle is locked
- Replace the brake line bracket
- Insert and tighten the 10mm bolts to the brake line bracket
- Re-clip the harness to the brake line
- Hammer the upper control arm onto the ball joint
- Replace and tighten the 15mm bolts to the control arm
- Torque the 15mm bolt to 55 to 60 ft/lbs
-
step 5 :Installing the Rotor
- Slide the rotor on
- Thread on one lug nut to hold the rotor in place
- Apply brake grease to the caliper bracket bolts
- Put the bracket back into place
- Start the 18mm bolts by hand and tighten them
- Torque the bolts to 110 ft/lbs of torque
- Install the new brake pads into the bracket
- Apply brake grease to the brake pads
- Put the caliper on
- Thread the 17mm bolts by hand
- Torque bolts to 40 ft/lbs
- Replace the hub nut and remove the lug nut
-
step 6 :Reattaching the Wheel
- Slide the wheel into place
- Start the lug nuts by hand
- Tighten the lug nuts preliminarily
- Lower the vehicle to the ground
- Tighten the hub nut
- Torque the lug nuts to 100 ft/lbs in a crossing or star pattern
- Torque the hub nut to 103 ft/lbs
- Reattach the center cap
-
step 7 :Testing the Brakes
- Pump your brakes repeatedly until they feel firm
- Test your brakes at 5 miles per hour and then 10 miles per hour
- Road test the vehicle
Tools needed
-
35mm Socket
A Piece of Pipe (for leverage)
15mm Wrench
Torque Wrench
Hammer
15mm Socket
Pry Bar
18mm Wrench
17mm Socket
Jack Stands
18mm Socket
19mm Socket
Brake Parts Cleaner
Flat Blade Screwdriver
10mm Socket
Drain Pan
Ratchet
Floor Jack
Brought to you by 1AAuto.com, your source for quality replacement parts and the best service on the Internet.
Hi, I'm Mike from 1A Auto. I hope this how-to video helps you out, and next time you need parts for your vehicle, think of 1AAuto.com. Thanks.
In this video, we're going to show you how to replace the front CV axle shaft on this 2003 GMC Envoy XL. We show you on the passenger's side, but the driver's side is a similar procedure. The items you'll need for this include a new front axle from 1AAuto.com, 10mm, 15mm, 17mm, 18mm, and 19mm socket and ratchet, a piece of pipe for extra leverage, a 15mm and 18mm wrench, flat blade screwdriver, torque wrench, hammer, jack and jack stands, and a pry bar.
Start off by prying off your hub cap. Then just loosen up this 35mm nut. If you don't have the benefit of air tools, you'll want to take this nut off all the way at this point. Now, you can loosen your lug nuts as well. We'll just fast-forward as Mike does this. Once you've loosened them, just jack the vehicle up and then remove the lug nuts the rest of the way. Now the wheel will pull off.
The next few clips, we remove the brakes. You don't have to do this, but in my opinion it does make it easier to see back in there and get the axle out. There are two 17mm bolts that you remove to remove the caliper, hold the caliper slides with an 18mm wrench, and then pry the caliper up and off. You'll want to secure it somewhere with wire ties so that you don't stress the brake line.
Then you can remove your brake pads. Two 18mm bolts hold the caliper bracket in place. Again, you don't really have to do this, but it just helps to be able to see back in there with the rotor out of the way. Remove the two 18mm bolts using a pipe for some extra leverage, and do this slowly and smoothly so you don't break any knuckles or anything like that. The caliper bracket comes up and off. Then you can remove your caliper either by using a hammer, careful not to damage the rotor at all. If you have to hammer more than just a medium taps, then you'd want to use a couple of M12 bolts. They thread it into the holes in the rotor and help to press the rotor off.
Remove the center hub nut the rest of the way if you haven't already. Using a 15mm socket and ratchet and a 15mm wrench, just remove this bolt. Now, using a hammer, just hit the upper control arm off the ball joint. Now, just pry open this clip and pull the harness free. You want to secure your caliper just somewhere out of the way. We just wire-tie it right here onto the backing plate.
Now, you want to remove these two 10mm bolts. We'll fast-forward as Mike does that. Now, just lift up on the upper control arm and pull this back. Make sure that the axle is loosened from the hub. Okay, to get your axle out, you need to use a pry bar or some other long item. You want to put it up in, and put it on the back of the axle right where it connects to the transmission or the axle I should say. Make sure you're hitting the middle and it comes right out. If you want to do the driver's side, you'll need to remove these four 15mm bolts to pull this panel down in order to access it.
Pull your axle the rest of the way out of the differential. Move stuff around a little bit and then get it going up. I'm just going to angle it up a little bit and get it going up, in, and remove it from the hub. Careful of all your ABS wires and hoses and stuff, eventually it comes out. Up top is the old axle; below it is the new one from 1A Auto. You can see they're identical, and they'll fit exactly the same.
Move the new axle up and in. Again, be careful of all your wires. I just feed it right into the hub. Pull it, move, just maneuver a little bit, and get all the way into your hub. Then pull on it and feed it into the axle. Careful with the seal. You want to put the steering knuckle back up in place as you go so you don't over extend the CB. I'm just going to put that in place, push your axle right in, and make sure it's locked.
Now replace your brake line bracket and the 10mm bolts that hold it into place. You just want to use the upper control arm to hold the wheel knuckle in place while you're doing this. Re-clip this harness. Now hammer your upper control arm back down into the ball joint. Replace the bolt and the nut and tighten them up. You want to tighten and then torque this nut and bolt combination to 55 to 60 foot-pounds.
You want to make sure that these holes line up in between the two holes that are on the hub. Then you just slide your rotor back into place and replace a lug nut to hold it into place. You want to check these slides on your caliper bracket and make sure they're greased up. If they're not, just apply some brake grease to them. Then fit the bracket into place and then just start twisting in your bolts by hand and then tighten them up. Torque these two bolts to 110 foot pounds. Torque each of these to 110 foot pounds. Then just replace your brake pads and if there's no grease on the ends, just apply some brake grease.
Now, push your caliper back down into place and replace those two 17mm bolts. We'll fast-forward as Mike does that and tightens those up. Now torque each of those to 40 foot-pounds. Replace the hub nut. Remove the lug nut that you put on there to hold the rotor in place, and then put your wheel in place. Then replace each of the lug nuts and tighten them preliminarily. Now torque each of these to 100 foot-pounds in a crossing pattern. Then torque the hub nut to 103 foot-pounds. Then replace your hub cap.
After you've done any work on the brakes, you want to just pump the brake pedal until it firms up. Then you want to do a stopping test from five miles per hour and then 10 miles per hour.
We hope this video helps you out. Brought to you by www.1AAuto.com, your source for quality replacement parts and the best service on the Internet. Please feel free to call us toll-free, 888-844-3393. We're the company that's here for you on the Internet and in person.
Shop Products


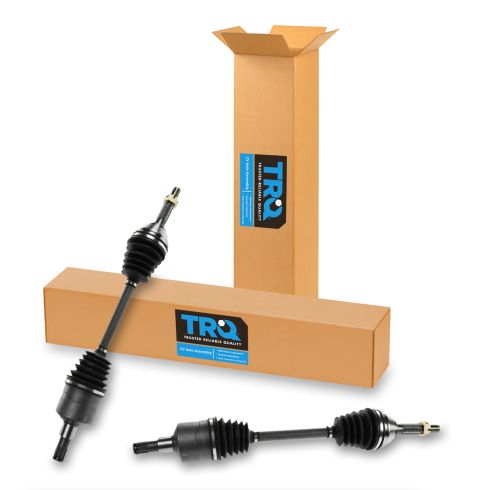
Front Driver & Passenger Side 2 Piece CV Axle Assembly Set TRQ CSA82476
Part Details:
- 2 Piece
- (1) Front Driver Side CV Axle Assembly
- (1) Front Passenger Side CV Axle Assembly
How to Replace Front Driver Side CV Axle 2005-16 Toyota RAV4
How to replace a bent, broken, rusted, or worn front driver side CV axle on your 05-16 Toyota Rav4.
