How to Replace Brake Kit 2000-02 Dodge Durango
Created on: 2011-01-05
Watch this video to learn how to fix squeaky or fading front brakes. The experts at 1A Auto show you how to replace the brake pads on your 98-03 Dodge Durango or 97-03 Dodge Dakota.
-
step 1 :Removing the Front Wheel
- Begin with your vehicle on the ground so the tires won't move
- Using your 19mm socket and ratchet, or a lug wrench, loosen the lug nuts
- Jack up the car using a lift or a floor jack and stands
-
step 2 :Removing the Brake Caliper
- Turn the wheels to the left by pushing on the passenger side wheel
- Remove the two T47 Torx bolts
- Then take your flat blade screwdriver and pry a little bit on the caliper and get it going
- Pull your caliper right off
-
step 3 :Removing the Brake Pads and the Rotor
- For the inner pad, you should be able to simply pull it out
- To get the outer one out, you use your hammer and you want to hit diagonally and they come out
- Place the caliper above and secure it with a wire-tie or something similar. You don't want to just let it hang down because there is a chance you can rupture your hose.
- With the caliper out of the way, simply remove the rotor
-
step 4 :Replacing the Brake Rotor
- Put the brake rotor back on and then you want to push your piston back in to your caliper
- As you tighten the C-Clamp, the piston goes down in to the caliper
- Remove the C-clamp
-
step 5 :Replacing the Brake Pads
- Your inner pad has the clamps to secure-just put in to the caliper and push it in
- Your outer pad goes right in. While making sure you have your bolts out of the way, you push them down like that with the caliper right in
- After the caliper is in, start your bolts back in and, once again, that's a T47 Torx
- Push on your bolts and start them
- Tighten up these bolts to about 35 pounds
-
step 6 :Replacing the Front Wheel
- Replace the wheel into the vehicle. Use the air wrench to start the lug nuts a little bit, and you want to torque your lug nuts to about 100 foot pounds
- Make sure that before you drive your car, you get in and pump the brake pedal a few times until you make it feel solid
- When you push the piston back in to the caliper you'll need to work it back against the discs
- Before you road test your vehicle, just make sure that the brakes are holding the car in gear
- Do a stop from 5 mph and 10 mph just to make sure that everything is working before you get it out on the road
Tools needed
-
Large C-Clamp
Flat Blade Screwdriver
Torque Wrench
Jack Stands
19mm Socket
Floor Jack
T47 Torx Socket
Brought to you by 1AAuto.com, your source for quality replacement parts and the best service on the internet.
Hi, I'm Mike Green, one of the owners of 1A Auto. I want to help you save time and money repairing and maintaining your vehicle. I'm going to use my 20+ years' experience restoring and repairing cars and trucks like this to show you the correct way to install parts from 1AAuto.com. The right parts installed correctly, that's going to save you time and money. Thank you and enjoy the video.
In this video, we're going to show you how to remove and replace the rotors and brake pads on this Dodge Durango; same as any 1998 to 2003 Durango and 1997 to 2004 Dakota. This vehicle had pretty good brakes so we actually just took them off and put them back on just to show you, in case you're wondering why we didn't put any new brakes on. Tools you'll need are jack and jack stands, a 19-mm socket and ratchet or your lug wrench, a T47 driver and ratchet, large flat-blade screwdriver, a hammer, a large c-clamp, and a torque wrench.
First, you're going to want to remove the front wheel. I have the benefit of air tools. If you start with your tire on the ground, you'll want to loosen the lug nuts first, then jack it up, and remove the lug nuts. I'm just going to take them off with my air ratchet. We'll just fast forward here a little bit.
Now, you want to go in behind. I've actually turned the wheels to the left a little bit on the passenger's side here. There's two T47 Torx bolts; one on the side, and then one right on top. Again, I'm going to use the T47 Torx bit. Then take your screwdriver and pry a little bit on the caliper and get it going. Pull your caliper right off.
To get the brake pads out, you'll pull the inner one right like that. To get the outer one out, you use your hammer and you want to hit diagonally and they come out.
Now, to get your rotor off, you'll take your caliper and place it up above. You don't want to just let this hang down because you can rupture your hose; rest it up here or maybe put it on there with a wire-tie or something. Then the rotor just pulls right off.
Put the brake rotor back on; you want to push your piston back in to your caliper. I just use a big C-clamp like this. As you see while I tighten, that piston goes down in to the caliper. I remove the C-clamp. Your inner pad has the clamps to secure just put in to the caliper and push it in. Your outer goes right in, while making sure you have your bolts out of the way, you push them down like that with the caliper right in.
Now, start your bolts back in and, once again, that's a T47 Torx. Push on your bolts and start them. These you want to tighten up to about 35 pounds. That doesn't sound like a lot. It really isn't because what really takes the braking pressure are these big arms. You can see that the caliper squeezes and then the pads push against those. These bolts are just kind of holding the caliper in place. They don't really do much of the braking.
Okay, so now you can see we've got our wheel back on. You want to put the cap on with the lug nuts. I'm just going to use the air wrench to start the lug nuts a little bit. You want to torque your lug nuts to about 100 foot pounds and you should be all set.
NOTE: Make sure that before you drive your car, you get in and pump the brake pedal a few times until you make it feel solid. When you push the piston back in to the caliper you'll need to work it back against the disks. Before you road test your vehicle, just make sure that the brakes are holding the car in gear and then do a stop from 5 mph and 10 mph just to make sure that everything is working before you get it out on the road.
This video was brought to you by www.1AAuto.com. We hope we helped you out. We are your source for quality replacement parts and the best service on the Internet. Feel free to call us, Toll Free: 888-844-3393. We're here for you on the Internet and in person. Thank you very much.
Shop Products


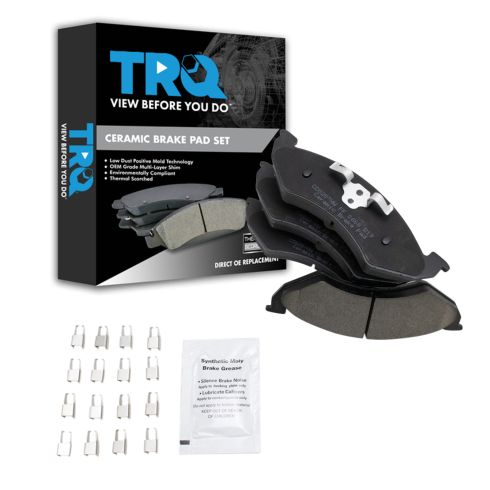
2000-02 Dodge Dakota Durango Front Ceramic Brake Pads TRQ BFA73294
Part Details:
- Premium Posi
- Contact Point Grease
- Hardware
- No
- Ceramic
- Black
- 0.79 in
- Yes
- Yes
- Yes
- 20 mm
- Bonded
- Yes
- No
- Yes
- 4
- No
- Standard Replacement
- 20 mm
- 0.79 in
- No
- Black
- Steel
- 0.79 in
- 73 mm
- 0.79 in
- 20 mm
- 2.36 in
- N
- 7.56 in
- 7.56 in
- R-S-R
- No
- No
- 20 mm
- 60 mm
- 192 mm
- 192 mm
- 2.87 in
- Ceramic
- Yes
- Yes

How to Replace Rear Brakes 2001-03 Nissan Maxima
Check out this video to learn how you can replace the worn or squeaky rear brakes on your 01-03 Nissan Maxima.
