How to Remove Reinstall Washer Fluid Reservoir 2011 Toyota Prius
Created on: 2018-01-12
How to repair, install, fix, change or replace a broken, damaged, split or leaking windshield washer bottle / reservoir on 2011 Toyota Prius.
-
step 1 :Removing the Bumper Cover
- Pry up the push clips with a flat blade screwdriver
- Remove the five clips from the top of the bumper
- Remove the 10mm bolts from the bumper
- Raise and support the vehicle
- Remove the 10mm bolts from the splash shield
- Remove the three push clips from the splash shield
- Pull the splash shield down to reach the headlight wiring harness
- Disconnect the headlight wiring harness
- Remove the clip from the fender liner on either side with a flat blade screwdriver
- Remove the 10mm bolt from the fender liner
- Pop the bumper cover out of its clips
- Lift the bumper up and off
-
step 2 :Removing the Windshield Washer Pump
- Disconnect the wiring harnesses
- Have a drain pan ready
- Remove the pump from the reservoir
- Let the fluid drain
- Pry the hose off of the washer pump
-
step 3 :Removing the Windshield Washer Bottle
- Pry the hoses out of the washer bottle
- Disconnect the wiring harness
- Remove the hose from the brackets
- Pry the clip on the harnesses out from the washer reservoir
- Remove the three 10mm bolts from the washer bottle
- Press the tab near the filler neck and push it up
- Lower the bottle and filler neck down and out of the vehicle
-
step 4 :Installing the Windshield Washer Bottle
- Insert the washer bottle into place
- Clip in the filler neck
- Tighten the 10mm bolts to the washer bottle
- Clip in the wiring harness to the bottle
- Connect the wiring harness to the pump
- Clip the hoses in to the bottle
-
step 5 :Installing the Windshield Washer Pump
- Transfer the grommet from the old pump to the new one if removed from reservoir
- Connect the hose to the washer pump
- Press the washer pump into the reservoir
- Connect the wiring harness
-
step 6 :Refilling the Washer Reservoir
- Insert a funnel into the opening
- Pour washer fluid into the reservoir
- Tighten the cap
-
step 7 :Installing the Bumper Cover
- Insert the bumper cover into place
- Snap the clips on the bumper in
- Align the fender liner
- Press in the clip to either side of the fender liner
- Tighten the 10mm bolt to the fender liner
- Tighten the 10mm bolt to the bumper cover
- Press in the push clips to the bumper cover
- Place the guard onto the bumper cover
- Press in the push clips
- Connect the turn signal wiring harness
- Tighten the 10mm bolts to the splash shield
- Press on the three clips to the splash shield
Tools needed
-
Socket Extensions
Flat Blade Screwdriver
Rust Penetrant
10mm Socket
Ratchet
Hi, I’m Mike from 1A Auto. We’ve been selling auto parts for over 30 years!
Pop your hood with this lever here. Find the safety release and pull it up. Prop your hood up just like that. Remove this trim piece. There's three clips: here, here, and here. The trick to these is you just push them in with your finger like that. They'll go in a little bit. Then you can pull this right up. Put that off to the side.
Remove the five clips on the top of the bumper right here, and then two more on this side. You can use a plastic trim tool from 1aauto.com just to pull these up. Get under here, and pull up like that. Take a ratchet and a 10mm socket and remove these two bolts. These feel a little bit rusty, so I'm going to use some rust penetrant. You definitely don't want to break these, so you might want to tighten it a little bit. Let the rust penetrant work itself in the threads, then loosen it back up very carefully. When you feel it get real tight, I'll tighten it back up. Repeat this process until they're removed.
We're going to raise and support our vehicle. We have a two-post lift, but you can do this in the driveway on the ground. There's a series of 10mm bolts along the bottom edge of the bumper. We're going to soak these in rust penetrant because they look pretty rusty. Now you can remove those six 10mm bolts. These also have a spot for a Phillips, but a 10mm is going to be easier. There's three clips just like the ones on the top of the bumper: one here, one in the center here, and one on this end here. You remove those.
Over on the driver side you can pull this little panel down. Before we remove the bumper, we want to disconnect this harness here. You want to push in on this lock here, pull down, and disconnect that harness. In the wheel well there's a 10mm bolt here you'll have to remove and a trim clip here. We'll take a flat blade screwdriver and spin this horizontal, and then use a trim tool to pull that out just like that. Now you can remove the 10mm bolt. Repeat the same steps on the opposite side.
You want to pull the fender liner back a little bit, grab the bumper, and just give it a good tug. If you need to, you can very carefully slide a trim tool in here and just very lightly pop this out just like that. It'd be helpful to have somebody to hold the other side of this while you remove the other side. Now you can remove the bumper.
Here's our washer bottle. We've removed our headlight so it's easier to see everything. We've also peeled the liner back here. You can find the two bumps on the backside here and here. We're going to push in the tab on this connector and pull it out. To drain the bottle, we're going to use this pump right here because it's closer and easier to get to. This will make a mess. Have a bucket handy and just try and catch as much of this as possible. You want to just pull this pump straight out. It's going to take a little wiggling. It's in a rubber grommet, and they can be stuck in there pretty good. Just let that drain.
If you're just replacing the reservoir, you can just disconnect this electrical connector for now and remove this hose. Be sure to note which hose goes to which pump. They're indicated by red and white up here, and then you just follow them down. Make sure you put them back in the same order. You might need a pick to loosen up the hose back here. We'll pull that off.
We need to remove this harness. Pop that out. Take these hoses and disconnect them from the bottle. Let them hang down. You can let your pump hang down just like that. That's fine. There's another harness clip on the top here. This one might be easier if you put a little pressure on it, push on these locks on the back since you can get to them, and pull that out. Just let that hang. Use a 10 millimeter socket, long extension, and a ratchet to reach this bolt back here. Remove that. We'll go for this one here. On the filler neck of a washer bottle there's some tabs here.
If you put a little pressure on here and push in on the front and the back, you can push that up and it unlocks. Then you can sneak this down. Watch out for the wires. It might even be easier just to pull this out, pull the filler neck out of here, but you can maneuver it and get the whole bottle out. If you were to install a new bottle, you would take this pump out the same way and reinstall it the same way we're going to do with this one. Our bottle's fine, so we're going to reinstall it. I just wanted to show you how to do it.
You want to feed the neck up past the harness. Make sure this piece goes back behind here above these wires. Feed the neck up this way and make sure that tab locks back in just like that. It's got a locating pin right there. Get this set up where it needs to be and reinstall the bolts. Just want to get these bolts snug, don't want to break the plastic.
Reinstall any of the harness connections to the bottle. Put them back here right back into place. You can reconnect your pump at this time. Feed these hoses back on their holders. Same thing down here. Slide it in here just like that. It might be more helpful to remove this grommet from the pumps and put that in first. Make it a little easier. You spin that into place just like that and you can reinstall your pump. Push it in. Make sure the electrical connection's facing up. Wiggle it into place nice and tight.
Reinstall the electrical connector. Make sure you reinstall both hoses into the same pumps that you removed them from. That one's all set. If you removed any clips to make this easier for yourself from the wheel well, you can reinstall those now. Before we forget, we're going to go ahead and fill our waster fluid. We used a clean bucket so we can reuse the washer fluid. When done you should reinstall your cap.
Reinstall your bumper. Line it up on the top. Hold the front. Line up the edges. Just snap them back into place just like that. Push your fender liner back into place just like that. Make sure this clip goes back in at the same time. Reinstall this piece. Just push it into place. I'll reinstall your 10mm bolt. Repeat these steps on the opposite side.
Reinstall your clips on the top. Just make sure these are pulled out like that. Push the base in and pop the top on. There's one in the center here, and two on each end. Reinstall your two 10mm bolts at the top here. Lay this piece back where it was. It was over this rubber gasket. Line it up. Push your trim clips out. Might help to have something hard to push against. You want them to be like that. Feed those in.
Reinstall the three trim clips on the top. Reinstall your connector for your turn signals. That will click. Feed this back up here like that. Reinstall your bolt here and your trim clip there. Now you can reinstall the rest of the bolts and trim clips on the bottom of the bumper. Close your hood, and you're all set.
Thanks for watching. Visit us at 1AAuto.com for quality auto parts, fast and free shipping, and the best customer service in the industry.
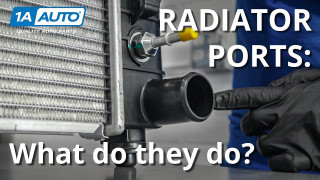
Why Does My New Radiator Have Extra Ports
Got a new radiator but it has extra ports or connectors? That's normal in the aftermarket. Check this video out to see why its OK!
