How To Remove Install Front Door Panel GMC Terrain
Created on: 2014-02-11
How to remove or replace the interior door panel trim on your vehicle. You need to remove the door panel for a number of different repairs, for example door handles, window regulators, power window motors, door locks and more to the GMC Terrain, years 10, 11, 12, 13, and 14.
-
step 1 :Remove the door panel
- Use a pick to pry up the access panels in the door pull and behind the door handle.
- Remove the 7 mm and two 8 mm bolts now exposed.
- Firmly pull out on the door panel to unpin it from the door.
- Disconnect the door latch cable and wiring harness leads.
-
step 2 :Reinstall the door panel
- Connect the door handle cable and wiring harness connections.
- Place the door panel onto the door and hit the edges of the door panel with the palm of your hand to clip it into place.
- Replace the one 7 mm and two 8 mm bolts and snap the little plastic covers back over them.
Tools needed
-
Flat Blade Screwdriver
8mm Socket
7mm Socket
Ratchet
Pick
Brought to you by 1AAuto.com, your source for quality replacement parts and the best service on the internet. Hi, I'm Don from 1A Auto. I hope this how-to video helps you out, and the next time you need a part for your vehicle, think of 1AAuto.com. Thanks.
In this video we're going to show how to remove and replace the door panel on this 2014 GMC Terrain, and we show you on the driver's side, but the passenger side is a similar procedure. The only tools you'll need for this is a pick, a flat blade screwdriver, a 7mm and an 8mm socket and a ratchet. Start off using a pick to remove this little panel behind the door handle. There's another panel right here. Again, just pry it off. Next, remove this 7mm bolt, and then remove these two 8mm bolts. Once those are removed, you can pull out along the edge of your door panel to release the clips, and then pull your door panel up and off. On the back of your door panel you want to release your door handle cable, and to do that you want to pry up the end of this clip and pull back, and then pull it forward, and then up and out.
Next, pull this harness from the door panel, and then push on the tab and pull the harness. To release this harness you want to push on the two tabs on the bottom, and then pull that handle back, and your door panel is free. To reconnect your door panel, push the harness into place, push that handle down, and then push this harness into place. Now take your door handle cable, push it down into place, pull it back, and then slide that clip back on. Put your door panel up over the lock rod and down into the window sill. Once you have it lined up, hit the clips in around the edge of the door panel. We'll just fast forward as Don replaces those two 8mm bolts, and the one 7mm bolt behind the door handle, and then replaces those two plastic panels.
We hope this video helps you out. Brought to you by 1AAuto.com, your source for quality replacement parts and the best service on the internet. Please feel free to call us toll free: 888-844-3393. We're the company that's here for you on the internet and in person.
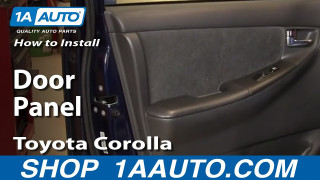
How To Replace Door Panel 2003-08 Toyota Corolla
For upgrades, or repairs, check out this 1A Auto video to learn how to remove or replace the door panel on your 03-08 Toyota Corolla.
