How To Replace Door Panel 2003-08 Toyota Corolla
Created on: 2010-03-30
For upgrades, or repairs, check out this 1A Auto video to learn how to remove or replace the door panel on your 03-08 Toyota Corolla.
-
step 1 :Remove the door panel
- Pry off the triangle mirror panel.
- Use a rag and a screwdriver and pry up the armrest and switch panel.
- Unplug the wiring harness.
- Use a Phillips screwdriver to unscrew the three mounting screws in the door panel.
- Pry off the door panel with a rag and putty knife.
-
step 2 :Replace the door panel
- Clip the door panel.
- Screw in the three Phillips screws.
- Plug in the wiring harness to the switch panel and clip it down.
- Clip down the arm rest.
- Put the triangle side mirror panel back on.
Tools needed
-
Putty Knife
Phillips Head Screwdriver
Cloth Rags
Flat Blade Screwdriver
Brought to you by 1AAuto.com your source for quality replacement parts and the best service on the internet.
Hi I'm Mike Green. I'm one of the owners of 1A Auto. I want to help you save time and money repairing and maintaining your vehicle. I'm going to use my twenty plus years of experience restoring and repairing cars and trucks like this to show you the correct way to install parts from 1a Auto.com. The right parts installed correctly, that's going to save you time and money. Thank you and enjoy the video.
In this video we'll show you how to remove and install a door panel on this 07 Toyota Corolla. Same as any 03-08 Corolla. Removing the door panel allows you to fix window regulators, door handles, mirrors things like that. Tools you'll need: flat blade screwdrivers both medium and small, Phillips screwdrivers, a ten millimeter socket with ratchet and extension for most of the project inside the door. Then a putty knife or door panel clip tool.
Take the medium screwdriver and a rag and you kind of pull on this trim panel here. Get the screwdriver down and behind and it comes out. Then you want to switch over to the smaller screwdriver. There's a little door here in your door handle that exposes a little Philips head screwdriver and then you're going pull off, again use your rag to protect your plastic and what not. Kind of put the screwdriver under there and pull up the arm rest base or pad. Okay and then your switch panel comes up the same way. Okay, now there's buttons. Unplug your switches and now your switch panel is off. Now you want to use a Phillips screwdriver. Okay then once those screws are removed take your rag again and a putty knife and you want to go down around the bottom.
Okay, this part goes bottom first. Slips in. Okay, plug in your door locks. Plug in your window, give it a try. Okay. Just trying the stereo, I can hear the tweeter, I can hear the speaker. That goes back down in. You're all done. We'll clean up the window and you're all set.
Brought to you by www.1AAuto.com your source for quality replacement parts and service on the internet. Feel free to call us toll free 888-844-3393. The company that's here for you on the internet and in person. Thank you.
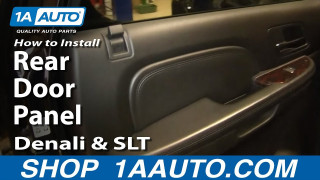
How To Remove Rear Door Panel 2007-13 GMC Yukon Denali
This video teaches you how to remove the rear door panel on your 07-13 Chevy or GMC SUV. 1A Auto makes it easy with step by step instructions.
