How to Fix Dents Deep Scratches On Your Car
Created on: 2019-07-20
Check out this video if you want to learn how to do your own patching and painting! This tutorial will help you repair those deep dents and scratches!
-
step 1 :Pulling Dents
- Wash the vehicle to best assess dents and scratches
- You can use a ruler to help gauge dent depth and location
- Pop out minor dents by hand from behind using light heat
- Pull moderate dents with a dent pulling tool
- Hammer out more severe dents or bends with a hammer and dolly
- You may need to remove trim or panel pieces, depending on the dent locations
-
step 2 :Repairing Deep Scratches
- Tape and mask areas that will not be worked on
- Grind and sand affected areas to expose the metal surface
- Apply fiberglass body filler as needed
- Sand the fiberglass body filler as needed
- Apply finish body filler as needed
- Sand the body filler as needed
-
step 3 :Painting the Vehicle
- Tape or mask any additional areas as needed
- Warm up primer if necessary
- Clean the work area with alcohol or acetone as needed
- Apply the primer as directed by the manufacturer
- Apply additional coats as needed
- Sand or scuff the area as needed
- Clean the area
- Apply the paint in several coats, as directed by the manufacturer
- Sand the painted area as needed
- Clean the area
- Apply clear coat as needed
- Allow the clear coat to cure overnight
- Wet sand the clear coat as needed
- Wash the area
- Apply buffing compound as necessary
Tools needed
-
Dust Mask
Dent Puller
Plastic Sheet
Sanding Block
Spray Primer
Bucket
Sandpaper
Vacuum
Heat Gun
Spray Paint
Dual Action Sander
Buffing Compound
Clear Coat
Painter's Tape
Safety Glasses
Grinder
Sponge
Gloves
Paper Towels
Hammer & Dolly Set
Acetone
Body Filler
Cardboard
Air Compressor
Cloth Rags
Buffing Pad
What's up guys? I'm Andy from 1A Auto. In this video we're going to be doing something a little bit different. We have some body repair we want to perform. We have a little bit of a dent and some scratches and same over here. So we're going to try to clean those up, make them look a lot better. If you need parts for your vehicle, click the link in the description and head over to 1aauto.com.
So here's the dent. It looks like someone hit, someone sideswiped this vehicle and there was some scratches and someone touched it up, which is a good thing that they touched it up, because then you don't have any rust rubbing through. And also right here, same thing. Looks like someone hit, probably the same person and then ... Or maybe not. There's scratches there and they tried touching it up. But they didn't do a great job. There's a little bit of a dent right there, some dent right there.
What we're going to do, the first thing I'm going to do is wash the vehicle, wash this side, we'll wash that and go from there.
Okay, so now that that is clean, I can get a real good look at the dents. This is raised up a little bit, and I can see under this light right here, this is raised up. So what we're going to do is take the wheel off, we'll take the inner fender well out and see if I can access any of this from the backside, see if we can push that back a little bit. We want to get as much of the dent out as possible before we start sanding. We are definitely going to have to sand and paint. This is bent up pretty good. Right here there's an edge that we're going to have to follow.
And the trim pieces, we'll pull this trim piece off, and also this trim piece. For this dent, I think I'm going to try to pull this a little bit. I'll heat it up a little bit, try to pull that. And then also right here, the trim piece is cracked, so I'm going to pull this off. Now this trim is really expensive. With that little crack, I should be able to fix it, make it significantly better. But we'll give it a try, see how it looks. If anything, we may have to buy a new trim piece, but all we can do is try.
For this dent, I do want to pull it a little bit. You can take a ruler and just see if there's any high spots. That's why I want to pull it, just a little bit. Actually it's not too bad. Take the ruler and just try to see what you can find. It's pretty low right there. And right there it's pretty high. Sometimes you might have a body line that you're like, "Oh, there's a high spot," but it's really just the curve of the vehicle. There is a little bit of a high spot right there because of the dent, so we'll pull that out, just a scooch.
I'm going to take the wheel off. I will loosen up the lug nuts before I raise the vehicle up. I'm going to put a jack stand underneath the vehicle. We want to make sure we put it in the proper location. I'll take that inner fender well out. A lot of times there's screws holding these in, or some push clip. So I got this down. I don't really have to pull it out any further than that. It's good enough. There's a lot of junk in there. We'll vacuum that out later. But that's no big deal.
Okay, so from the inside now I can access that light. Pull that light out. Let's see if we can pull this out a little bit. From the backside just going to push on this, slide this out. All right, that's pretty cool. So now we can access behind here. I can do this a couple of ways. I could try to heat this up and try to pull on this a little bit. And right here as well. Let's try a couple of different methods.
I am going to take a rag from the inside and try to push up on this. First just move this light out of the way. But I am going to heat it up with a heat gun. Now I don't want to heat this up too much because I don't want to ruin the paint. Just heat it up a little bit.
Looking better. Just pushing it from the inside. I am going to before I start sanding anything down, I am going to try to use some of this paintless dent remover tool so that I can try to get some of this out, hoping that I don't have to do as much body work up top and I can just focus on down below. It'll be easier to paint it afterwards.
Pull some of this out. These tools work really well. That's looking better. All right, so far so good. It's starting to look better. I am going to keep pulling that. And then underneath here keep pulling that.
All right, so that looks pretty good. I'm pretty happy with that. I am going to try to hammer this out a little bit because the fender is pushed in a little bit before I start grinding, and I'm going to take these trim pieces off as well.
All right, let's take this trim off. Just going to use a trim tool. Get behind here. Slide it out. There is, this piece had a broken piece right there. Just slide that out. Oh yeah, it's broken right there. Set that aside. Do the same with this. Slide it out without cracking it. It's a good idea to go from underneath. That way if you scratch anything, it's less likely to be seen afterwards.
There we go. That came off nice. And actually that's still together a little bit on the back side there. So we're going to try to fix this up a little bit.
I pulled out as much of the dents that I can pull out before actually grinding down and using any type of body filler. I just pulled this one a little bit, just to get the high spot down, which it looks pretty good. Now I'm going to mask off the vehicle. Now this being a convertible, I don't want any of the dust to get into that top, so I'm actually going to tape it up right now and go from there.
Now when I tape up the line, I'm going to tape it up at this line where I don't want paint to go. Now I am going to re-tape it before I actually paint it, but this is just for the grinding spot so I could actually tape it up a little higher and then re-tape lower. That's not a big deal.
I taped this up, masked it up pretty good. I will mask it up a little bit more when I go to paint it. But for now this is going to keep most of the dust out of the convertible top. Now I'm going to start grinding. I can use this more aggressive grinder. That's what I'm going to start with. And then if I need to, I can use this little smaller die grinder with some smaller discs and stuff. All right, so let's get to it. Let's move to the smaller die grinder.
All right, so that looks pretty good. I might grind it a little bit more, but basically you want to get down to bare metal so that we can have the body filler stick to the rough metal. Like I said before, we're not going to use a lot of body filler, just a skim coat, just to get some of the little dents out and some of the scratches. That came out pretty awesome. I'm just going to take a vacuum and vacuum some of this up, clean it up, and then wipe it down, and we can start filling it.
Now I can use a little bit of acetone and wipe it down with a rag, clean that area. Not as worried about cleaning the other areas at this point. We're going to clean that later. When we go to paint, we're going to want to clean real good. You can take a blow gun and try to get as much dust out of the area as possible.
All right, everything's prepped on the car. I've ground down what I needed to grind down. It's nice and clean. Now I can start mixing my body filler. I'm going to use a fiberglass body filler to start. That'll give me a little bit of strength, and it's not going to crack or anything, be brittle. Start mixing that. Now you don't want to mix up too much because if you mix up too much, then it's going to harden on you and then you're going to have to start over. So just mix up a good, about three inch circle, three inch diameter circle is good.
They say not to mix this on anything that's porous. This cardboard has a coating on it so it's not going to seep into the cardboard. I don't think it really matters but that's what the can says at least. Then I want to mix the hardener up. What I do is open the cap, get the air bubbles out, close the cap back up and then just squeeze it. You're supposed to mix this like this for about three minutes or so, or a minute. Something around there. So just mix it up a little bit. Sometimes it gets liquid-y if it's kind of old. And put the hardener in. Just make a line across.
Now I'm going to mix the body filler. You don't want to mix it up like a cake. You just want to fold it, because you don't want to get air bubbles in it. So just mix it up until it's all one color. It should turn like a brown color, a greenish brown. That looks pretty good. Now there's fiberglass in this, so it's going to give it a little bit of strength. Just want to do a thin coat, not thick at all. If you do a thin coat, then you don't have to sand as much.
We will go back and use some body filler just to fill in the little cracks and stuff. Just do that, nice and thin. Looks pretty good. All right, move on to the next section. Go over here. I'm going to try my best to make this body line right here, but just try to make it blend in would be good too.
Keep in mind that when it's hot out, this stuff dries a lot faster. It's nice and cool in here, so I have a little more time to use it, to spread it. But on a hot day this would be already starting to cure up and then we'd have to stop. Looks pretty good. All right, let's let that dry and then once it cures up a little bit, I'm going to start sanding.
While that's drying, I just want to take a look at this molding. I just want to clean this up a little bit. This is kind of attached on the backside, which is good right now. I'm just going to sand this down a little bit. I'll just put a little bit of fiberglass in there and fix this up. Looks pretty good right here. It should be okay.
Okay, should be dry enough to sand. I'm just going to use some 80 grit sandpaper is ideal. I have 100 grit, but it would be good, ideal. What you want to do is use 80 grit sandpaper, sand it down, get it to the level you want, and then switch to a 120 grit sandpaper and that would work good for you.
All right. I'll use different type of sanding blocks. The bigger the sanding block, the easier it's going to be to get it pretty level. You want to go in all directions, back and forth, at an angle. Switch back to the other one once in a while. It's a good idea to wear a mask when you're doing this.
All right. So there was a bit of a low spot on this area. When I was sanding it, I could feel right here was a little lower than over here. So what I did was sand it down a little bit more and put another coat of filler on and now I'm going to sand it down again.
So on this curve section it's kind of hard to get a curve. So what I'm doing is just taking a sponge. This is actually a sanding sponge, using it behind the sandpaper, and sanding it that way.
I have my fiberglass body filler all set and sanded. It's shaped the way I want it to be shaped. Now I'm going to add some regular body filler and go from there. Okay, my hardener is all mixed up. Got a three inch round, spread a line right across the middle, about a quarter of an inch thick. Now mix it up. Once it's all one color, then I'm ready to spread.
Now this, I'm going to spread this a little thinner than I did the other, the fiberglass filler. This is going to fill any little sanding lines and any little pin holes. All right, so that looks pretty good. I did repair this trim already. I just used a little bit of fiberglass. And I'll just put a little of this, this filler on, just clean it up a little bit.
Now we're going to move on to this area. That's about as much as I can do with that. You're going to have to stop there and let it dry and then sand it down. You only have so much time to work with this stuff and then it starts to harden and then you're going to cause more damage than good. Yeah, see, right there, it's too hard. So I'll sand that down and if I have to do another coat, I can do another coat.
All right. So that's pretty dry. I'm going to start to sand that down. Just try to contour it the way of the trim. Now I'm going to use the DA sander. All right. It actually feels really good. A bit down here, I just got to sand a little more.
Now I'm going to use some 400 grit sandpaper, try to get some of the fine lines out. I'm going to use it dry first and then I'll probably wet sand all of this afterwards. Some of these little, little areas would almost be helpful to have a filler primer. When priming it, it'll fill in all those little imperfections and then we can wet sand it. All right, I'm just going to wet sand it. You can feel, just see how it feels. It feels pretty good.
The good thing about wet sandpaper is there's no dust so you don't really need a mask while you're wet sanding, which is nice.
I washed the floor. You want to try to get as much dust out of the area as possible. What I'm going to do is remove this plastic cover. When I'm spraying the paint it may cause an issue, it may not. Static electricity may suck the paint in certain areas you don't want it. So I'm actually going to put some paper on the top to mask it and put a little paper on the floor.
So I masked off everything that I don't want to get paint on. I used some paper and then masking tape, just taped off the areas that I don't want to get primer or paint on, right here and all around there. That way the plastic is out of the way a little bit. That's the area that I plan on painting right there. Make sure, don't forget wheels too. Obviously the front wheel is not on this, but cover up the wheels, keep them from getting paint on.
Now I'm ready to prime. I'm going to take the rattle can and actually put it in a bucket of warm water. Let it sit for about 15 minutes. Let it warm up. You can do this if you're using a rattle can paint as well. You want to warm it up so then it'll just work better. You can check the back of the can and just make sure, see what the temperature of the primer or the paint should be and go from there.
While I'm letting that can of primer warm up a little bit, I'm just going to take a rag and some alcohol or some type of cleaner and just wipe down the areas that I'm going to paint, get rid of all the dust, anything on there. I'm not going to prime where there's paint. I'm just going to prime the areas that were repaired. Try not to be in a dusty environment. If you're doing it outside, try to put some kind of paper down if you're doing on dirt or something, even on your driveway. You want to try to keep the dust down.
All right. Now my primer's warm. Now I'm going to shake the can for as long as the direction tell me to shake it for. Make sure you have a respirator. We sell this respirator at 1aauto.com. Just going to sweep back and forth keeping the distance that it says on the can. Just get the area that I need to get.
Because of how I want to blend the paint right here, I was spraying in this direction right here, to keep the paint going this way and try to keep the paint away from this way. I don't want the paint to go all the way up to the tape line over here. Just try to keep it away as much as possible.
Now I'm going to give it another coat. And I'm going to prime this trim. This primer came out really good. It's nice and dry right now. This area right here is pretty rough, so what I'm going to do now is I can either wet sand it and wet sand further out for the paint because you're going to want the paint to stick. We want that to be more of a rough surface. Not this rough though. But it feels pretty good. I can do that. Or I can take a scuff pad and try a scuff pad. I've had luck doing either one, so I'm going to try the scuff pad first. If it doesn't work, then I'm going to wet sand. I'll have to replace this piece of paper afterwards, but we'll try the scuff pad first and go from there.
I'm just going to take a blow gun, blow away as much dust as I can. So I pulled back the tape a little bit because I don't want to spray the paint right on that same primer line. So I am just going to scuff this up right up to the line and then tape a little bit higher and then I'll do my paint.
The bottom line right here doesn't matter because the molding is going to cover that, so I'm not that worried about that one. I cleaned up all that around the primer there. Then I can put another tape line right there. Same over there. And we'll clean this up and get ready to paint.
All right. Now again now I'm just going to clean it, clean the area, get all the dust off. Clean this at the same time.
I have the paints in here. You can buy paint. You can order paints online. Just find a company that sells paint and all you do is give them your color code and they can send you some paint and some clear coat and primer even. I've got the paints in here. This gauge, this gun comes with a gauge. There's three different guns in this kit. There's a little one for smaller areas, a bigger one for regular areas, and there's also a priming gun. We're going to use this. We sell this at 1aauto.com.
Just hook it up to the air. You can adjust the pressure. And when you use the trigger, when you use the first part of the trigger it's just straight air. It is no paint coming out. Then when you squeeze it a little harder, paint will come out. So you can play with it. You could try it with a little bit of paint thinner on a piece of cardboard to practice a little bit and then eventually try it on your car.
I'm going to put my mask on. I'll just try it on this little area first. We can turn the pressure up a little bit. Just go back and forth. We're good.
I'm going to do the areas that are primed first. Looking at the color, the color matches pretty good. And let that dry and try to give it another coat.
The base coat is done. The texture came out a little bit on the rough side which is okay. I'm going to wet sand it to make this really smooth. And then I'm going to clear coat it. I'm just going to take off some of my paper this time because I want to try to reuse it if possible. Or I can get new paper. Either way it's going to get wet.
Okay, so I'm just going to use some wet sandpaper and a sponge. This is just a household sponge. Slip it around this way. I'm going to start with 1500 grit sandpaper and just do it very lightly. If I have to, I'll got a more coarse sandpaper. Just going to do it very lightly. Be careful near the edges. You don't want to go too hard on the edges because it'll burn right through the edges pretty quick.
I'm switching to 1000 grit because it wasn't really doing much. I'm done wet sanding, and my texture of the paint actually feels pretty good now. This is what I would've hoped the paint would came out like when I spread it. But this is good now. We're going to prep it and get ready to spray the clear on.
I masked up every area that I don't want paint to get on. I wiped down the areas with a rag. Make sure you use some kind of cleaner, get the dust off, and then I'm just getting ready for some clear coat.
All right, I have my clear coat in my gun. I have my mask. I'm a well ventilated area. I have the exhaust fan on. Now I can do, start shooting.
All right. Now I'm going to let that dry a little bit and give it another coat. It's been about 15 minutes. I'm going to give it another coat.
That's had some time to cure up. It's not tacky anymore. Before I let this dry too much, I am going to peel back on the tape. I don't want to have to take a razor blade to the tape if I leave it overnight. I just do it gently, try to peel up. So it peels away. Just go around just the areas that are near the tape. I don't have to unmask the whole car, just these areas. Overall the color looks pretty good. I'm pretty happy with the color. It is a little darker, but it's okay.
I left this overnight. It came out pretty good. There is a lot of orange peel in the paint, and then there's this paint line, which I am going to wet sand and then I'm going to buff. But overall it actually came out really good. So try to move that. The paint color is slightly different. You can see the difference right there. Part of that could be the age of the vehicle, the old paint has faded and stuff. But it'll look pretty good once we're done.
Now I'm just going to leave all the plastic on the vehicle because when I do the buffing, a lot of the compound is just going to go all over and I don't want it to get on that convertible top because it'll be a pain to remove. And same with the rest of the car. The car is going to have to be washed anyway, but keeping that stuff off will help. I'm just going to move this stuff and start wet sanding.
I'm going to start by wet sanding to try to eliminate this line. I'm going to start with 1000 grit sandpaper and a sponge. The reason I use the sponge is I want to try to eliminate fingerprints. See if this works. If I have to, I can switch to a more coarse grit if this doesn't work how I want it to. Every once in a while, take the sponge, just wipe it away, see how it looks. I see this area. I have to do this little bit more. But looks pretty good. And it feels nice and smooth. It's a lot different than over here. So just keep working it.
Depending on the condition of the car and how the actual paint came out, you may be all set, you may be happy with the job. We want more of a mirror finish on this vehicle to match the rest of the car. What we want to do is eliminate the orange peel and what orange peel is actually the texture of the paint. If it looks like it's not as smooth, that's what we're going to eliminate.
All right. So I'm done sanding. Everything came up good. I am going to use a bucket of hot soapy water, wash this off real quick. You probably don't have to use soapy water, but there's a lot of fingerprints on this, so just to get all the oils off I'm going to use soapy water and rinse it and dry it.
All right. Now I'm ready to buff it. I'm going to use a buffer with a medium cut pad and also some medium cut compound. Or you want to use a heavier cut to start with and then we'll switch pads and then use a lighter cut. Just follow the directions on your buffing compound and just take your time. Be careful around the edges. You don't want to hit this too hard in the edges. So keep it slow. Sometimes I like to use a drill better. Sometimes they have different attachments for a drill you can use.
Just keep going over it and then you can wipe it off and check it. See how it came out. Now it's not going to be extremely shiny because we're going to have to go back over with a finer cut. Now I taped up the edges that I'm going to go up against that I don't want to actually buff up there and down there and same on the door over there because I don't want to hit the good paint.
This is coming out really good. I'm starting to see a really good shine on this and the scratches are gone. So what I'm going to do now is switch out my foam pad on my buffer with a more of a finisher type pad and then also I'm using a lighter cut compound, and we're going to buff this some more, shiny it up a little bit more.
All right. So that's as much as a buffing as I'm going to do. Came out really nice. It's very mirror looking. I'm going to peel some more of this tape back and actually just going to wax this side of the car. Just make sure I clean this up a little bit. Because right now all the clear coat that's on there, there's no wax on it, so we want to put some wax on it, make it shine a little bit more.
On like that. Here we go. That looks good. There we go. It fits. I already put the inner fender well in, installed all those screws. So that's good. Now I can pull the plastic off the rest of the car. Pull all the tape off.
There it is. It came out awesome. I'm very happy with the result. If you're thinking of starting to do some body work, and you've never done it before, there's some tips to get you by. Try someone's car that doesn't look so good, one of your friends. Probably not a good idea to grab your boss' BMW, but if you have a car that's not so nice, try to make it look nice. Rock and roll.
Thanks for watching. Visit 1aauto.com for quality auto parts shipped to your door, the place for DIY auto repair. And if you enjoyed this video, please click the Subscribe button.
Shop Products
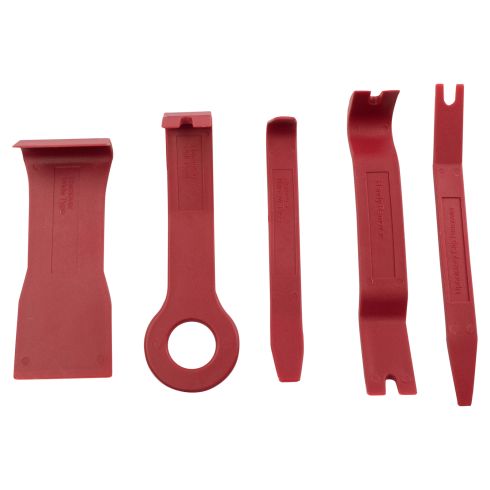
Interior Trim Removal Kit

Trim Clip Removal Pliers Available on 1A Auto
1A Auto reviews a trim clip tool available on 1aauto.com
