Top 5 Problems Cadillac CTS Sedan 1st Generation 2003-07
Created on: 2020-04-29
Top 5 problems for the 1st generation Cadillac CTS, with advice on how to resolve or repair them.
In this video, we're going to be going over the top five problems on this first-generation Cadillac CTS. There's nothing wrong with this car. There's nothing wrong with owning one or buying one. We're just going over the top five problems. Every vehicle has their issues.
Number one, EVAP purge solenoid. Now, a lot of times, whenever you get an EVAP code in your car with the check engine light, you always want to check the gas cap. Check that first. But then most of the time, under this cover. Just grab it, pull it up. The EVAP purge solenoid is located right here, and that's going to put the vacuum on the EVAP system to make it work. These will get stuck closed or stuck open, or electronically they won't work anymore, so replace that, clear the code, and you'll be good to go. When you do check the gas cap, this is what you're looking for. Just grab it. Just make sure it's not loose. If it's just sat in there, then that's going to give you a code. Loosen it up. Just check the seal here. See if there's any cracking. If you look real close there, there is a little bit of cracking starting, so this gas cap is going to need to be replaced soon. And then check the ratchet. Make sure it feels tight. That's good.
Number two, no start issues. First, let's talk about a no crank no start, which means when you go to turn the key, you don't hear anything. You don't hear a click. You don't hear the engine turning like it's trying to start. Now, you always want to check the basics first. You want to make sure the battery is good, the connections. Test the starter and check the fuses. Make sure those are all good. You hook up a scan tool and you try to communicate with the PCM or ECM, you have no communication. Normally, that means the PCM internally is bad, but you definitely want to check the connections at the PCM. Check to make sure you have power and ground there. If that's the case, it needs a PCM. Another no start condition is a cranking no start. So, you go to start the car and the vehicle is actually turning over and it never kicks. It never starts. What you can do is check it with a scan tool. You need to be on the screen where you can read the RPMs while you're cranking the vehicle. The RPM stay at zero, chances are it's the crank sensor. So, underneath the vehicle on the backside of the motor, you can see the crank sensor is located right there. Another symptom is when you're driving around and the vehicle suddenly stalls after it's been warmed up a while and you go to start it, it won't start, just cranks, and cranks, and cranks. If you let the vehicle cool down and then you go to start it and it starts up, it could be the crank sensor. And one more thing. If you're cranking it and it sounds a little funny, there could be something wrong with the timing chains or timing belt.
So, that brings us to number three, timing belts and timing chains. Now, Cadillac, when they designed this CTS, they had many different engines. Based on what engine you have, you may have a timing belt or a timing chain. The belts, if they go too long and you don't change them, they're going to break. If you have the chains, they could stretch and cause other issues. So, this engine happens to be the 2.8-liter V6, and this engine has timing chains, not timing belt. If you have the belts, you should have an external cover that's on the front. It won't be attached to the valve cover like this one. What the timing belt and the timing chains do is connect the crankshaft to the camshafts. The crankshaft is located down below and that's what's connected to the pistons and the camshafts are located up top. So, when those break or stretch and the engine is not synchronized, you're going to have issues.
Number four, engine misfires. So, your engine is running rough. Your check engine light is flashing. You have a P300. What does that mean? One of your cylinders is misfiring or multiple cylinders are misfiring. Now, the first thing you want to do before you check anything else is check the oil level. A lot of the times these engines will burn a little bit of oil and people neglect to check it. And when the engine oil gets down, there's a lot of components internal of the engine that aren't able to work properly, like the time and chain tensioners, the camshaft, solenoids, the lifters. So, when the oil level is down to the base of the hash marks, that normally means you need about a quart of oil to bring it back up to par. Now, if you find it way down here or not even on the stick, you could be two or three quarts low. Make sure you top it off. It'd always be a good idea to just change the oil. Get fresh oil, and just monitor it. Now, there is always other things that could go wrong with it. You could have coils that are bad or spark plugs, but very common, check the oil level.
Number five, the coolant thermostat. Now, the first thing you may notice is the check engine light is on, you go to scan it and you have a P0128, which is coolant thermostat below threshold. So, the PCM is monitoring the engine coolant temperature and it wants to see it at a certain level close to 210 degrees. And if the thermostat gets stuck open a little bit, and it's only getting up to 175 degrees, that's going to give you a check engine light. Unfortunately, if you have the V6 engine, the location of the thermostat is on the backside. It's pretty difficult to get to. Now, you can take the battery out, and the battery tray, and part of the cowl and access it. That'll make it a little bit easier, but still not that easy. You can see on this scope, on this borescope, that's where it is. It's located right there. There's the housing. Now, you have to replace the housing with the thermostat. Now, if you had the V8 engine, the LS2 engine, your thermostat is going to be located right on the front.
So, those are the top five problems that we have found with this vehicle. If you've had any of those problems or other problems with these vehicles, leave us a comment below. If you enjoyed this video, make sure you subscribe to our channel, ring that bell, turn on all notifications so you don't miss any of our videos.
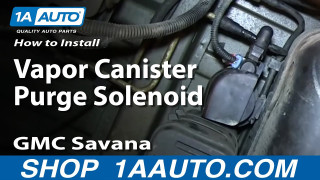
How To Replace Vapor Canister Purge Solenoid 2003-10 GMC Savana
Watch this video to learn how to fix emissions problems. The experts at 1A Auto show you how to replace the vapor canister purge solenoid on your 03-10 Chevy Express or GMC Savana van.
