Stuck Bolt Broke Welding Trick to Remove Rusted Broken Bolt or Stud
Created on: 2017-02-08
How to remove a stuck, rusted, or frozen bolt using a torch.
-
step 1 :Removing a Broken Nut
- Clean the rust off the bolt with a wire brush
- Place a nut onto the bolt
- Attach the welder ground to the nut
- Weld the bolt threads to the nut
- Weld the bolt center to the nut
- Remove the bolt with the socket and ratchet that fits your nut
- Install the new bolt
Tools needed
-
Socket Extensions
Ratchet
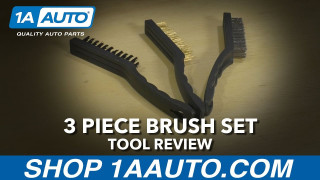
Wire Brush
Welder
Complete Metric Socket Set
Hi, I'm Mike from 1A Auto. We've been selling auto parts for over 30 years. We're dedicated to delivering quality auto parts, expert customer service, fast and free shipping, all backed by our 100% satisfaction guarantee. Visit us at 1AAuto.com, your trusted source for quality auto parts.
In this video, we're going to show you a trick for removing a broken bolt. This method requires a welder and just basic welding skills. You don't need a big 220 welder or anything for this. You can do it with just a small 110 or 120 home welder like an average hobbyist would have. If you like this video, please click subscribe. We have a ton more information on this vehicle as well as many other makes and models, and more tips and tricks like the one we're going to show you here. While we're working with our 2006 Chrysler 300, this information is generic to a variety of vehicles as long as you have a couple of threads sticking out of the bolt. If you ever need parts for your car, you can follow the link down in the description over to 1AAuto.com. Here are the items you'll need for this repair.
The bolt for the center bearing on our Chrysler 300 broke off when we were trying to remove it. Fortunately, we have some threads sticking out here, so this one's going to be real easy to remove with a nut that I found lying around the shop and a welder. We'll use a wire brush just to get the bulk of the rust buildup off of there. You may need to use a flat disk or some sandpaper. You really want to clean that up well. Ours isn't super rusty here, so we'll just clean that off with a brush a little.
I found this 13 mm nut in my little spare hardware box I keep at the shop. Now, it's not going to thread on, but the thing I like about this one is I have this fixed washer on the end, so I can get this over the end of the threads, come up and weld the nut and the washer onto the threads of my bolt, and then weld on to the center of the bolt inside of the nut. You could get a nut that threads on and weld the cap. Some people like to weld the washer on and then weld the nut to that. There's a few methods to do it that are going to depend on what hardware you have. For me, I think I'm going to try this one.
Since this is going to be difficult for you to see on camera, what I'm going to do is place the nut and washer here, come in from the back, and tack the threads onto that fixed washer that I have on the back here. Once it's held on there, I'll reach up into the center and weld the end of the bolt onto the nut, and that should give us a pretty good grip as well as the added benefit of heating up this bolt. I have sprayed some penetrating oil in there, so I wiped it all out and blew it out with an air gun as best we could, but you may see a little bit of flame here. We have people watching with fire extinguishers while we do this. Whenever you're doing a project like this, safety is always your number one priority.
Now the key here is to have a good ground, so I'm going to attach my ground clamp directly to the nut we're using. This will also free up having that in the way, and it'll give me a good way to hold that nut in place without getting in my own way. Having a good ground and having a good hot weld are going to be the keys here. I've got it turned up about as high as my little 120 welder will go here, and we're really going to try to burn this in. Now when I welded in the center of nut, I took a lot of time in there. Again, I ran my welder really hot. Fortunately, we got this thing glowing red. Normally, I would take a torch and try and heat all this up and release it. Since we heated up the nut, we also heated up the bolt.
Now, ours was 13 mm, yours may vary. Now we have a new head on the bolt which we heated up. It's coming right out. Now that we've got our old rusted bolt out, we've reinstalled our center bearing, and we can install a new piece of hardware with the same thread and length.
Thanks for watching. Visit us at 1AAuto.com for quality auto parts, fast and free shipping, and the best customer service in the industry.
3 Piece Brush Set - Available at 1A Auto
Use this brush set on your next project to clean rusty, grimy or old gasket coated parts.
