Scuffs or Scratches on Your Car or Truck How to Repair Light Scratches in Your Cars Paint
Created on: 2021-08-09
Andy gives you some tips to repair light scratches on your car or truck with just some sandpaper and buffing!
Do you have scratches all over your car? In this video, we're going to go over how to fix them.
Something like this, you're gonna have to have the car repainted. But let's go over some scratches that you can fix. This trunk has many different scratches from lighter ones to deeper ones that are deep into the paint that can't be repaired. So let's go over how you determine which ones we can fix.
For the most part, if you can feel the scratch, it's probably unrepairable. But a cool little trick is taking some water and if you're looking at the littler, smaller scratches and the scratch seems to disappear, then it's probably repairable. If you look at these, you can still kind of see that one. But over here, you can definitely see those, so that's not repairable. But this little section right there, you can see it's a lighter scratch, that section would probably be repairable. And this one as well. So that's a cool little trick and it has to do with how deep the scratch is and the light reflecting off the clear coat. So all these should be repairable. You can still see that one, so probably not. But that one, and that one.
You want to start by washing the car. You don't want any dust or dirt or debris on the vehicle while you're trying to fix the scratch. You're just going to make more scratches. So rinse the car down, wash it with soap and water, rinse it again, and then dry it. Now that it's all cleaned up, I'm gonna take some masking tape and we'll tape up a couple of sections and we're gonna try a couple of different techniques on how to do this.
In these different sections, we have lighter scratches and a couple of heavier scratches. Nothing that isn't repairable on all of these. This one might be a little bit unrepairable. But for the most part, they're all pretty much the same. So let's try a couple of different techniques.
For the most part, waxes and scratch removers don't really work too well. Some people try to get scratches out with them. You might be able to get a little bit, but they're not gonna do much. So let's try these out.
This is more of a traditional wax and you just wanna follow the directions on the bottle or the can and just use an applicator and just do some swirl motions. And we'll let that dry. Remember, when you're applying waxes, don't do this out in the hot sun. You want to make sure your vehicle's cool and in the shade.
Now I'm gonna use a wax like this that actually has a little bit of color in it so it might be able to hide some of those deeper scratches. The problem with this is if you have an odd-colored car like a yellow or a bright purple, you might not be able to find the right color match. Just drip a couple of drops on. Just use a microfiber towel and just like the other wax, just make circular motions. And that looks good and now we're going to let that dry.
And this is the last one we're gonna use. This is more of a liquid type wax and you use it similar to the other ones. I'm gonna use a microfiber towel. Just go back and forth for 30 seconds.
All right. Now, these are all dry. Now we can buff them away. Just take a microfiber towel, just pretty much buff it off. You want to go in a straight motion. You don't want to do circles when you're buffing this off. It actually looks pretty good, but there's still a lot of scratches in there. If we pull the tape off and see if you improved them. And there's really not much improvement.
And this is the color match wax. And pull the tape, and again the same. Looks like it polished it up a little bit, but you still see plenty of scratches.
And the last one, this is actually Sue's favorite. She likes using this one. The scratch remover. It looks like it polished it up really well. Let's see how it did with the scratches. And that's probably the best out of all of them. There are still definitely some scratches there. So that worked a little bit, but let's go over the right way by buffing your car.
I'm just gonna put some tape on this so you can see a difference before and after. Now we're gonna take some wet sandpaper and sand this down a little bit. I like to use a sponge on the backside of the wet sandpaper. Using your fingers, you could leave finger marks and stuff. And if you're using a sanding block, it's not a great idea because the car has a little bit of a curve to it, and you may end up damaging the paint. Ideally, I would start out with 1200 grit sandpaper. What I have here is 1500 grit and 800 grit, 800 is a little bit too harsh for what we're doing, so we're gonna start with 1500.
All right. So just wet the car down a little bit, then wet the sandpaper and the sponge, just very lightly. This scratch right here, we're obviously not going to be able to sand this down till that is gone. But some of those other smaller scratches like right here, the scratch that was going there, where it actually disappears with the water, we can try to sand those down. And then if you wipe this away...oops. If you wipe some of the water away and you still see the scratch pretty good, then keep sanding.
So we wiped it off and let it dry and it's looking pretty good. Any scratches that you still see, you'd have to continue sanding and getting those out. I did bump this up to 2000 grit sandpaper right here to make it a little bit smoother, and you can keep increasing the increments of sandpaper to help it look a little bit better. You can see on the edge where it looks bumpy, that's actually the orange peel. That's the way the paint sits on the car from the factory. And if you wanted to make it look really, really nice, you want to do the entire back trunk.
While you're sanding, you want to keep in mind go in the direction of the wind, the way the wind goes on the car. That's gonna give you the best result and you don't wanna go too deep. If you get past the clear coat, you're gonna end up having to paint the car. I'm gonna use a buffer where the pad is spinning constantly. Now, these can burn through the paint if you're not careful, so you wanna practice on one of your friend's cars that you don't really care about.
If you've never used one of these, they do make polishers that are dual-action. They don't actually spin, they just kind of orbit and those are a little bit safer. So you could start out by using one of those. The compound that we're starting with is a medium cut, and then we're gonna end up using a finer cut to give us a better finish. Give it a couple of dabs. Turn this down.
While you're doing this, you want to make sure that you're constantly moving the buffer. You don't want to burn through the clear coat. If you stay in one place for too long, that's gonna cause you to go through the clear coat. Take a microfiber and just wipe it and see how you're doing. That's pretty good.
Now I'm switching to the finer cut compound and I switched the pad as well. It's a little bit smoother than the more aggressive one that's going to dig in a little bit more. So we're pretty much going to do the same thing. Wipe this off, see how we did. It's looking really good and black is normally pretty hard to buff. You can cause some damage. You can have swirl marks. You know, we'll probably have a little bit of swirl marks, which that's okay. This isn't an extremely high-end car or anything. It's not a Mercedes or nothing. It's just a Camry.
At this point, you can take some wax. You can do any of the waxes that we used earlier. This is the one I prefer, and just wax it just like you did earlier. Oh geez. Crap. Whoops. This is gonna bring back the shine and protect it.
Now we'll take our microfiber towel and wipe it away. Going in the same direction of the wind again. It looks really good. Now let's take off the tape and compare. So that looks pretty good. You can definitely see a difference between before and after. Now, the edges are a little bit. There's a little bit of areas where I could have done a little more polishing, so I'll go back and do those later. Actually, I'm probably gonna do the whole trunk now because otherwise, it's not gonna match.
You can see right here where this scratch actually went away and it starts right there. That's where the tape was and that's about where I stopped polishing and sanding. But it looks really good. So this is my method for how I get scratches out. If you think you can do better, leave me a comment below. If you enjoyed this video, make sure you subscribe to our channel, ring the bell, turn on all notifications so you don't miss any of our videos.
All right, all right. What are you laughing at?
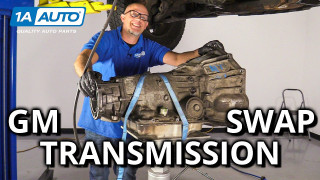
Burnt Fluid Hard to Move Might Be Time to Swap the Transmission
Andy guides you through the process of removing the old transmission and installing a replacement for the GM GMT800 truck and SUV platform
