Scraping While Turning How to Inspect Your Car or Truck Brakes
Created on: 2020-07-27
This video shows you how to inspect your brakes and diagnose a scraping, grinding, or squealing noise.
Do you hear that scraping noise? I guess we're gonna have to check that out. Hey friends, it's Len from 1A Auto. Today, I want to talk to you about some of the things that I would look for if I heard a scraping noise from my vehicle either when I was driving or when I was making long, sweeping turns.
First of all, of course, you wanna road test your vehicle, you wanna try to pinpoint when your vehicle makes the noise that you're trying to figure out where the issue is, right? So, maybe you're making a long left-hand turn and you hear [vocalization], or a long right-hand turn [vocalization]. Or maybe you're just driving on straight down the road and you hear [vocalization] some sort of scraping, or even a squealing noise. Obviously, that's more than likely gonna come from the brakes. So, that's where we're gonna start. One of the first things I like to do after I take a road test is just take a walk around the vehicle real quick and see if I can find anything apparent because that'll give me a starting point.
I have access to a lift, so I'm gonna check all four brakes. For you personally, it might be a little bit harder if you're doing one wheel at a time. But in all honesty, if you're looking at these wheels, I can see that the brakes look fairly good on the front of this right here, I can see the front outer pad looks good, but I don't necessarily know what that inner pad looks like. A lot of times, if a caliper has an issue, it's gonna wear out that inner pad first, so you're probably gonna hear a noise but you might not actually see a problem. It's best to just check them out thoroughly.
If you were to just take an initial look at this, you can tell that the outer pad right here, this is the meat of it, you can see where that line is where my screwdriver is. The meat of it is very thick. And also what I'm noticing is it's not worn at an angle like as in this side was a thin area and then if I look down there, it was very thick. So, that's a good sign, that's telling me that it looks as though the caliper sliders are functioning properly and the pad's not stuck inside the bracket. Let's go ahead and give this a little spin or turn it.
Now, looking at this side, you can look right between the area of the caliper right here. And you can see where the inner pad is. You can also tell that it has plenty of meat there as well. What I like to do is take off the caliper, so I would remove this caliper bolt right here and this one right there. And then I would, of course, pry this off and take a better look. Let's just put a lug nut on here to keep the rotor from moving around. Now, we're gonna turn the wheel and we'll get the caliper out of the way.
Here we are. Use a pry bar of some sort. Just try to get right in between here, you should be able to pry your caliper off. Once you have it off, it's important to take a look at this boot right along your piston. If you notice that there's fluid coming out of there, that means you have a brake fluid leak and of course, that's very bad. That's not one of the symptoms for what we're looking for, but I do like to mention it.
Just to say we have the caliper hanging like this only because we're doing a brief video on the brakes. If we were actually replacing the brakes and it was gonna be hanging for a long period of time, we would hang it with a nice coat hanger or something else that's going to keep it secure and not put a pinch on that hose, you could potentially damage your hose if you leave it hanging too long.
Now, we have a clear view of our pads. Let's go ahead and take the pads out of here. You wanna make sure they come out nice and easy. If for some reason you have to use a hammer and a larger pry bar to get them out, you know that they're probably stuck inside the bracket. Looking at your pads, you wanna make sure that they don't look super glazed, by glazed I mean mirrored. If I can look into this pad and I can count the hairs on my beard, odds are it's very glazed, and of course, it's gonna make a noise overall. The crud inside this area right here, of course, could make a noise as well, so, just bear that in mind. If you wanted to clean this out, It's gonna be helpful overall. That's brake dust, so make sure you don't breathe it in. We'll check both pads just the same way. As you can tell, they're in very good condition. These pads are actually in a very, very good condition. I'll set these aside. The tins themselves, that's these right here. They just kind of press onto the bracket there. And what can happen is, these little tabs can bend out. If they were to bend and hit up against your rotor or even be close to your rotor, that's when you're gonna hear squealing noise a lot of times because the metal against metal, of course, that's gonna make noise. We'll just slide that right back on there for now, that's not an issue, I can tell it's very far away from the rotor all the way around, and it's in good condition. Something else that could make a noise aside from the pads and the tins right here would be this area right here. You have a backing plate, the backing plate is supposed to protect the rotor braking surface from any debris, water, anything like that, that could come up and potentially cause damage to your brakes. If this is bent in and hitting against your rotor, obviously, that's gonna make some noise. This one, looking all the way around. Looks like it's very clear from the rotor. If you do happen to notice that your backing plate is too close to your rotor, just take a nice pry bar, and get right in between and just try to separate the two so you have a nice gap all the way around.
Up here in the left front, I don't see any issues that would cause that squealing noise that we heard before, especially the one that was going around corners. I always like to wiggle these around. These are your caliper sliders. If one's frozen and it doesn't wanna spin or go in or out, you need to make sure you take care of that. What you would do is you just, of course, take it out, check it, clean it, if it looks like it needs to be replaced, replace it, but just add a little bit more lubricant, put it back in there, and of course, I would do the same to both.
The next thing we need to do is of course check the right front. We're gonna check all those same areas: the tins, the backing plate, and of course, the sliders and the pads. Once we've done that, we're gonna go ahead and move along to the rear. One of the easiest ways to test what's going on is just give the wheels a spin. There's an issue. Now, that that wheel's off, we have a nice clear view of what's going on back here. I'm just gonna take a quick peek to make sure that I have a nice gap between my backing plate and the rotor itself. It does look great, so I'm not super worried about that. But as you can tell by the rotor braking surface, this is a very probable cause. I'm gonna give this a little spin. Okay, yeah, there's definitely something going on. Let's get the caliper off.
Check that caliper piston. Yep. Wow, look at the pads. Holy moly. I can't even get this out of here. As you can tell by this pad, as you can tell from the pad, it's worn very low. It's actually been hitting up against the squealer here, this is the wear indicator that tells you when your pads are too low and they're unsafe. Well, it's been hitting. So, you can tell that this pad is in very poor condition, there isn't really much more to say about it other than it needs to be replaced. I'll set that one aside. Of course, we'll check this one as well. That one isn't in much better condition at all. It's even hitting along here which is very bad. The reason why it's hitting along here is because of this large rust lip on the rotor right there. If your rotor has rust buildup like this, that can cause a noise because as this rust is coming around, it's gonna be, of course, wearing into your pad, it could potentially hit up against your tins or even the bracket depending on how big the rest area is.
So, now that everything's apart, I'm just gonna give this a little spin. And this sounds amazing at this point. So, I'm really not too worried about the bearing on the backside there. We have a clear view, of course, of that whole backing plate, it looks great. Some vehicles will have their emergency brake cable incorporated in with the caliper itself. If it looks like this, then that means that you don't actually have separate emergency brake shoes located behind the rotor. With that said, if your emergency brake cable doesn't go to the caliper and it looks as though it goes to the backing plate or into the rear back here on your vehicle, that means you're gonna have emergency brake shoes. So, what you would have to do at that point would be, of course, to take the caliper off completely. Get it out of the way and then you'd have to get the rotor off so you can inspect the shoes behind there to make sure everything's in good condition. If you suspect that you have an issue where the rotor's hitting up against your backing plate, of course, it's a great idea to go ahead and take the bracket off as well. Take the rotor off and then you can look at the backing plate to see exactly where the scraping's been coming from.
Okay, friends. So, as you can tell, the pads and rotors on the left rear of this vehicle are in very poor condition, that tells me that I, of course, need to go over and check the right rear as well. If for some reason your brakes are in condition like this, this is very bad. It's unsafe overall. And of course, you're gonna have a braking condition whether it's a squeal or even a pulsation. With that said, there really isn't much you can do to fix this in exception of, of course, replacing the pads and rotors themselves. And you'd, of course, wanna test those calipers to make sure the pistons push back as they should.
Okay, friends. So, we found our brake issue. Hopefully, you learned a little something along the way. If you did, and you want to talk about it, leave it in the comments section below. If you liked the video, please smash on the like button for me, it would mean the world. While you're at it, why don't you go ahead and subscribe and ring the bell. That way that you can be kept up with all of our latest content. Thanks.
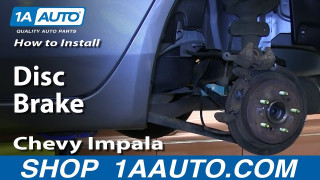
How to Replace Brake Kit 2006-10 Chevy Impala
Here's a video on how to service or replace the rear brakes on your 06-10 Chevy Impala.
