Power Windows Not Working Check for Broken Wires
Created on: 2021-05-12
Len diagnoses a problem with the power window wiring at the door jamb.
Now let's get this window...oh, come on. What now? Hey, friends, it's Len from 1A Auto. So, today, we've got a Second-Generation Jeep Grand Cherokee in the studio. I wanted to go over one of the issues that I'm having with power windows and go over the steps that I'm gonna go through to diagnose the issue. So first, we need to figure out exactly what's going on. Is it one window that's not working or is it multiple windows that aren't working? For my particular issue, I've got no power to any of my windows right now. So, I wanna figure out what's going on. Now, obviously, we're gonna wanna make sure that we have power. So, if you can find the fuses, go ahead and check all the fuses. Make sure that you have power on each one of the prongs. So, now, let's go with the assumption that you checked all of your fuses and you have power going to exactly where it needs to go. Well, that's great, but we need to continue on. One of the most common issues that happens with these power windows is actually the wiring that leads from inside the passenger compartment down and through and into the door itself. There's gonna be an area right along here that you're gonna wanna pay attention to. Now, why is this a common issue for the wires braking in this particular instance? Well, of course, the door is gonna be open and shut a whole bunch of times throughout the life of the truck itself. With that said, this is gonna be an area where the wires are gonna be going [vocalization] over and over, every time you open and shut the door. So, with the door open, you're gonna wanna use a pick or a small screwdriver.
And we're essentially just gonna go ahead and pull this boot back and away from this area here. Once you have it nice and open, you're gonna go ahead and inspect the wires. Go ahead and give them a nice little tuck. Not too hard. Obviously, we don't wanna break anything. If you see something that looks like this, obviously, somebody already had this issue and they ended up trying to fix it. Any wires that aren't leading to anything, just kind of a dead-end like this is telling you that, well, there's probably the issue. So, obviously, we're gonna have to try to find the other side of this wire and then reconnect it in. I'm gonna go ahead and get rid of this connector right there and make something of my own. At the same time as I'm doing that, I'm gonna inspect every other wire inside this area. I'm just gonna carefully pull this out a little bit. Obviously, I don't wanna put a tug where it connects into underneath the dash here. And as you can tell, this wire is in very poor condition. We're gonna go ahead and take off some of this outer sheathing. And then, of course, clean up the other end of this, do the same thing, and then I'm gonna put on another attachment. Now that I have both my wires nice and cleaned up, and they're spliced and ready to go, I'm gonna continue on with my connector. Now, this connector is one of the ones that you can go ahead and heat-shrink down. So, once I go ahead and put the wires in there, I'm gonna heat-shrink it. And essentially, it's gonna help keep the moisture out of there. That's gonna be super important. Now I'm gonna come in here and I'm gonna start with the harder one first. That's what I'm just kind of giving a little bit of a tug. And like I said, I wanna be very careful not to go ahead and put a tug underneath there where it connects in.
Go ahead and twist the connector as you put it on. That's gonna ensure that the wires go all the way in. And then, of course, we'll crimp it down. Go ahead and give that a nice squeeze. And then, of course, make sure it's secure. You don't want this falling back apart again. Now, let's do the same to the other part of the wire. Go ahead and put that right in there as far as it'll go. Crimp it down, be very careful not to cut your wires. And then, of course, give it a nice little tug. You wanna make sure that this is 100% secure because, well, that's the reason why we're in here in the first place. All right, so I'm gonna make sure as I'm heating this up, I'm not aiming my flame at any of my other wires or, of course, my hand. Just keep moving that flame around. And then, of course, just go ahead and carefully grab onto it and then squeeze it down. Do the same to both sides. Let's go ahead and put the key back in the on position and test that window. Let's see if the others work. Awesome. Okay, friends. So we found a broken wire in one of the most common areas to find a broken wire. It's in a pivot point. This door, of course, opens and shut every time I get in and out of this Jeep. It's just bound to happen. Of course, if you looked in here and you didn't end up finding a bad wire, you could potentially go over to the passenger side, do the same thing. You wanna ensure that you don't have a broken wire in any of those connections. Now, let's go with the assumption that for some reason, you look behind both of these doors and you didn't end up finding a broken wire. Well, maybe it could actually be the master switch right here. That's another possible cause. If that is the issue, you just go ahead and replace it or maybe you go out and you try your windows and just one window doesn't work but all the rest happen to work. Typically, if that's the issue, more than likely, it's a window motor. Okay, friends, so we got that all put back together and the windows work just the way they should.
I hope you learned a little something in the video and I hope it helped you out. Maybe you've got a Jeep of your own or maybe a power window issue of your own and you got something to say, leave it in the comment section below because I always love to hear from you. Of course, if you liked the video, smash on the like button, it would mean the world. While you're at it, go ahead and subscribe and ring the bell, that way there you can be kept up with all of our latest content. Thanks.
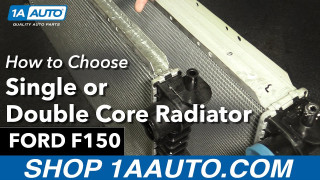
How to Choose Single Core and Double Core Radiators
1A Auto shows you the difference between single core and double core radiators, and helps you choose what radiator to get
