How to Replace Timing Belt and Water Pump on 1999-2006 Hyundai Elantra
Created on: 2013-07-21
Watch this video to find out how you can replace the timing belt and water pump on your 01-06 Hyundai Elantra. This is Part 2 of this installation.
-
step 1 :Beginning the Repair
- This is Part 2 of a two part video
- Please consult Part 1 for prior instructions
- Perform the steps outlined in Part 1
-
step 2 :Removing the Timing Belt
- Pull off the timing belt tensioner
- Pull off the timing belt
-
step 3 :Draining the Radiator
- Have a drain pan ready
- Twist off the radiator cap
- Unscrew the radiator drain plug
- Allow the coolant to drain
-
step 4 :Removing the Water Pump
- Have a drain pan ready
- Remove the 8mm Allen bolt from the water pump if possible
- Allow coolant to drain from the water pump
- Remove the four 12mm bolts from the water pump bracket
- Remove the three 12mm bolts from the water pump
- Tap the water pump loose with a hammer
- Allow the coolant to drain
- Pull off the water pump
- Remove the gasket from the pump and its mounting area with a razor
-
step 5 :Installing the New Water Pump
- Apply spray adhesive to the water pump gasket
- Put the new water pump into place
- Start the seven 12mm bolts into the water pump
- Tighten the 12mm bolts to between 17 - 19 foot-pounds of torque
-
step 6 :Installing the New Idler Pulley
- Put the new idler pulley into place
- Start the idler pulley bolt
- Tighten the idler pulley bolt to between 25 - 30 foot-pounds
-
step 7 :Installing the New Timing Belt Tensioner
- Put the new tensioner into place
- Start the 14mm tensioner bolt
-
step 8 :Installing the New Timing Belt
- Check that the timing marks are lined up correctly
- The hole in the cam pulley should be lined up with the red timing mark
- The white mark on the crank pulley should line up with the timing mark on the engine block
- Feed the new belt into place
- Make sure the belt is lined up correctly
- Recheck the timing marks
- Attach a 5mm Allen wrench to the timing belt tensioner
- Push the tensioner forward to tighten the belt
- Tighten the 14mm bolt in the tensioner to 38 foot-pounds
-
step 9 :Reinstalling the Timing Belt Cover
- Push the lower timing cover into place
- Insert the bolts into the lower timing cover
- Push the upper timing cover into place
- Put the timing cover bracket into place
- Insert the bolts into the upper timing cover
- Tighten the timing cover bolts to between 15 -16 foot-pounds
- Put on the engine mount bracket
-
step 10 :Reinstalling the Water Pump Pulleys
- Put the smaller pulley into place with the dish side facing in
- Put the larger pulley into place with the dish side facing in
- Start the bolts into the water pump pulleys
- Lift the engine with a jack to access the water pump pulley bolts
- Put the water pump belt into place
- Have an assistant hold the water pump belt as you tighten the water pump pulley bolts
- Pull off the water pump belt
-
step 11 :Reinstalling the Engine Mount
- Put the engine mount into place
- Put on the engine mount bracket
- Lower the engine with a jack to line up the engine mount
- Start the engine mount bolts
- Lower the engine into place
- Tighten the engine mount bolts
-
step 12 :Reinstalling the Power Steering Reservoir
- Insert the bolt into the power steering reservoir bracket
- Slide the reservoir onto its bracket
- Insert the retaining screw into the power steering reservoir
-
step 13 :Reinstalling the Crankshaft Pulley
- Put on the crankshaft pulley washer
- Put the crankshaft pulley into place
- Insert the crankshaft pulley bolt
- Tighten the crankshaft pulley bolt
-
step 14 :Reinstalling the Splash Shield
- Lift the splash shield into place
- Insert the bolts into the splash shield
-
step 15 :Reinstalling the A/C Compressor Belt
- Feed the A/C compressor belt into place
- Feed the belt around the compressor belt tensioner
- Check that the belt is routed correctly
- Tighten the tensioner with an 8mm Allen wrench until you can move the belt 1/8 inch by hand
- Tighten the 14mm bolt in the tensioner pulley
-
step 16 :Reinstalling the Alternator Belt
- Feed the alternator belt into place
- Feed the belt around the alternator belt tensioner
- Check that the belt is routed correctly
- Tighten the tensioner until you can move the belt 1/8 inch by hand
- Tighten the 12mm bolt into the tensioner pulley
- Tighten the nut on the bottom of the alternator
-
step 17 :Reconnecting the Negative Battery Cable
- Reconnect the negative battery cable
-
step 18 :Refilling the Coolant
- Reinstall the drain plug into the radiator
- Fasten the splash shield into place
- Fill the radiator with coolant to about an inch below the top
- Add coolant to the coolant reservoir
- Drive the car
- Check the coolant level
- Add coolant as necessary
Tools needed
-
20mm Socket
Razor Blade / Gasket Scraper
Funnel
Jack Stands
2 Jaw Gear Puller
5mm Hex Wrench
3M Adhesive
Drain Pan
Ratchet
Floor Jack
Flashlight
11mm Socket
12mm Socket
13mm Socket
A Piece of Pipe (for leverage)
14mm Socket
Torque Wrench
15mm Socket
16mm Socket
17mm Socket
18mm Socket
19mm Socket
21mm Socket
8mm Allen Wrench
8mm Socket
9mm Socket
10mm Socket
Assistant
1/2 Inch Breaker Bar
1/2 Inch Impact Gun
Brought to you by 1AAuto.com, your source for quality replacement parts and the best service on the Internet.
Hi, I'm Don from 1A Auto. I hope this how-to video helps you out, and next time you need parts for your vehicle, think of 1AAuto.com. Thanks.
This is a second part of a two part series. In the first part, we took basically the front of the engine apart and removed the timing belt. In this one we're going to show you how to change the water pump, and then, put the timing belt back on, and put everything back together. The first set of tools are basically the same. You will need a 5mm Allen wrench, a razor blade and holder to clean off the gasket area for the water pump, a torque wrench, as well as what I didn't mention here was a catch pan for catching the coolant from the engine.
With these out of the way, you can slip the belt right off and out. Locate the drain plug on the radiator, right here. It's red. Remove your radiator cap. Unscrew your drain plug. Have your bucket there to catch it. There's an 8mm Allen bolt right in there and that's right below the water pump and if you remove that and have a container underneath it'll drain out your coolant to below the water pump level. In this case the bolt is too rusted in there.
We couldn't remove it so we're just going to knock the water pump off, and let it drain into the pan that way. Locate your two 12 mm bolts that hold the bracket to the water pump and to the alternator and power steering bracket and remove those. There are two more 12mm bolts that hold that bracket that are in behind where that power steering pulley is. We'll speed up, here, as we remove those bolts. You can see it's a matter of using different size extensions to get to the bolts. Once you loosen up one of them, the power steering pump can be moved, slid up a little bit out of the way to get to the other one. Locate your three bolts that are remaining holding in your water pump and those are 12 mm. We'll fast forward here as we remove those last three. So, that's seven bolts, in all, that hold that water pump in. Use a hammer to tap on the water pump to break it free. You hear that we broke it free. The water came out because we weren't able to drain from the plug beforehand. We have the catch pan in there to get as much of the water as possible. Grab the water pump and pull it out. You see, in the old pump, some of the gasket stayed with the pump. The other part of it is on the block and we're going to clean that up with a straight blade razor. Be sure to clean all of the gasket material off as well as you can. The better you clean it off the better it will seal when you put it back together.
We've got the old water pump and the new part. We've used a little spray adhesive on the gasket to hold it here in place while we put it back in. We'll speed up, here. Basically, Don just puts it down into place and then gets all the bolts started in by hand first, and then tightens them up. When you tighten these up, you should tighten them to between about 17 and 19 foot-pounds.
I have the old idler here. I've got the new one here and you can see they're the exact same and it's going to go in just the way it came out. We'll speed up here as we put the bolt in place for that idler pulley and then tighten it up. This should be tightened up between 25 and 30 foot-pounds.
The old and the new tensioners look exactly the same and they're going to go on the same way. I'm just leaving that loose for now.
Make sure your engine is in the right position. Shine a light directly at the front pulley. The light should go right through that hole and light up the red mark behind it. Then down, a little hard to see, but the white mark that's on your crank pulley should line up with the white mark that's on the block of the engine. Put the new belt down inside. When you've got it on, make sure that the teeth all line up on the belt and sprocket for the cam and for the crankshaft. Recheck to make sure that your timing marks are lined up. We're going to take the 5mm Allen wrench that we have, put in the tensioner, and press on it until the belt is firm and then tighten back up your 14mm. Torque your tensioner bolt to 38 foot-pounds.
Put your lower timing cover back on. I'm feeding the lower timing cover up and I'm keeping it to the right or to the front of the engine with the water pump inside of it at this point. Then I'm going to slide it over the water pump. After doing that, I'm going to feed it underneath the engine mount bracket and the idler pulley, the idler tensioner. It may require a little force. You can see right here this is where it hangs up. I'm just going to give it a little push and it goes right in. Fast forward as Don goes from the bottom and the top both to put the bolts on for that lower timing chain cover. Install the upper timing cover. We'll fast forward here some as we start the bolts in. Don't forget that there's a bracket that goes on the rear part of that timing chain cover. Make sure you put that in place and bolt it in place. We'll fast forward again here as we put the rest of those bolts in. Tighten them up nice and firm at probably about 15 or 16 foot-pounds. I'm putting the bracket back on, that goes to your engine mount.
I'm reinstalling the pulleys for the water pump and I want to put the dish side in, small one on first. Do the same thing with the big one. Put the dish side in. Again, we'll fast forward as we get those bolts started in and then we'll do the same thing we did to take it out. I'll hold the belt on the water pump while Don tightens each bolt. Again, you do have to have the engine lifted up a little bit in order to access this.
We're putting the motor mount back in. As you can see, we let the engine down a little bit to line things up. I'll fast forward it, here, as we just start all the bolts by hand, get everything lined up, and then start tightening them up. Once you get them all started, you can let the engine down back into place and then tighten everything up nice and firm.
Put the bolt back in the power steering reservoir and then the retaining screw. I'm going to put the washer and pulley back on. It's only going to go one way because it's keyed. Put the first in your pulley. Tighten it with my impact gun slowly. I'm putting the splash shield back up. You feed it from back to front, the easiest way to get it in, and secure it with your two bolts. Go ahead and feed the belt back up over the A/C compressor. Make sure it's on there correctly and pull it over the crank and feed it over the tensioner. Once I know everything's okay there, I can tighten up the tensioner. Checking the tension on the belt, we want it to be tight but have a little bit of flex. You should be able to move the belt up and down about 1/8th of an inch once it's tight. That's all set. Tighten up the 14mm on the end of the pulley.
Put the alternator belt back up and get it on the top pulley first and around the alternator and around the crank. I'm going to fast forward here slightly. The belt's back on and now we're retightening that tensioner. You basically want to tighten it up until you can grab the belt between the pulleys and you should be able to move the belt up and down between 1/8th and 1/4 of an inch, actually closer to 1/8th of an inch. Once it's that tight, then you can use your 12 mm and tighten the bolt that's on the back of the tensioner that goes into the alternator.
I'm tightening up the lower nut on the alternator. I'm reconnecting the battery. Speed it up here as we refill the radiator. Refill the radiator to about within an inch of the top and then fill just using the regular coolant fill. Drive your car a little bit and check the fluid the first few times you drive it.
We hope this video helps you out. Brought to you by www.1AAuto.com, your source for quality replacement parts and the best service on the Internet. Please feel free to call us toll-free, 888-844-3393. We're the company that's here for you on the Internet and in person.
Shop Products
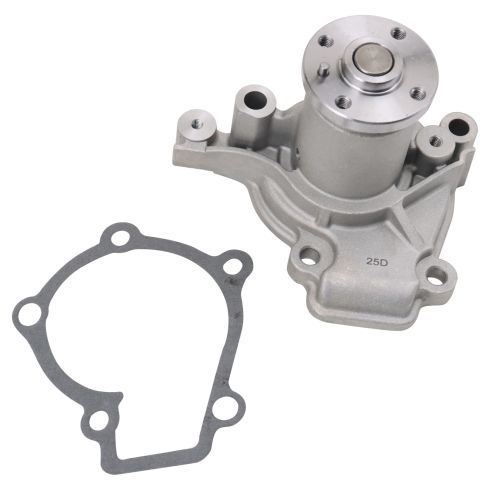
Hyundai Kia Engine Water Pump TRQ WPA07382
Part Details:
- 6
- 5
- Standard
- No
- 60 mm
- 4
- Aluminum
- No
- 2
- No
- No
- 3.39 in
- No
- Cold Rolled Steel

Top 5 Problems Ram Truck 1500 4th Generation 2009-17
Watch this video to learn the top problems facing the 2009-17 Ram 1500 truck.
