How to Replace Windshield Wiper Arms 2005-11 Honda Civic
Created on: 2017-12-06
How to repair, install, fix, change or replace a damaged, bent, or failing windshield wiper arm on 2008 Honda Civic.
-
step 1 :Removing the Wiper Arms
- Mark the location of the wiper blades by pressing tape to the windshield
- Pop off the cap on the end of the arm
- Remove the 14mm nut from the wiper arm
-
step 2 :Installing the Wiper Arms
- Install the wiper arm with the bend and DR on the bottom to the driver side
- Tighten the 14mm nut
- Install the wiper arm with the P on the bottom to the passenger side, below the driver side arm
- Tighten the 14mm nut
- Reinstall the caps
Tools needed
-
Socket Extensions
14mm Socket
Rust Penetrant
Painter's Tape
Ratchet
Hi, I’m Mike from 1A Auto. We’ve been selling auto parts for over 30 years!
We're going to take our windshield wiper arms off. If your windshield's kind of dirty, there's probably lines where the wiper blades were to give you a sort of reference point when you put them back on. If not, you can just sort throw a piece of tape. That's where that lower one is going to meet that one. Top of the other one is going to meet right about here. That just gives you an idea when you put them back on, how to line them up.
To remove the wiper arm, I'm going to pop this plastic cap off. Just kind of grab it and it pops right off. There's a big nut under here, that's holding down the wiper arm. That is 14 millimeter. I'm going to loosen it. I'm going to spray some rust penetrant in here to help this slide off of the wiper transmission. Just put some rust penetrant in there. I just lifted up the arm and I just kind of wiggled it back and forth, and it came right off.
Just repeat for the other side. These wiper arms are left to right dependent. So passenger and driver's side. This is the driver's side. So just a clue, it's got this little bend to it. The end of it is slightly longer and molded on the inside is DR. So to reinstall this I'm just going to flip it up, make sure the caps off. I'm going kind of eyeball it. I can sort of see marks, if you didn't use tape. But I've got a pretty good idea that it should sit right about here in the windshield. That looks good.
Obviously, you don't want to install it, if it's like sitting like that it's not going to work for you. Or, you know, too low. These are kind of inline with this black painted part of the windshield. We're going to reinstall the nut and then tighten it down. You don't have to go super tight but just enough. That feels good there. I'm going to reinstall the cap and move to the other side. So I flip this up. The passenger side one goes below the driver's side. It doesn't go up here. It goes below. So I kind of eyeball it. Too high. That looks perfect right there. You can also see it lines up with this contour here. Reinstall the nut and tighten it down. Reinstall the cap. And wiper arm is replaced.
Thanks for watching. Visit us at 1AAuto.com for quality auto parts, fast and free shipping, and the best customer service in the industry.
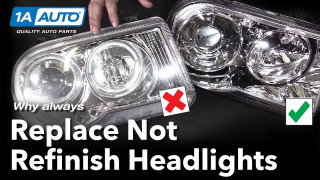
Why you Should Replace Not Restore Headlights
See why replacing your cloudy headlights with new ones is always better than refinishing them Why should you replace your headlights and not clean or refinish them? Three reasons: It's a simple fix, it increases visibility, and it enhances the overall look of your vehicle. Headlights are made from a polycarbonate plastic that can be damaged by UV rays from the sun or suffer pitting caused by road debris light salt and rocks. If you look closely at an old set of headlights, you'll see that the lens is full of micro-cracks. This is called crazing. This crazing, along with pinning, will turn your headlights from crystal clear to hazy yellow and it cuts the output in half, making it very difficult to see at night. It also makes your car look old and dated. With parts from 1AAuto.com and our how-to videos, you can make your vehicle look new and stay safe on the road. To get new headlights for your vehicle, visit 1AAuto.com and visit our YouTube page for do-it-yourself and how-to videos.
