
How to Replace Window Sweep 1982-92 Chevy Camaro
Created on: 2011-07-13
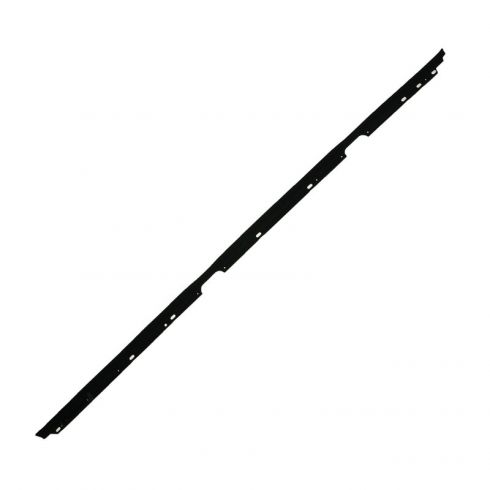
How to repair, install, fix, change or replace an inner window sweep that is falling down, coming apart, or the adhesive is failingon 82, 83, 84, 85, 86, 87, 88, 89, 90, 91, or 92 Chevy Camaro Iroc-Z and Pontiac Trans Am models.
-
It's recommended to mark bags and organize the parts accordingly as you remove them
step 1 :Removing the Door Panel
- Disconnect the negative battery cable
- Remove the three T27 screws on the door pull
- Remove the six T10 screws on the switch panel
- Pull the lock button back
- Disconnect the lock wiring harness with a flat blade screwdriver
- Remove the T10 Torx screw behind the lock button
- Remove the mirror control
- Remove the retaining clip from the mirror control with a flat blade screwdriver
- Pry behind the lock with a flat blade screwdriver
- Slide the side panel back and out
- Pry out the door panel with a door panel clip tool or putty knife
- Lift the door panel up and off
-
step 2 :Removing the Window Sweep
- Pull the nuts on the sweep and spin them counterclockwise with needle nose pliers
- Remove the sweep from the door panel
Tools needed
-
T10 Torx Driver
Flat Blade Screwdriver
T27 Torx Driver
Phillips Head Screwdriver
Putty Knife
8mm Socket
7mm Socket
10mm Socket
Ratchet
Needle nose pliers
Marker / Writing Utensil
Brought to you by 1AAuto.com, your source for quality replacement parts and the best service on the Internet.
Hi, I'm Mike from 1A Auto. I hope this how-to video helps you out, and next time you need parts for your vehicle, think of 1AAuto.com. Thanks.
In this video, we're going to show you how to remove the inside door sweep (or door weather strip/window weather strip). It's attached to the black molding that's on top of the door panel. Most of the time those black moldings break. Both of them, on both sides of this vehicle, are broken up near the mirror. We'll show you how to remove that. You will basically remove it with the door panel, and then separate it from the door panel. The tools you'll need for this include T27 and T10 Torx drivers, medium and small flat blade screwdrivers, 7mm, 8mm, and 10mm wrenches or sockets with a ratchet, Door panel clip tool or a putty knife, a Phillips screwdriver, pliers, plastic bags, and a marker.
On this, what you'll want to do first is disconnect your negative battery cable. That will protect your car from the battery draining down.To remove a door panel, you want to start with three T27 Torx screws. One is right in the door pull there, and then two are underneath. One there, and one back here. Then there are two T10 Torx screws here. A lot of these are fake, but there are two here, and then two here.
Okay, I'm just going to fast-forward as I remove those three T27 screws. Then there are six T10 screws, and this car is fairly original, but on a lot of these cars they've probably been taken apart and put together before, and with different fasteners used, so the tools you may need for your car could vary. Once those are out, then you pull your lock button back, and now use a screwdriver and push it in there and pry up. You want these little tabs, and you want to pull back at the same time as well. Once you get that disconnected, then there's another T10 Torx screw here. You're going to want to take your mirror and remote control out.
All right, I've got the small screwdriver, and poke this little retaining clip, pop that up and out and put it back in. Keep it in a safe place. Then take your screwdriver again and carefully find behind your lock, and then it'll off. It's just clipped in there, and now just slide this out, and then forward it off, and this little trim panel also comes off so you don't lose it.
The exterior door panel is held in by clips around the edge, and if you want to reuse your door panels, you want to do this as carefully possible. So I'm using a putty knife and I'm dragging it behind until it stops. I find the clip as they're pretty much evenly spaced. Now, normally this molding up here is pinched or riveted on to the door panel. This vehicle, it looks like somebody has already probably ripped this apart and not done it carefully, but normally what you would do is remove all these pins, and then this is just going to fall off, so I'm just going to take it off.
So, this is if your door is not on correctly, but normally you would take the whole panel, pull it out, and then lift up on this molding here, and take the whole door panel and molding off at the same time, and again, like I said, the door panel is supposed to be attached on here, but somebody had already ripped this off.
Now, this clip is from later after I had taken more stuff apart, but it basically I just wanted to show you that when you take things apart, especially in this case, where this car we're going to take all apart and then get it painted, I do things, like I took the mirror off, and then I put the nuts back on so I can find them. I put the bolts back into the track, put the little triangle pieces on, and then put things back together. I took little bags and clearly marked them as far as maybe the door panel hardware, or some of the window hardware, and things like that. Then, like the little door handle bezel that you can see underneath my hand there, all in black, I reassembled that with the switches and stuff. Just put things back together so that when you're ready to put the car back together, you can find all the bolts, and nuts, and everything, and it makes it a whole lot easier when you go to put the car back together.
So, as you can see again, our upper plastic panel with the weather strip on it was just kind of ripped away from this door, but if you did have an intact door, and you were trying to get it apart, needle nosed pliers are probably the best, and you want to just kind of pull these nuts and spin them counterclockwise, and hopefully you can get them off.
If you're replacing the whole plastic molding and weather strip, you don't have to worry too much about breaking. They generally just break right off, so basically, if you're taking this apart, most likely you're just going to break it, and you're going to need to buy new ones. If you're very careful, I haven't been able to do it yet, but probably if you're very careful, you can probably get these off, without breaking those.
I'm going to speed it up here as I remove the rest of those, and I can tell you, I tried to be very careful, but those things ended up breaking most of the time. If you're replacing a door panel, I would plan on replacing that plastic molding and the weather strip, as well. Just pull the plastic tabs out of these speed nuts, and put them in the door panel hardware bag.
We hope this video helps you out. Brought to you by www.1AAuto.com, your source for quality replacement parts and the best service on the Internet. Please feel free to call us toll-free, 888-844-3393. We're the company that's here for you on the Internet and in person.
Shop Products


Easy Trick to Fix Dragging Power Windows for Good
An easy way to keep your windows from dragging or going up slowly. This easy trick will save you lots of money!

