How to Replace Window Regulator 1998-2002 Oldsmobile Intrigue
Created on: 2011-10-05
Watch this video from 1A Auto on how to replace the window regulator on your 98-02 Oldsmobile Intrigue.
-
step 1 :Removing the Door Panel
- Pry up the window switch panel by hand
- Disconnect the window switch wiring harnesses
- Pry off the trim panel inside the door handle with a flat blade screwdriver
- Remove the two T30 Torx screws behind the door pull
- Remove the Phillips head screw from inside the door panel
- Pull off the door handle bezel
- Disconnect the door lock wiring harness
- Pry off the door panel with a putty knife or a door panel clip tool
- Pull the door panel up and off of the window sill
- Disconnect the speaker wiring harness
- Carefully peel back the water shield
-
step 2 :Removing the Window Regulator
- Raise or lower the window by hand to access the window track
- Remove the two 10mm bolts from the window track
- Raise the window by hand
- Loosen the three 10mm bolts for the motor
- Remove the lower two 10mm bolts from the regulator
- Loosen the upper two 10mm bolts for the regulator
- Disconnect the window motor wiring lead
- Lift the regulator up and pull it out of the door
-
step 3 :Installing the New Window Regulator
- Transfer the bolts from the old to the new regulator
- Put the new regulator down into the door
- Hang the motor in place by its bolts
- Hang the regulator in place with the upper two bolts
- Start the two lower regulator bolts by hand
- Tighten the seven 10mm bolts
- Push the window down onto its track by hand
- Insert the two 10mm bolts into the window track
- Connect the window motor wiring harness
- Connect the window switch wiring harness
- Turn the vehicle ignition on
- Test the window with the window switch
- Turn off the ignition
- Disconnect the window switch wiring harness
-
step 4 :Reinstalling the Door Panel
- Put the water shield back into place
- Connect the speaker wiring harness
- Hang the door panel on the door
- Push in the door panel clips
- Connect the door lock wiring harness
- Push on the door handle bezel
- Insert the Phillips screw into the door handle bezel
- Insert the two T30 Torx screws behind the door panel
- Push the trim panel into the door handle
- Connect the window switch wiring harnesses
- Push the window switch panel into the door panel
Tools needed
-
Socket Extensions
Flat Blade Screwdriver
Phillips Head Screwdriver
Putty Knife
10mm Wrench
10mm Socket
Door Panel Removal Tool
Ratchet
Brought to you by 1AAuto.com, your source for quality replacement parts and the best service on the Internet.
Hi, I'm Mike Green. I'm one of the owners of 1A Auto. I want to help you save time and money repairing or maintaining your vehicle. I'm going to use my 20-plus years experience restoring and repairing cars and trucks like this to show you the correct way to install parts from 1AAuto.com. The right parts installed correctly: that's going to save you time and money. Thank you and enjoy the video.
In this video, we're going to show you how to replace the front window regulator on this '99 Intrigue, same as any '98 to'02, and same as a bunch of other different GM vehicles, as well. If your window stops working, but it's still making noise, a kind of a grinding noise, that usually means the cable on your regulator is snapped. Tools you'll need are Phillips and flat blade screwdrivers, a T30 Torx driver, door panel clip tool or putty knife, and a 10mm wrench, or a socket and ratchet with extension. These tools are specific to the Intrigue. If you're working on a different GM vehicle, these tools may differ slightly.
Start here, take this panel, and lift it up carefully. Pull it down, and, underneath, disconnect the two harnesses. To disconnect your near harness, usually I take a little screwdriver, push the little tab. Push down, pry it up, and pull it out. You've got to use your screwdriver again, and right in behind your door handle, you'll see a little slot. Put your screw driver in, and pry out. Pull this little panel out. Now there are three screws. There's a Phillips screw right there, and then this bezel comes off and you have to disconnect your switch. There's a T30 screw here and another T30 screw underneath that door pull. Speed it up here, as I use a T30 Torx screwdriver to remove those two Torx screws, and a Phillips screwdriver to remove the screw for the door handle bezel. There's a little thumb tab. Pull that connector off. You want either a putty knife, or if you have one, a door panel clip tool. Put the knife in under, slide it until you feel a pin. Give it a good pull. Slide until you feel the next one. Keep going up. There's one usually up here. Pull it out. Then our speaker here, is connected. Press the little tab. It's got the speaker. The door panel's off. The next thing you want to do is remove this water shield, carefully and slowly.
I have put my switch back on, and you can see, actually, my window worked fine. Some of the time what happens with these regulators is this cable here snaps, and when that happens, you can actually take with your hand and move your window up and down so you can get to these bolts easily. If your window is stuck all the way down or it's way up, you usually can get in here with a 10mm ratchet, I mean, sorry, a 10 mm wrench either way down inside or up in here too, if you need to. Either way, you want to remove these two bolts. Speed it up here, as I remove those two 10mm bolts using a ratchet socket, a 10mm socket and an extension. Once you have those two bolts off, just take your window and lift it right up, and just put it all the way up. Now, you're going to loosen these three bolts here to the motor. I'm going to speed it up here. You can tell when you can just loosen them rather than taking them all the way out. They have a larger oblong hole up on top of them. The three bolts for the motor, you just loosen and then two of the bolts for the regulator, I removed. Two of them I just loosened and you can lift everything up and out. Here's my lead. It's either going to be plugged in here or actually, maybe, plugged in right in behind here. You can do it two ways. I believe this has already had a regulator replacement because usually, on an original GM, the lead is right on the motor. But, I'm going to disconnect this here. I will use a screwdriver. If your lead is inside the door, what you may need to do is lift up your window first, and lift up the motor first. Bring it out here to disconnect it, or bring it through and disconnect it. You lift this up, lift the regulator up, and bring the motor out, and then the regulator up and out.
Here's our new regulator from 1A Auto. Here's the regulator that we took out. Like I said, I'm pretty sure the regulator we took out is a replacement. It's got all of the same quality control markings on it and everything. If you were going to put your new regulator in, what you would want to do, is transfer the bolts: one, two, three, four and five. Transfer the bolts on to your new regulator. This regulator is working fine, so I'm not going to put a new regulator in it. I just want to show you the new one from 1A Auto. It's going to go in there. It's going to bolt in correctly, and it's going to plug in correctly and fix your issue.
Obviously, for re-installation, what we want to do is put the regulator down in first. Put the motor in. Lift the motor up into place. Hang it up right there. Push our regulator up into place. Hang this one up, and hang that one up. Bring it down. I'll speed it up again, here. I start in the two bolts by hand that you take out, and then use 10mm socket with a ratchet and tighten all seven bolts up. You want to tighten them up nice and firm. Don't over tighten them and break a bolt, or anything like that, though. After you that, take your window. You want to slide it down carefully. Basically, push it into the rear track the whole time. Slide it down until it meets and the window has a couple of little teeth. You want to make sure to go to the inside of the regulator. Just pull on the window a little bit. Wind it up here, add one bolt. And again, speed through here as I put those bolts in and then tighten them up with my socket ratchet and extension. Pull your feed through, connect it. Do a quick test. It should be all set.
Speed up here again, as I just disconnect that switch and then put my water shield back up in place. We're going to speed right through putting the door panel back together. You can probably get enough and you probably remember enough from taking it apart. If you do want to see putting the door panel on in regular speed, just check out our other videos.
We hope this video helps you out. Brought to you by www.1AAuto.com, your source for quality replacement parts and the best service on the Internet. Please feel free to call us toll-free, 888-844-3393. We're the company that's here for you on the Internet and in person.
Shop Products


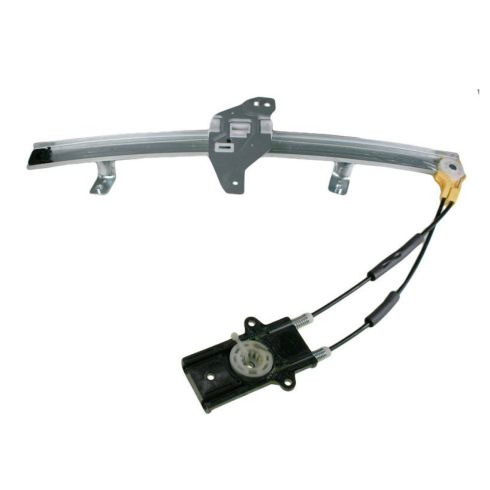
Buick Century Regal Olds Intrigue Front Passenger Side Window Regulator TRQ WRA51459
Part Details:
- No
- Galvanized Steel
- Electric
- No
- No
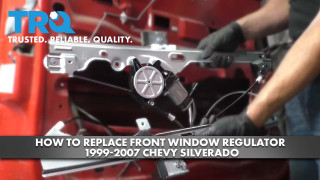
How to Replace Front Window Regulator 1999-2007 Chevy Silverado
This video shows you how to install a new window regulator on your 1999-07 Chevy Silverado.
