How to Replace Window Regulator 1998-2002 Oldsmobile Intrigue
Created on: 2011-10-12
In this how-to video, our experts show how to replace the window regulator on the 98-02 Oldsmobile Intrigue
-
step 1 :Removing the Door
- Pull up on the window switch trim
- Disconnect the window switch wiring harnesses with a flat blade screwdriver
- Pry off the trim piece inside the door handle with a flat blade screwdriver
- Remove the Phillips head screw inside the door handle
- Remove the two T30 Torx screws inside the door handle
- Remove the door handle bezel
- Pry out the door panel with a door panel clip tool or putty knife
- Pry off the base trim piece by hand
- Lift the door panel up and off
- Carefully peel off the water shield
-
step 2 :Removing the Window Regulator
- Lower the window by hand
- Remove the two 10mm bolts that hold the window to the regulator
- Raise the window by hand
- Hold the window in place with painter's tape
- Disconnect the window motor wiring lead
- Remove the three 10mm bolts from the window motor
- Disconnect the window motor lead
- Remove the two 10mm bolts from the regulator and loosen the other two
- Pull the window regulator out through the door
-
step 3 :Installing the New Window Regulator
- Transfer the three motor bolts to the new motor and the two in the old regulator
- Push the regulator into the door
- Hang the regulator by its bolt
- Insert the four 10mm bolts into the regulator
- Insert the three 10mm bolts from the window motor
- Remove the painter's tape from the window
- Lower the window onto the regulator
- Insert the two 10mm bolts that hold the window to the regulator
- Reconnect the window motor lead
- Reconnect the window harness
- Turn the car on
- Disconnect the window harness
-
step 4 :Reinstalling the Door Handle
- Put the water shield into place
- Lift the door panel into place
- Push in the door panel clips
- Re-clip the door handle bezel
- Insert the two T30 Torx screws inside the door handle
- Insert the Phillips head screw inside the door handle
- Insert the trim piece inside the door handle
- Connect the window switch wiring harnesses
- Clip the window switch panel
Tools needed
-
Socket Extensions
Flat Blade Screwdriver
Phillips Head Screwdriver
Putty Knife
T30 Driver
10mm Wrench
Painter's Tape
10mm Socket
Ratchet
Brought to you by 1AAuto.com, your source for quality replacement parts and the best service on the Internet.
Hi, I'm Mike Green. I'm one of the owners of 1A Auto. I want to help you save time and money repairing or maintaining your vehicle. I'm going to use my 20-plus years experience restoring and repairing cars and trucks like this to show you the correct way to install parts from 1AAuto.com. The right parts installed correctly: that's going to save you time and money. Thank you and enjoy the video.
In this video, we're going to show you how to replace a rear window regulator on this 1999 Oldsmobile Intrigue, same as any '98 to '02 Intrigue. The tools you'll need include a Phillips and flat blade screwdriver, T30 Torx driver, a door panel clip tool or a putty knife, and a 10mm wrench or socket, and a ratchet with extension.
Okay, we're going to start a little bit out of order here. You'll notice I have the door panel off already. I'm just going to show you. I have taken the door panel off and looked inside the door and kind of found the problem. I'll show you basically the symptom that it has, which is that the switch activates the motor but it doesn't do anything. This is generally preceded by a pop and a cracking, and then some grinding noise. Okay, so again, here we're hearing the motor running but there's no movement of the window. Check our condition of our window regulator. There we go. You can see here it's held up by a couple of looks like somebody put some wire ties on there and this is all broken.
So, on this vehicle, obviously our window regulator has failed, so we're going to show you how to get at it and replace it. To remove this rear door panel, you want to pull up the back of your power window switch plate, and then pull it back and turn it over. Use a flat blade screwdriver. Push on there's a tab here push on that tab. Disconnect it. Then right here, behind the door handle, you'll see a little slot at the bottom. You want to pry the trim plate in here up. Now, behind there is a Phillips screw, a T30 Torx screw there, and a T30 Torx screw up through there. We'll pick up the pace here as I remove those two T30 Torx screws, and then remove the Phillips screw behind the door handle.
Now, it's held around the edges with clips. Start with a putty knife, and you can kind of put it in there. Go down until you feel a clip. As you pull it out, if you want, you can actually continue with your putty knife, or use a door panel clip tool. You put it around that clip, pull, and you can see it kind of comes off. You can use your clip tool or putty knife to go around the edge of the door. As you come to a clip, pull it off, and the door panel comes right off. We pull our water shield off. Snip these wire ties. On this vehicle, somebody had realized that the regulator was broken, took the door panel off, put some plastic wire ties on here to hold the window up. So we'll remove those wire ties, and then you can see how your window will basically move on its own.
Now, I can move my window down. Now there are two bolts right down here that I'm going to remove. These bolts separate the window from the regulator. I'll just speed it up here as I remove those two 10mm bolts. Now, you can see the regulator, just feel down. I'm going to take my window, and pull it right up. You can see I just used a little bit of painter's tape to make sure that that window doesn't slide down while we have our hands inside the door.
A 10mm wrench again. We'll speed it up here as we just loosen those three 10mm bolts that hold the window motor. Take this out. Here's our lead for the power window. You press down on a tab and pull it out. Now, we're going to loosen up this bolt here. Speed it up here again. There are four bolts holding the window regulator rail. You can loosen two of them and remove the other two. I'm going to lift this up. There's our regulator; here's the window motor.
Now, here's our new regulator from 1A Auto. Obviously, it's going to go in there and fix the problem. One minor difference is that the motor has kind of a pigtail on it. Not a big deal. What you want to do now is transfer the bolts. So these three bolts that are in the motor, I'm going to transfer them to our motor here, and then these two bolts that are still in the regulator, we're going to transfer them to our regulator here. Put the regulator in, the motor in, scoot them up. Make sure your regulator goes inside the window. So, I've got the regulator hung up here, and now I'll hang up the window motor there, and tighten up all these bolts. Okay, speed through this again. We're tightening up the five bolts that are already installed in the regulator, putting in the other two bolts.
The bolts that hold the regulator in are the longer bolts. The shorter ones hold the regulator to the window. Just make sure you don't mix those up. Then we'll pick it up once we're done tightening. Now, I'm just releasing my tape from the top. Slide your window down until it comes in contact. Make sure that these little teeth come on the outside of the window, and you can push it around just a little bit to get it to fit correctly.
Now, you need two bolts. We'll speed it up here again as I just put in those two bolts that hold the regulator to the window, and then tighten them up. Plug your lead in. The power window goes up and down. Now, here, I'm just using a little piece of tape, and I'm taping the wire to the motor, just so it doesn't have a chance of getting caught up into the window. Then remove my switch and put the water shield back on, and you're set to reinstall the door panel.
I am going to kind of fast-forward through putting the door panel back on. If you want to see this in regular speed, or actual speed, just check our other videos for the Olds Intrigue door panel removal and installation. You just put the panel on and make sure that the pins line up. Push them in. Then put your bezel back on with the Phillips screw, your two Torx screws that hold it, and then reconnect your switch and put the switch back into place.
We hope this video helps you out. Brought to you by www.1AAuto.com, your source for quality replacement parts and the best service on the Internet. Please feel free to call us toll-free, 888-844-3393. We're the company that's here for you on the Internet and in person.
Shop Products


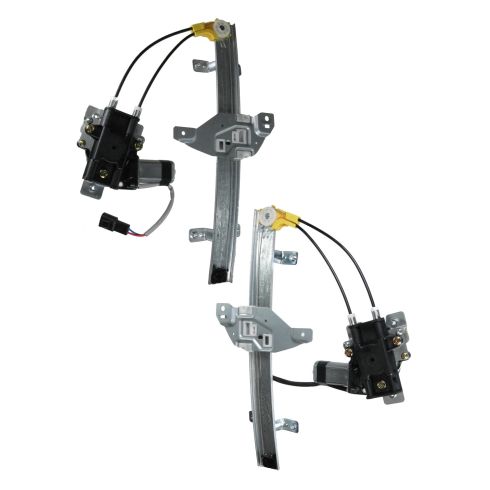
Buick Century Regal Olds Intrigue Rear Driver & Passenger Side Power 2 Piece Power Window Motor & Regulator Assembly Set TRQ WRA50223
Part Details:
- Power
- 2 Piece
- (1) Rear Passenger Side Power Window Motor & Regulator Assembly
- (1) Rear Driver Side Power Window Motor & Regulator Assembly
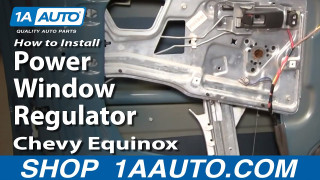
How To Replace Power Window Regulator 2005-09 Chevy Equinox
Learn how to remove the door panel and replace a damaged or bad window regulator motor with the help of the 1A mechanics in this video.
