How to Replace Window Regulator 1997-2003 Chevy Malibu
Created on: 2011-09-26
Learn how to remove the door panel and replace a damaged or bad window regulator motor with the help of the 1A mechanics in this video.
-
step 1 :Disconnecting the Battery
- Disconnect the Negative battery cable with am 8mm wrench
-
step 2 :Removing the Door Panel
- Pry off the trim behind the door pull with a flat blade screwdriver
- Pry off the window switch panel with a flat blade screwdriver
- Disconnect the window switch wiring harness
- Pry off the mirror base bezel with a flat blade screwdriver
- Remove the Phillips head screw from inside the door handle
- Remove the two 7mm bolts from behind the door pull
- Pry off the door handle bezel with a flat blade screwdriver
- Disconnect the door lock wiring harness from the door handle bezel
- Pry the door panel off by hand
- Carefully peel back the water shield
- For more detailed instructions, please see the 2001 Malibu door panel replacement video
-
step 3 :Removing the Window Regulator
- Push out the window motor tabs with a screwdriver
- Pull out the window motor
- Disconnect the window motor wiring harness
- Pry the spring out with a flat blade screwdriver
- Pull the spring around and off with the pliers
- Lower the window by hand
- Loosen the 10mm bolts that hold the window to the regulator
- Lift the window by hand
- While supporting the regulator, remove the regulator gear
- Slide the regulator out of the door
-
step 4 :Installing the New Window Regulator
- Slide the new regulator into the door
- Put the regulator wheel into the track
- Insert the regulator gear
- Raise the regulator by hand
- Push the window motor onto its posts
- Lower the window by hand
- Remove the 10mm nuts from the old regulator
- Start the 10mm nuts that hold the window to the regulator by hand
- Tighten the 10mm nuts
- Put the spring into place about a half turn from its final position
- Pull the spring into place with the pliers
-
step 5 :Reinstalling the Door Panel
- Put the water shield back on, pulling through all the wiring harnesses
- Put the door panel into place, pulling through all the wiring harnesses
- Reconnect the window switch wiring harnesses
- Push the window switch panel into place
- Connect the door lock wiring harness to the door handle bezel
- Push the door handle bezel into place
- Insert the Phillips head screw into the door handle
- Insert the two 7mm bolts behind the door pull
- Push in the trim piece behind the door pull
- For more detailed instructions, please see the 2001 Malibu door panel replacement video
-
step 6 :Reconnecting the Battery
- Connect the negative battery cable using an 8mm wrench
Tools needed
-
Socket Extensions
Flat Blade Screwdriver
Phillips Head Screwdriver
9mm Wrench
7mm Socket
10mm Socket
Slip-Joint Pliers
Ratchet
Brought to you by 1AAuto.com, your source for quality replacement parts and the best service on the Internet.
Hi, I'm Mike Green. I'm one of the owners of 1A Auto. I want to help you save time and money repairing or maintaining your vehicle. I'm going to use my 20-plus years experience restoring and repairing cars and trucks like this to show you the correct way to install parts from 1AAuto.com. The right parts installed correctly: that's going to save you time and money. Thank you and enjoy the video.
In this video we're going to show you how to replace the window regulator on this 2001 Chevy Malibu same as any '97 to '03. We show you the front driver's door which is similar to the passengers door as well. Tools you'll need are pretty basic, flat blade screw driver, Philips screw driver, 7mm and 10mm sockets with ratchet and an extension as well as a pair of pliers.
Using an 8mm wrench, disconnect your negative battery cable. This is more just to protect your battery from running down while you have the door open.
We're going to fast forward through removing the door panel. If you want to see this in regular speed you just check out our other videos but there's probably enough here to figure it out. Remove the switch, unplug it, remove the bezel around the door handle, a couple other bezels and pull the door panel off. You'll want to remove your water shield, just pull it down enough so you can see everything. I do remove it all the way just to make it get it out of the way for filming.
To remove the regulator you're going to want to take the power window motor off which is basically pushing on these tabs and pulling the motor off. You're going to want to take this spring off and then once you take that spring off you can move the window down a little bit and remove that 10mm nut and then this 10mm nut here. Let's just get this out of the way for right now. Push it down and pull out, pull up on this tab, pull out and then I put the screwdriver right in here at the top and then use another screwdriver and push this tab over here. Window motor pulls out and so the wire doesn't get disconnected. This spring you can either . what you want to do is just be careful, pry it off some, grab it with some pliers. Then, you're going to want to pull your wrist. The other thing you can do is just pry it right off with the screwdriver. Just be careful because it could go flying. Once that's off, you can move your window up and down with no problem. Here's that first 10mm nut. Disconnect it from the window sash. Just loosen that. Loosen this front one up here. Now, the window can come up and just lift it right up into place and now, just be careful reaching in here, because you can get your hands cut. You can support your regulator a little bit, and take this here twist it clockwise. It should come out. That comes out and then your gear comes down, your regulator slides forward and out, and comes right out.
The new regulator from 1A Auto is made just like your old one, all the plastic and everything is nice and brand new so it'll fix any of the looseness problems. Put it in. You need to make sure this wheel here goes into this track and now lift this up. Make sure your gear comes through here. Your gear is right here. Lift it up into place. You'll have to move your regulator around a little bit while you push this through. You can pull the regulator on, turn that clockwise, which locks it on.
You can bring your regulator up to just about as high as it will go. You want to leave it down just a little bit so you can slide the window down. Put your window motor back on, a little post the window motor, these holes in the window motor go on to. Push it into place and move your regulator up and down just a little bit. Now, you can actually take your window and slowly move it down until the sash connectors are going down right over there. Same thing here and take the original nuts off of the regulator, off your old one. Start this one on here, start this one here, and tighten those up, nice and firm. Reconnect your window motor; pull this stuff down out of here. This spring is going to go on like this so that that is basically opposite where it needs to go. This is probably one of the most difficult parts. Grab on to the end of the spring, hold on tight, bring it right around and on. Make sure it's pushed on there correctly and you're all set.
You can put the water shield back on. Make sure you feed the speaker wire through and reconnect the speaker and then also make sure you feed all the other harnesses through the correct spots. Like the beginning, we're going to fast forward through putting the door panel on. Make sure you pull those harnesses through and then everything kind of goes back in reverse order. In addition to this just make sure you reconnect your negative battery cable and you'll be all set to go. If you want to see replacing this door panel in regular speed just check out our other videos.
We hope this video helps you out. Brought to you by www.1AAuto.com, your source for quality replacement parts and the best service on the Internet. Please feel free to call us toll-free, 888-844-3393. We're the company that's here for you on the Internet and in person.
Shop Products


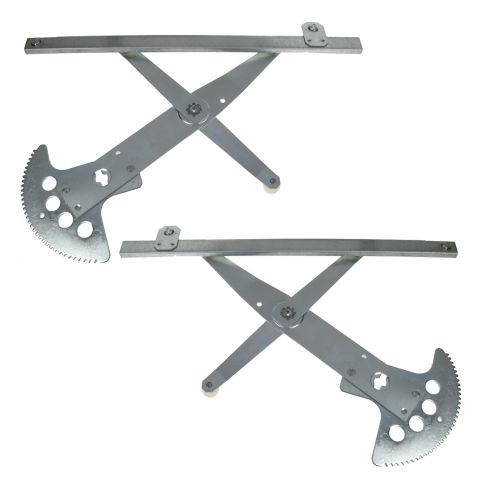
Chevrolet Olds Front Driver & Passenger Side Power 2 Piece Window Regulator Set TRQ WRA50393
Part Details:
- Power
- without Motor
- 2 Piece
- (1) Front Passenger Side Window Regulator
- (1) Front Driver Side Window Regulator

How to Replace Window Regulator 2001-06 Chrysler Sebring
How to repair, install, fix, change or replace a slow, stuck, cracked or damaged window regulator on Chrysler Sebring and Dodge Stratus, model years 01, 02, 03, 04, 05, and 06.
