How to Replace Window Regulator 2006-13 Chevy Impala
Created on: 2013-08-27
Learn how to remove the door panel and replace a damaged or bad window regulator motor with the help of the 1A mechanics in this video.
-
step 1 :Removing the Door Panel
- Pry off the trim piece inside the door handle with a flat blade screwdriver
- Pry off the trim piece inside the door pull with a flat blade screwdriver
- Pry off the trim piece at the rear of the door with a flat blade screwdriver
- Remove the T30 Torx screw inside the door handle
- Remove the two T30 Torx screws inside the door pull
- Remove the 7mm bolt at the rear of the door
- Pry off the window trim piece with a flat blade screwdriver
- Pry out the door panel with a door panel clip tool or putty knife
- Lift the door panel up and off
- Disconnect the latch cable from the door handle with needle nose pliers
- Pry the door lock switch out of the door panel
- Carefully peel off the water shield
-
step 2 :Removing the Window Regulator
- Remove the two 10mm bolts that hold the regulator to the window
- Pull the window up by hand
- Hold the window in place with painter's tape
- Disconnect the window motor wiring harness
- Remove the lower left 10mm bolt from the window regulator
- Loosen the remaining two bolts from the window regulator
- Loosen the three bolts from the window motor
- Pull the regulator out of the door
-
step 3 :Installing the New Window Regulator
- Remove the five 10mm bolts from the old regulator and motor
- Install the five 10mm bolts into the new regulator and motor
- Feed the new regulator into the door
- Hang the regulator and motor by the bolts
- Insert the lower left 10mm bolt into the regulator
- Tighten the remaining two 10mm bolts into the regulator
- Tighten the three 10mm bolts into the window motor
- Reconnect the window motor wiring harness
- Secure the wiring with wire ties
- Remove the painters tape from the window
- Lower the window by hand
- Insert the two 10mm bolts that hold the window to the regulator
-
step 4 :Reinstalling the Door Panel
- Put the watershield into place
- Connect the latch cable to the door handle
- Push the door lock switch into the door panel
- Lift the door panel into place
- Push in the door panel clips
- Insert the 7mm bolt at the rear of the door panel
- Insert the T30 Torx screw inside the door handle
- Insert the two T30 Torx screws inside the door pull
- Push on the window trim panel
- Push on the trim piece at the rear of the door
- Push on the trim piece inside the door pull
- Push on the trim piece inside the door handle
Tools needed
-
Socket Extensions
Flat Blade Screwdriver
Putty Knife
T30 Driver
7mm Socket
Wire Ties
Painter's Tape
10mm Socket
Door Panel Removal Tool
Ratchet
Needle nose pliers
Brought to you by 1AAuto.com, your source for quality replacement parts and the best service on the Internet.
Hi, I'm Mike from 1A Auto. I hope this how-to video helps you out, and next time you need parts for your vehicle, think of 1AAuto.com. Thanks.
In this video, we're going to show you how to replace a rear power window regulator on this 2006 Chevy Impala. It's pretty much the same for any 2006 to 2012 and the regulator usually what happens is you'll hear a popping and then a grinding noise and obviously your window stops working and you know it's your regulator if you can grab the window and pull it up and down some. We'll be showing how to do the driver's side rear, the passenger's side rear is the same procedure. You'll need a new window regulator from 1AAuto.com, flat blade screwdriver, 7mm and 10mm socket with a ratchet and extension, needle nosed pliers and T30 Torx driver.
To start, there are three trim panels. There's one right in behind the door. Just use a small flat blade screwdriver and pry out the little trim panel. There's also a panel right in the door pull area, just kind of rubber that pulls right up. Then there's a small trim panel down near the rear of the door. Pull that out. There's a T30 screw behind the door handle, two in the door pull cup and a 7mm bolt right back in there. We're going to speed up here as I remove those three T30 screws and the 7mm screw. Use your flat blade screwdriver again and carefully pull the little triangle piece of trim at the top off. It's better to use a putty knife or even a door panel clip tool, if you have one, to pry out on the door panel and you'll release some clips. Once they come off, then you'll need to lift the door panel up and go in behind once you get it up off the doorsill. Go in behind. The cable snaps in. You just need to squeeze a couple of tabs with some pliers and pull the cable back and out and then the ball right up out of the socket. For the lock switch, if you just pry on the tabs a little bit, or you can disconnect the harness, bring that out and the door panel is off. Carefully remove the water shield. You want to be careful not to rip it because you do want to reuse it again and it provides a vital of function of keeping water outside of your vehicle.
Now if your regulator's gone bad this is usually the point where you can start seeing the problem. Generally what happens with these window regulators is the cable snaps in some way and you'll hear a popping noise and then kind of a grinding of the motor but the window won't move anywhere. What you'll find is basically you can grab onto the window and pull it up or push it down at will. What you want to do is pull the window up or push it down until you can get these two bolts, they're 10mm, right here. I'm going to fast forward as we remove those two bolts. Once they're removed, you can pull the window up from the window regulator and then put it up top and secure it with some tape, just so it doesn't fall down while you're working. Disconnect the window regulator from the power window motor. You can use a small screwdriver, if it helps to pry the tab. There are six bolts, 10mm, that hold the window regulator rail and motor on. I'll fast forward. There's only one of the bolts that you actually have to remove; most of them you can just loosen and then you can slide the rail and the window motor up and pull the bolts through the door.
The new regulator from 1A Auto is on the right and the original is on the left. They're exactly the same. The connectors are going to be the same. We'll want to transfer the bolts that are in the original regulator over to the new regulator so that it's ready to be installed.
Then, reinstalling the new regulator is basically a reverse of the procedure. Put it in the door and line up the bolts. You can see, here, we have to just loosen up a couple of the bolts a little bit later in the clip to get the thing to go down in. There you go. We'll fast forward as we install that one bolt and then tighten up the rest of them. Reconnect the harness and then we're going to use a plastic wire tie just to secure it. Since the replacement regulator has that pigtail on it, we just want to secure it in there so that pigtail doesn't have a chance to get caught up with the window when it's going up and down. We'll secure it with a wire tie and then cut the extra off. Now we can un-tape the window and slide it down carefully to line up with the regulator. Fast forward as we insert those two 10mm bolts that hold the regulator to the window and tighten those up and put your water shield back in place.
To reinstall your door panel, bring the door panel close to the door and put the ball and socket from the door latch cable back in, snap the cable back into its bracket and then put the lock switch back in place. The top of the door panel goes onto the window ledge and then there are series of pins that hold the door panel onto the door. First we'll get the door panel up and secured onto the window ledge and, pretty much, once you do that, it's lined up. You can just tap it down and then the pins should be lined right up. Just use a firm fist to set those. We'll fast forward as we put the four screws. Again, the one 7mm goes in the back of the door, two T30s down in the door pull cup, and a T30 in behind the door handle. Then finished off by putting the trim panels back on
We hope this video helps you out. Brought to you by www.1AAuto.com, your source for quality replacement parts and the best service on the Internet. Please feel free to call us toll-free, 888-844-3393. We're the company that's here for you on the Internet and in person.
Shop Products


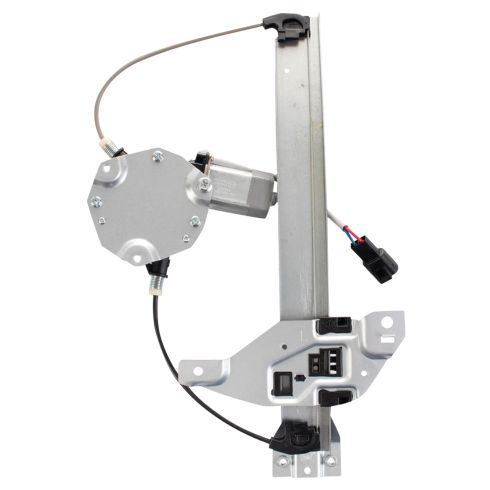
Chevrolet Impala Impala Limited Rear Driver Side Power Power Window Motor & Regulator Assembly TRQ WRA52311
Part Details:
- Power
- 2
- No
- No
- Galvanized Steel
- Nylon
- Yes
- No
- 8

How to Replace Front Window Regulator 2010-15 Cadillac SRX
How to repair, install, fix, change or replace a slow, stuck, cracked or damaged window regulator on 10, 11, 12, 13, 14, 15 Cadillac SRX
