How to Replace Window Regulator 2002-06 Nissan Altima
Created on: 2013-12-08
How to repair, install, fix, change or replace a slow, stuck, cracked or damaged window regulator on Nissan Altima, years 02, 03, 04, 05, and 06.
-
step 1 :Removing the Door Panel
- Remove the cap from the pull handle
- Remove the Phillips screw from the switch panel
- Pry the switch panel trim piece with a flat blade screwdriver
- Disconnect the window switch wiring harnesses
- Remove the caps from the pull handle
- Remove the Phillips screws from the pull handle and door handle
- Lift the door panel up and off
- Pull the cables out of the door handle
- Carefully peel off the water shield
-
step 2 :Removing the Window Regulator
- Loosen the two 10mm bolts that hold the window to the regulator
- Raise the window by hand
- Hold the window in place with painter's tape
- Disconnect the window motor lead wiring harness
- Remove the four 10mm bolts from the regulator
- Remove the 10mm bolt from the window track
- Pull the window regulator out through the door
-
step 3 :Installing the New Window Regulator
- Insert one of the bolts into the window regulator
- Push the regulator into the door
- Hang the regulator by its bolt
- Insert the four 10mm bolts into the regulator
- Insert the 10mm bolts into the window track
- Reconnect the window motor wiring harness
- Remove the painter's tape from the window
- Lower the window onto the regulator
- Insert the two 10mm bolts that hold the window to the regulator
-
step 4 :Reinstalling the Door Panel
- Put the water shield into place
- Reconnect the cables back into the door handle
- Lift the door panel into place
- Push in the door panel clips
- Insert and tighten the two Phillips screws at the pull handle
- Insert and tighten the two Phillips screws at the door handle
- Connect the window switch wiring harnesses
- Push in the window switch panel
- Replace the Phillips screw on the switch panel
Tools needed
-
Flat Blade Screwdriver
Phillips Head Screwdriver
10mm Socket
Ratchet
Brought to you by 1AAuto.com, your source for quality replacement parts and the best service on the Internet.
Hi, I'm Don from 1A Auto. I hope this how-to video helps you out, and the next time you need a part for your vehicle, think of 1AAuto.com. Thanks.
In this video, we're going to show you how to replace the rear window regulator on this 2003 Nissan Altima. It's the same process on these Altima's from 2002 to 2006. We show you how to do this on the passenger side, but the driver side has the same process. This vehicle has a cable and rail style regulator, and these fail usually because of either a cable failing or the pulley breaks or something like that. To tell the sound of it failing there is usually a popping noise followed by a grinding noise. After you press the button to move the window, you'll hear the motor trying, but nothing's actually happening. This means the regulator has failed. You'll need a new rear window regulator from 1AAuto.com, a flat blade screwdriver, a Phillips screwdriver, and a 10mm socket and ratchet.
In your pull cap here, there's a small little screwdriver. Just pry that out and remove the Phillips screw that's under there. Now, carefully pry up your switch panel. Then disconnect the window switch by pushing on the tab on the harness. Behind your door handle, there's this little panel. You want to remove that, and then remove the Phillips screw in there, and then the one in this pull cap. Once those are removed just pull out along the edges of the door panel to separate the clips on the back. Then lift the door panel up and off.
On the back of the door panel are these two cables. You want to pull them out of the door, push them forward, and disconnect them. Remove your water shield carefully. You can see here, we're using utility knife to cut the adhesive. You can do that, or you just pull it carefully. You want to be careful not to stretch or rip the water shield too much. We do it so you have a better view of what we're doing inside the door. To remove the bolts and secure the window, you want the regulator to be down, and this is a cable cell regulator, so you should be able to just push the window down. If, for some reason, you can't, you should be able to access the two bolts with an open-end wrench. Those two bolts you can see they're right here, one here and one here, both of those are 10mm. Just go ahead and remove those, and once those bolts are removed you just lift your window and just tape it up.
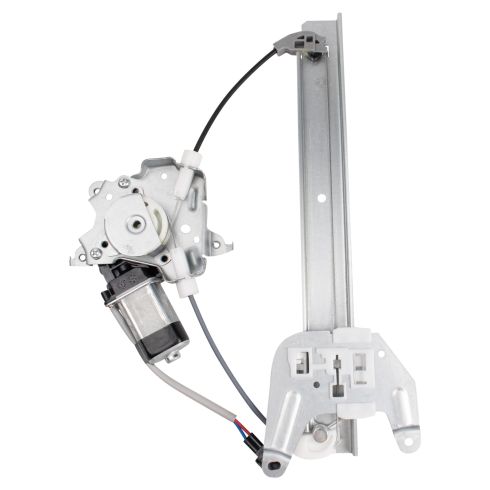
To disconnect your power window motor, just push on the tab with the harness and pull up free. Then you want to remove the six bolts, each of them 10mm. Once those are removed, you can just pull your regulator down and out. On the left is the old window regulator; on the right is the new one from 1A Auto. You can see they're identical, and they'll mount up exactly the same. Take your regulator, you want to just replace that top bolt right there so that you can slide it into place, and just feed your regulator up into the door, and hang the regulator. Then we'll fast-forward as Don replaces the other five bolts. Reconnect the window motor harness, and now you can remove the tape from the window. Now, carefully lower the window down into the regulator, and you just want to make sure that the holes on the window are lined up with the holes on the regulator.
Replace those two 10mm bolts. Push your cables and harnesses back to that water shield, push it back up into place, and replace the bracket if you removed it. Now, to reconnect them, you want to clip them in, push them forward, and then push them back into the door. Now, put your door panel up on to the window cell and push it down, and then hit around the edges to reactivate those clips. Make sure your window switch harness comes through, and we'll fast-forward here as Don replaces the Phillips screw.
Then pull cap and Phillips screw behind the door handle and replace that little cover. Now reconnect your window switch, and push the switch panel down into place, replace that other Phillips screw, the pull cap, and the screw cover that goes over it, and you're all set.
We hope this video helps you out. Brought to you by www.1AAuto.com, your source for quality replacement parts and the best service on the Internet. Please feel free to call us toll-free, 888-844-3393. We're the company that's here for you on the Internet and in person.
Shop Products


2002-06 Nissan Altima Rear Passenger Side Power Power Window Motor & Regulator Assembly TRQ WRA52325
Part Details:
- Power
- 2
- No
- No
- Galvanized Steel
- Nylon
- Yes
- 7.87 in
- No
- 8

How to Replace Front Window Regulator 1997-2005 Chevy Venture
Check out this video and learn how to replace the front window regulator on your 97-05 Chevy Venture or Pontiac Montana.
