How to Replace Window Regulator 2001-07 Ford Escape
Created on: 2012-06-13
You can learn how to replace the window regulator on your 01-06 Ford Escape with this video from 1A Auto. Check it out!
-
step 1 :Removing the Door Panel
- Pry off the trim piece inside the door handle with a flat blade screwdriver
- Remove the two Phillips screws at the bottom of the door panel
- Remove the Phillips head screw inside the door handle
- Remove the Phillips head screw inside the door pull
- Remove the door handle bezel
- Lift the door panel up and off
- Remove the wiring harness from the switch panel
- Remove the Phillips screw from the bracket on the door
- Carefully peel off the water shield
-
step 2 :Removing the Window Regulator
- Loosen the two 10mm bolts that hold the window to the regulator
- Raise the window by hand
- Pull the window out back first
- Disconnect the window motor lead
- Remove the three 10mm bolts from the motor
- Remove the two 10mm nuts from the regulator
- Pinch the tab and remove clip on the wiring harness
- Pull the window regulator out through the door
-
step 3 :Installing the New Window Regulator
- Remove the three nuts from the new motor
- Push the regulator into the door
- Thread the three 10mm nuts into the motor
- Reconnect the window motor lead
- Place the two nuts on the regulator rails and tighten them
- Lower the window, place the front into the track, then the rear
- Slide the window onto the clips in the regulator
- Tighten the two 10mm bolts that hold the window to the regulator
- Test the regulator by connect the window switch wiring to the switch panel
-
step 4 :Reinstalling the Door Panel
- Put the water shield into place
- Connect the wiring harness to the switch panel
- Push in the door panel clips
- Connect the door handle bezel
- Tighten the Phillips head screw inside the door pull (larger screw)
- Tighten the Phillips head screw inside the door handle (natural color)
- Tighten the two Phillips screws at the bottom of the door panel (Skinnier in back, larger in front)
- Attach the trim piece inside the door handle
Tools needed
-
Socket Extensions
Flat Blade Screwdriver
Phillips Head Screwdriver
10mm Wrench
10mm Socket
Ratchet
Brought to you by 1AAuto.com, your source for quality replacement parts and the best service on the Internet.
Hi, I'm Mike from 1A Auto. I hope this how-to video helps you out, and next time you need parts for your vehicle, think of 1AAuto.com. Thanks.
In this video, we're going to show you how to replace a front window regulator on this 2002 Ford Escape. We will be working on the driver's side, the passenger's side front door is basically the same procedure. This is the same for any 2001 to 2007, also similar for the Mercury Mariner. You'll need a small flat blade screwdriver, a Phillips screwdriver, and a 10mm socket with a ratchet and extension.
To start out, use a little screwdriver, there's a little trapdoor here, reach in, pry it out, and there's a Phillips screw back in there. Same thing here, pop that off, and there's a Phillips screw right down in the door pull. Another Phillips screw is on the back. We'll just fast-forward here as I remove those four screws.
Once you have those out then you can pull your bezel around your door handle here right off. Now, usually you can reach right into this corner and start pulling out and work your fingers underneath. Pull out firm, there's a series of clips that hold the door on. There are two up in here. The door panel comes off. Even though I'm going in fast motion here, you want to carefully pull your water shield down. Be careful not to ripe it. While you're doing that also there's a Phillips screw there on the bracket that holds that bracket in place. Remove that and pull the water shield down so you can access the inside of your door.
The window regulator on these vehicles are cable actuated. Actually, the regulator on my truck is absolutely fine but I wanted to do this video to show you what will happen when your regulator breaks. It is generally when you press the button, but when it breaks you'll hear a clicking or grinding and then a pop noise. That pop is usually the cable breaking. Once your regulator's broken, your window will probably just fall down into the door. Once you get to this point, you can lift, raise, and lower your window by hand. What you want to do is put your window at this point so you can see these two bolts here, and you want to remove, I believe yes, you want to remove those two bolts.
Increase the speed here as I use a 10mm socket with a ratchet and extension to remove those two bolts. Now, you can remove this piece of weatherstrip, and then your window will come up off the regulator. You can pull the back of it up first, and pull the window right out. Now you'll want to disconnect your lead to your window motor by pressing a tab there and pulling it off. Then these three bolts here hold the motor in, and then this nut and this nut down here holds your window regulator on. I'll fast-forward here as I remove those two nuts and the three bolts.
To give yourself some more room, there's a little clip that holds the wiring harness. You just reach in back, pinch the tabs on the clip to pull it out, and that lets you move the wiring harness around and get the regulator a little more easily.
New regulator from 1A Auto, it's going to mount in the same. There are a couple of minor differences. The motor mounts with nuts instead of bolts, and the motor has a pigtail on it. It's going to connect the same. It's going to be in a little different place.
First, I'm just going to take these three nuts off. We put the regulator and motor back in just the same. Your regulator over there, bring this over, and mounts there. Once you have the regulator in place, just use the three nuts and start them onto the studs for the window motor, and then tighten them up, and you want to tighten them up nice and snug. You don't need to over tighten them, though. Also, while you're here, you can reconnect the window motor lead and then put the two nuts back on the regulator rails and tighten those up as well.
Now, you want to put the nose in, just make sure you guide it around the regulator here. Make sure the back and the front are in the track. It goes up and down nice and easy. Slide it down through the regulator. I'm plugging my panel back and I've got the key on. I'm just going to run my window up a little bit until I get to this hole right here. I'm just going to fast-forward here as I insert that second bolt and tighten it up.
With everything hooked up now, I'll do a quick test. It works pretty good. Disconnect this. Put my weather strip back on. Connect that. Then carefully put your water shield back in place. Look at some of the holes where the screws go, and the guide pins on the door panel just to make sure that it's lined up well. You don't want to block off the screw holes. First, reconnect your harness. Hook the top up and over the weather strip here. Look back in here, make sure the pins are going into the holes. Fast-forward as I put the bezel on, and then the screws. The natural colored screw goes behind the door handle. The skinny diameter black screw goes in the back, and then the two larger black screws go in the door pull and the front of the door panel. Then, to finish up, make sure you just close the little trapdoor in behind the door handle and put that front button trim back on.
We hope this video helps you out. Brought to you by www.1AAuto.com, your source for quality replacement parts and the best service on the Internet. Please feel free to call us toll-free, 888-844-3393. We're the company that's here for you on the Internet and in person.
Shop Products


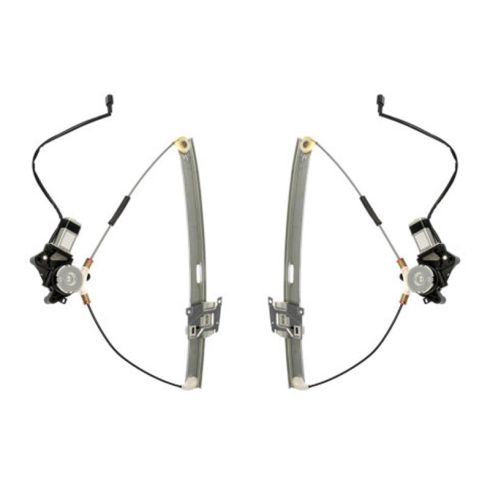
Ford Escape Mercury Mariner Front Driver & Passenger Side Power 2 Piece Power Window Motor & Regulator Assembly Set TRQ WRA50474
Part Details:
- Power
- 2 Piece
- (1) Front Driver Side Power Window Motor & Regulator Assembly
- (1) Front Passenger Side Power Window Motor & Regulator Assembly
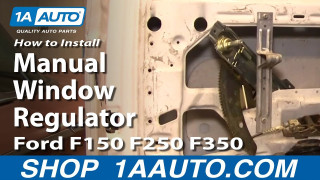
How To Replace Manual Window Regulator 1980-96 Ford F-150 F-250 F-350
Check out this video from 1A Auto to learn how you can replace the window regulator on your 80-96 Ford F-series truck.
