How to Replace Window Regulator 1997-2005 Lexus GS
Created on: 2020-11-17
This video shows you how to replace both the window regulator and the motor on your 1997-05 Lexus GS300.
Tools needed
-
Razor Blade / Gasket Scraper
Socket Extensions
Socket Driver
Phillips Head Screwdriver
10mm Socket
Painter's Tape
Ratchet
Trim Tool Set
Pocket Screwdriver
Marker / Writing Utensil
Pick
All right, friends, to get started, let's grab ourselves a nice little pick. We're gonna come behind this area here and just pop this cover. Behind that, there's a Phillips-Head screw. Let's removed that. There it is. Right over here, there's gonna be another Phillips-Head. Four Phillips-Head screws across the bottom. Right under this area right here, you're gonna find another Phillips-Head. And then right up here, let's grab this one. Now let's grab a nice plastic trim tool. We're gonna come right along this edge between the door and the panel itself. Just try to pop that free. After that, go ahead and lift up on this. Pay attention to this left side. We want to try to lift it up and around this molding here. After you've done that, just kind of bring it out at an angle and draw it up and away from the vehicle. Here we are. Let's go ahead and take off our little cables here. Just kind of pull on them, slide them off of there.
We've got an electrical connector, squeeze the little tab, and then pull this off. Do the same for the other one. Just push in on the tab and draw it away. If your car still has the vapor barrier, just go ahead and peel that back. Just be careful for that black goo. That's called butyl tape and it's really nasty. Now, we're just gonna put a whole bunch of painter's tape on the window just to hold it up while we continue. After you have your window safely taped up, we're gonna move along to removing the two bolts that hold the window to the regulator itself. There's going to be one located here and one all the way up here. As you can tell, they're a little bit hard to get to, but if you take a nice ratchet wrench or something the like, you can come in through the slot right here and get to those bolts. Remove them both.
Let's go ahead and clip back in our window switch here and put the key in the on position. Once you've done that, we're going to go ahead and push down on the window regulator button here. And essentially, we want this to come down, but we want the window to stay up. Put your window regulator so it's in the parallel position. Now, let's disconnect this wire right here. This is for the motor. I'm just gonna come right under this, separate the two. Let's get this off of here as well. Press down on this carefully not to damage it. We're just gonna put that into the door area here. All right. So, now we need to move along to removing some 10-millimeter headed bolts. There's going to be two right here and then four over there. I'm just gonna leave this one loose for now. Let's grab that regulator, we're gonna carefully lift up and pull the bolt through. Now we'll just let this down.
At this point, we're going to try to work it right out through this hole right here.
Okay. There we are, friends. Now it's going to be time to get the motor off of the regulator. You wanna remove these three mounting screws. So, now we're just going to separate the two. Just be careful because this is spring-loaded on the backside. So, as soon as you pull the motor off, it's going to want to kind of [vocalization]. There we are. So, now we want a marker tooth on our motor here. Once you've done that, go ahead and connect in the connector. Put the key in the on position and take your window switch, and we're gonna make sure that we push this down. We wanna use the auto-down switch. We're going to watch that motor, and we want it to stop. It's gonna stop on its own.
So now that we've gone all the way down with this and we let it stop, we need to go back to our window switch and we want to easily pull up on it. We want to just do the single click, not the auto function, okay? And we're gonna hold that for approximately five seconds and we wanna make sure that mark goes around at least six times. No more than 10. There we go. Now you would just take your window regulator and we're going to go ahead and set this so it's past the halfway point. See this bar right here, that's halfway. I'm just gonna go a little bit past that and I'm gonna start this right onto the motor there.
Okay. Let's go ahead and start in all the bolts. Make sure it's nice and snug. Let's go ahead and transfer over the bolt that we had left on the other one to the new one here, and get ready to mount it in. Okay. Let's slide this up. Reaching up through here, let's go ahead and make sure that our wiring's coming through now. We don't want that getting pinched anywhere. Start in the rest of the mounting bolts here. All right. So at this point, we have the window regulator with the motor loosely installed inside here. What you're gonna notice is this arm right here, that's supposed to be connected to the actual window itself, you've your little bolt hole here, it's gonna be down sitting very low. We're gonna need to remove the speaker unit from this area here so we have access to being able to mount the window in there.
The next thing we would want to do is disconnect our speaker. So, just go ahead and follow the wiring to wherever it connects into and disconnect it. Now, the next thing we're gonna do is remove all of our mounting bolts that go around. There's going to be one up top that's a little hidden behind these wires, and then, of course, all the rest. Let's carefully grab that speaker, pull it away from the vehicle. All right, friends, for what we're going to do next, we want to make sure we have our bolts and, of course, our ratcheting wrench nice and handy because we're gonna carefully lower the glass down so it mounts up against this lower bar right here. Just get it so it's approximately straight. And then after we've done that, we'll, of course, bring down our window nice and carefully. I'm gonna hold pressure on the window because that's gonna help make sure it doesn't fall down on me.
Here we go. Nice and carefully down. We want it to go as straight as possible. I'm coming down. I'm just gonna try to line this up here. You can see that the tab just kind of fell right into there. You can start in that bolt and then, of course, do the same to the other side. Whatever feels good for you. Now, we're just gonna go ahead and snug those up. Just double-check this one. That feels good. Now, at this point, what we want to do is pay attention to that other rod that's on there. I see mine right across here. I'm just gonna try to line that up with its bolt holes and start those in as well. All right. Now that we have all of our bolts started, let's go ahead and snug them up. Two for the bar, and then we've got four for the motor/regulator over on the other side. Reconnect this in. Listen for your click, of course.
Now, let's reconnect in our window, switch here, and then put the key in the on position again. Now what we need to do with the key in the on position is to put our window in the all the way up position, but you want to do that in manual mode, not the automatic mode. So, just one click. We're gonna go ahead and hold that. Okay. That's all the way up. Now, we're gonna bring it all the way down once again in the manual mode. All right. Now, let's repeat that process approximately five more times. Okay. So, now that we've done that approximately five times manually, let's give the auto function a try. That looks great. That looks great as well.
If you happen to notice that your window goes all the way up and then for some reason it comes down a little bit when it stops, that means that you haven't performed the actual resetting or relearn procedure correctly. If that's the case, well, then you're gonna have to redo it. Let's go ahead and get these bolts back in here that hold the speaker. Make sure you're reconnecting your speaker wiring. Let's get our door panel back over here. We're gonna start reconnecting in the wiring. There we are.
Now, we're going to reattach these. Start with a lower one. Goes right in like that. Latch it in. Now getting these cables in here might be a little bit easier with the window down. You'll be able to get your hands through here and, of course, your head. Once you get your cables connected, just go looking back down by the wires. Make sure everything's kind of pushed back in and it's nice and secured. At this point, we're gonna carefully try to put the door panel back on. We want to slip this in down and under this speaker area. And then we're gonna come right along here and we're gonna carefully press this down as well.
This should sit down nice and smooth coming all the way across. We'll just make sure it comes down along here. This feels pretty good. I'm gonna give it a loving bonk pushing my two little clips. And now let's put in all of our mounting screws. Let's go ahead and put in the anchor bolt here. Okay. That's nice and snug. Let's go right up here. Go right for this one. Let's get this guy right here. And now, the rest down along the bottom. Let's get this back in here now. Perfect. Now just clean up your mess.
Shop Products
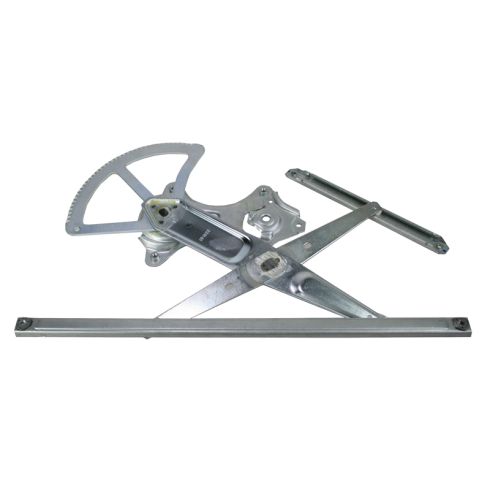
Lexus GS300 GS400 GS430 Front Driver Side Window Regulator TRQ WRA51786
Part Details:
- No
- Galvanized Steel
- Electric
- No
- No

How to Replace Window Regulator 2001-06 Chrysler Sebring
How to repair, install, fix, change or replace a slow, stuck, cracked or damaged window regulator on Chrysler Sebring and Dodge Stratus, model years 01, 02, 03, 04, 05, and 06.
