How to Replace Window Regulator 1996-2000 Dodge Caravan
Created on: 2012-02-14
Learn how to remove the door panel and replace a damaged or bad window regulator motor with the help of the 1A mechanics in this video.
-
step 1 :Remove the door panel
- Use a window crank removal tool (which you can purchase on our website) to remove the window crank
- Remove all the Phillips screws securing the door panel.
- There should be one in your door pull, two behind/in the door handle area and one on the upper inside corner of the door panel.
- Use a putty knife or door panel removal tool (also found on our website) to unclip the door panel from the door.
- Disconnect the wiring harness connections and door latch rod.
- Carefully peel back the water shield.
-
step 2 :Remove the window regulator
- Unclip the window from the regulator with your flat blade screwdriver.
- Tape the window up with painters tape so it’s out of the way and set the wire clips aside somewhere safe.
- Unbolt the four bolts securing the rails using your T30 Torx bit and ratchet.
- Pry off the crank assembly and use pliers and a flat blade screwdriver to assist with this.
-
step 3 :Install the new window regulator
- Feed the regulator tracks up into the door and bolt them in with your T30 Torx socket and ratchet.
- Clip the crank assembly onto the door.
- Untape the window and secure it to the window regulator, using your metal clips you saved to secure it.
- Replace the water shield.
-
step 4 :Install the door panel
- Make sure all the door panel clips are transferred to the door panel.
- Connect the latch rod and clip the door panel to the door.
- Secure the four Phillips screws.
- Replace the window crank.
Tools needed
-
Flat Blade Screwdriver
Phillips Head Screwdriver
Putty Knife
T30 Driver
Window Crank Removal Tool
Paper Clip
Painter's Tape
Door Panel Removal Tool
Needle nose pliers
Brought to you by 1AAuto.com, your source for quality replacement parts and the best service on the internet. Hi, I'm Mike Green. I'm one of the owners of 1A Auto. I want to help you save time and money repairing and maintaining your vehicle. I'm going to use my 20+ years experience restoring and repairing cars and trucks like this to show you the correct way to install parts from 1AAuto.com. The right parts installed correctly. That's going to save you time and money. Thank you and enjoy the video. In this video, we're going to show you how to remove and install a new manual window regulator. That's the one with the hand crank on this 1998 Dodge Caravan, same as any '96 to 2000 Dodge Caravan, as well as the Plymouth Voyager.
Tools you'll need for this job are a window crank removal tool available on 1AAuto.com, Philips screwdriver, small flat blade screwdriver, a door panel clip tool, which is also available on our site, large flat blade screwdriver, a T30 Torx bit with a ratchet driver, pliers, and painters tape. First things you're going to do is remove your manual window crank. The best tool for it is the actual tool that you use. You can do it a couple of different ways, but this tool usually only costs a few dollars. We do sell them on 1AAuto.com. It's easy enough, you slide in between here. Just be careful because the clip can fly out sometimes. It just went right into my floor, so I can see it. That just goes in. Pushes the clip off. Just make sure you keep the washer here. Now you're going to remove a few screws. There's one right there next to your door pole. There's one right in behind your door handle, small screwdriver, pry this little trap door open and you'll find another screw and then there's also one right up in here. Using this short screwdriver, this one up here is easiest.
I'm going to speed it up. I actually think all you need to take out is the screw next to the door pole and the one that you can see that's in behind your door handle. I don't think you need to take this top one off or the one behind the little trap door, but I did it anyway. You need a door panel clip tool, also a putty knife works too. I actually used the putty knife first, get it in there. You slide it down. You find the clip. Then you use your door panel clip tool. Get right around the clip. Once you start it going, then you pull, lift it up and off. Lock threads in behind. Flip that off and pull it down. Next you want to carefully take off your water shield. Yes, I am showing this in fast motion, but you want to carefully peel it off. Try not to rip it and get it out of the way. This manual regulator is a cable style regulator and what usually happens is the cable breaks and in that case, you can just grab your window and move it up and down. My regulator is actually in fine shape, but when the regulator breaks, you'll be able to just move it up and down by hand. Then what you want to do is right in here on each side, you'll see a little wire connector. Start prying it out and then put your finger on it because as you get it a certain way, hopefully it will shoot right out. Take one out there and then it's the same thing here. You may just have to move your window down a little bit to get to that one.
Once you have these clips out, push the window out and you can then bring it up. Bring it up out of the way. Secure the window up with some painter's tape. Now the crank or transmission part of the regulator is help in by T30 bolts and actually what you want to do is take a large screwdriver and pry it away because they're actually put into rubber rivets. One down here and then there are four bolts that hold the rails on. You want to loosen the bottom two and remove the top two. Now your crank assembly should pry off and what I did was a couple of them broke. Actually the plastic of the assembly broke, which is not a big deal. What you need to do is reach in behind with some pliers and hold on to the rubber in the back, turn, get the bolt to turn a little bit, loosen up the rubber, and then they'll pull right out. You can see one pulled out like it was supposed to and these two broke off. What you can do is just go back in behind, grab hold of the rubber, and keep using your wrench to basically peeling it apart. Get the rubber separated from the metal. You should be able to pull them right through. I'm going to fast forward here as I pull that other one out. Then I'm going to loosen up the four bolts and remove the top two. Then I'm also going to pull the little clips out that hold that cable that goes diagonally across there. Another one out.
New regulator from 1A Auto. I've got my bottom two screws loosened. My top two screws are out. My clips are in. You're just to put the window down and then snap it into the regulator. When you put it in, you basically want to twirl it this way and have this cable that has the pins on it be in behind the regulator or the actuator here, but what you're going to want to do it hold it just like this. Put this rail up in first. Seal in it place and now flip this over like that. Put this bottom top in first. Hold this up. Put that in. Flip it around. Make sure it doesn't get caught in here. Now you want to see the hole where that bolt goes through there, pull it in towards yourself, slide it up. Actually you can move this towards the back. Slide that bolt up and in. Seal that bolt there. Same thing over here. Slide this forward. Get this bolt put in. Now you can see your hole where that bolt goes. Start this bolt. Now I'm going to speed up as I start in those bolts and then use this extension and torques bit to preliminarily tighten them up. I am going to keep the fast motion rolling. It's pretty easy to explain the steps. Here I'm just clipping the clips in to hold the cable in place. The new window regulator from 1A Auto comes with the rubber rivets and the T30 Torx bolts, so I push that transmission into place and then tighten up those bolts until its holding nice and secure. Take your tape off. Then slide the window down and you'll hook the regulator, push your window towards the outside of the door, slide it down some more. Put it in place. Forward on. What I'm doing here is you can feel the tin on the window and then you got to feel the socket in the regulator and then get them together and then pull them together. Pop it into place.
Now tighten the four bolts, the four T30 bolts that hold the rails in place. It looks pretty good. Carefully put your water shield back on. The latch rod goes through that long slit and then the lock button goes through there at the top. Try and stick it on as well as you can. Here you can see the clips. Not sure why they didn't want to come out. Basically, just go right around them with your clip tool and pop them out. Once you pop them out, put them back into your door panel. Pull your lock rod over. Put it up into this clip. Flip the clip over. Now find your lock here. Force it through your panel here. Put your handle up in there and I peak back in here. Get your pins to line up. I'll speed up here as I just put those four screws back in and that little trap door back on. Then I'll get into replacing the window crank. Take our little clip and usually put it back in. Use a screwdriver and carefully push it back on. This little indent in the washer goes on top of there like that. Then you can just put this on in position. Be sure it latches on.
We hope this helps you out. Brought to you by www.1AAuto.com, your source for quality replacement parts and the best service on the internet. Please feel free to call us toll free 888-844-3393. We're the company that's here for you on the internet and in person.
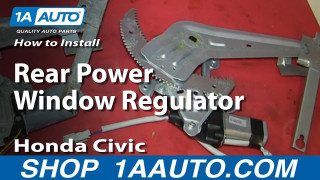
How To Replace Rear Power Window Regulator 1996-2000 Honda Civic
How to repair, install, fix, change or replace a weak, noisy, damaged or defective power window motor on Honda Civic, years 96, 97, 98, 99, and 00.
