How to Replace Window Regulator 2000-06 Nissan Sentra
Created on: 2012-09-25
Learn how to replace the window regulator in your 00-06 Nissan Sentra with this 1A Auto how to video.
-
step 1 :Removing the Door Panel
- Pry off the door pull panel by hand
- Pry off the window switch panel by hand
- Disconnect the window switch wiring harness
- Remove the 10mm Phillips head bolts behind the door pull
- Pry off the clip at the front of the door panel
- Remove the Phillips screw at the bottom of the door panel
- Pry the door handle bezel off with a flat blade screwdriver
- Pull the door panel off by hand
- Carefully remove the water shield with a putty knife
-
step 2 :Removing the Window Regulator
- Move the window by hand until you can access the window bolts
- Remove the 10mm window bolts
- Lift the window by hand
- Turn the window and pull it out
- Disconnect the window motor wiring harness
- Remove the three 10mm bolts from the window motor
- Remove the four 10mm bolts from the window regulator rail
- Pull the window regulator and motor out of the door
-
step 3 :Disconnecting the Window Motor
- Remove the three screws from the window motor with a Phillips head ratchet bit
- Remove the motor from the regulator
-
step 4 :Connecting the New Motor to the Regulator
- Line up the motor with the regulator
- Start the three screws by hand
- Use the Phillips head ratchet bit to tighten the three screws
-
step 5 :Reinstalling the Regulator
- Start the top left regulator rail bolt by hand
- Slide the regulator and motor into the door
- Hang the regulator in place by the bolt
- Hang the motor in place with its two teeth
- Thread all the 10mm bolts by hand
- Tighten all the bolts with the 10mm socket
- Connect the window motor wiring harness
- Slide your window into the door, starting with the front corner
- Push the window on to its track
- Insert the bolts that connect the window to the regulator
- Connect the window switch wiring harness
- Test that the window works
- Disconnect the window switch wiring harness
-
step 6 :Reinstalling the Door Panel
- Carefully put the water shield back on
- Thread the window switch wiring harness through its cavity
- Put the door panel on
- Push the door panel clips in
- Insert the 10mm Phillips bolts behind the door pull
- Insert the plastic clip at the front of the door panel
- Insert the Phillips head screw at the bottom of the door panel
- Push on the door handle bezel by hand
- Connect the power window switch wiring harness
- Push the power window switch into the door starting at the front
- Push the door pull panel into place
Tools needed
-
Socket Extensions
Flat Blade Screwdriver
Phillips Head Screwdriver
Putty Knife
10mm Wrench
10mm Socket
Ratchet
3/8 Inch Drive Ratchet
Brought to you by 1AAuto.com, your source for quality replacement parts and the best service on the Internet.
Hi, I'm Mike from 1A Auto. I hope this how-to video helps you out, and next time you need parts for your vehicle, think of 1AAuto.com. Thanks.
In this video we're going to show you how to replace a front power window motor on this 2006 Nissan Sentra. We show you the driver's side; the passenger's side is pretty much the same procedure. Tools you'll need are a flat blade screwdriver, Phillip's screwdriver, a 10mm wrench or socket with a ratchet and extension . really the socket with ratchet and extension is the easier way to go. You'll need a putty knife to help get the insulation off. Then you'll need a Phillip's socket bit, which can either be a 1/4" drive or a 3/8" drive and you'll see how I use that later in the video.
Okay, you can actually take this panel and lift up. You have to get your fingers underneath and underneath back in here, and lift up firmly. It comes right out. Then this, lift up firmly as well. Then right back here there's a little tab on your harness, push that in and disconnect the switch harness. Now right in behind here there are two 10mm bolts, or you can use a Phillip's screwdriver. Although, usually using a socket and ratchet is a little easier. With the screwdriver you do have to press quite hard to get them going. Those come out. There is another small clip right up in here; it's a Phillip's screw. Get your screwdriver there and lightly turn it. You may have to just reach in behind with your fingernail or a flat blade screwdriver, and try to pry that out. It doesn't always come right out. There's also another Phillip's screw right down here at the bottom of the door panel. You remove that screw. Then take your small screwdriver and carefully pry out this bezel around the door handle. Pull out on the door panel and pull it right up and off.
Next step, you want to carefully remove your water shield. I'm actually using a putty knife, because it's stuck on with some butyl style adhesive bead. Just be careful, you don't want to rip this water shield as well as some sound insulation. You just have to work at it and go around the edges. Even though I am doing it in fast motion here, you do want to do it carefully.
Now, inside, your regulator is actually a cable activated regulator. Usually what happens is you hear a popping noise and then you can hear the motor running and some crunching and grinding, but your window doesn't move anywhere. Usually actually if you grab onto your window you can move it up and down by hand. What you want to do is either move it up and down or have a helper move it until you can see the bolts. Let me go back here. The bolts that hold the regulator to the window, you want to be able to see them through these two holes. Then we're going to take those off. Use a 10 mm socket with a ratchet and extension. Fast forward here again as I finish removing both those bolts. Once you have that unbolted you can lift your window right up. Bring it back and forward a little bit, and it just come right up and out.
Now to remove the regulator and motor, first, you want to unplug the motor. The connector is right here. You just press down right here and pull. Then there are three bolts that hold the motor: one, two, and three. Two bolts at the top and you can just loosen that bolt and then it slides out through that hole. Then there are two bolts at the bottom as well. I'm going to speed up here as I just use my 10mm socket with a ratchet and extension to remove those bolts. There is two of them that you just loosen, and then you slide the regulator over or the motor up, and then pull the bolts right through the enlarged holes. Now reach behind, slide this back, and this rail out. You can reach right in here and pick your motor up. Then bring your regulator and motor right out through here.
Now, you can see there is three screws that hold the regulator or the motors to the regulator. You can try with just a regular screwdriver, but normally doesn't quite work and you need to use a larger bit with a ratchet handle. Get them loose and then you go back to the screwdriver. What is important is that this plastic wheel, with the cables wrapped around it, doesn't come out of the regulator. Grab it; lift it up off like that.
You can see, and this motor is actually in fine shape, so I'm just going to reinstall it.You just put it down on the same way. You might have to manipulate the motor a little bit to get the holes lined up. Start your three screws in. Now I'm going to fast forward here as I use a screwdriver, I get the screws most of the way there, and then use my 3/8 drive Phillip's bit and tighten them up.
To reinstall, you want to make sure you have this bolt, right up here, installed and put the regulator and motor in the door. You're reaching through here, pull the motor up a little bit. Put the regulator up and hang that bolt up right there and bring your motor over. It's got two teeth right there that you hang up. You just start all your bolts right back in. We use some fast forward again here, as I just thread all the bolts in to both the motor bracket as well as the rail and then use my 10mm socket and ratchet to tighten those bolts up. Once you've tightened it all up, then you can just plug this right back in. As I said on a replacement you probably pull the harness through, loop it around, and then just connect it right up here. You just want to take your window, put the front down in first. Then, let it go to the front. Looking at the front, make sure the front goes into the track there. Then looking down inside, making sure the back goes into the track properly. Make sure it slides up and down easily, and then let it down, and it contacts the regulator. Right down here, just move your window around a little bit. It's usually easiest if you put the bolt right into your socket and just feed it through and in. You may need to lift up on the window just a little bit to get it started. Fast forward again here as we install those two bolts that hold the window to the regulator. If you'd like you can plug your power window switch back in and turn your key on and test the window motor.
After that, carefully put your water shield back on. What I like to do is line up the two holes in the middle where the screws go through the door panel and secure the door panel, that way you know those are lined up. Then just stick the rest of it on around the edges.
To reinstall the door panel is pretty easy. Just make sure that your harness comes through. Door panel up, make sure it goes down all the way, that then your clips should line up. Then you just need to hit it around a couple times. This one down here I'm just going to lift up a little bit. Put these two Phillip's bolts back in. This little plastic one just pushes right into place. Screw underneath, put it right into place. This goes on; just push it in to lock in place. Reconnect your power window switch. Put the front down in first then lock the back into place. Then put this right into place and press down.
We hope this helps you out. Brought to you by www.1AAuto.com, your source for quality replacement parts and the best service on the Internet. Please feel free to call us toll-free, 888-844-3393. We're the company that's here for you on the Internet and in person.
Shop Products


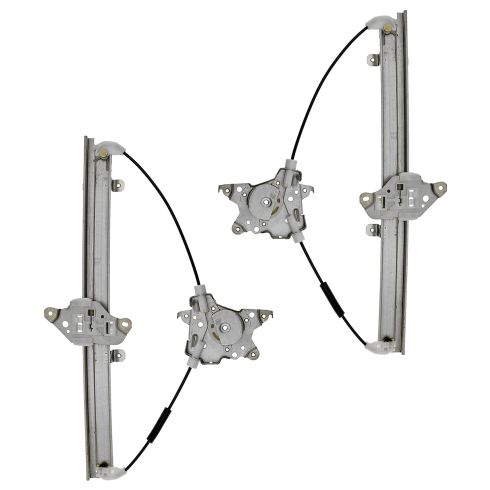
2000-06 Nissan Sentra Front Driver & Passenger Side 2 Piece Power Window Regulator Set TRQ WRA50379
Part Details:
- Power
- without Motor
- 2 Piece
- (1) Front Passenger Side Window Regulator
- (1) Front Driver Side Window Regulator

How to Replace Window Regulator 1993-2011 Ford Ranger
Watch this video to learn how to replace the window regulator in your 93-11 Ford Ranger. You can do it yourself and 1A Auto is here to show you how!
