How to Replace Wheel Bearing Hub Part 2 1997-99 Cadillac Deville
Created on: 2011-08-11
Watch this video to learn how to replace the front wheel hub and bearing in your 97-99 Cadillac DeVille. This is Part 2 of the video.
-
step 1 :Beginning the Repair
- This is Part 2 of a two part video
- Please consult Part 1 for prior instructions
- Perform the steps outlined in Part 1
-
step 2 :Removing the Hub
- Loosen the hub bolts
- Disconnect the ABS sensor wire
- Unseat the hub by loosening it up with a large hammer
- Be careful not to damage the backing plate
- Pull off the hub and backing plate
- Push the axle aside
- Pull the ABS sensor wire clip through the backing plate
-
step 3 :Attaching the New Hub
- Remove plastic backing from ABS clip on new hub
- Hold the backing plate in place as you position the hub
- Thread the ABS sensor wire through the backing plate
- Thread the front lower bolt
- Preliminarily tighten the front lower bolt
- Thread the top front bolt
- Preliminarily tighten the top front bolt
- Thread and preliminarily tighten the two rear bolts
-
step 4 :Attaching the ABS Sensor
- Clip the ABS sensor into place
- Connect the ABS sensor to the ABS lead
-
step 5 :Securing the Hub
- Tighten the bolts with a socket
- Tighten the bolts to 70 foot-pounds with a torque wrench
- Put the hub nut into place
- Preliminary tighten the hub nut
-
step 6 :Reinstalling the Brakes
- Slide the brake rotor into place
- Attach one lug nut to hold the rotor in place
- Put the bracket between the rotor and the steering knuckle
- Attach the bracket bolts
- Tighten the bracket bolts preliminarily
- Tighten the bracket bolts to 85 foot-pounds
- Clean the slides with a wire brush
- Slide the brake pads into place
- Push the brake cylinder into the caliper with a large C-clamp
- Attach the caliper
- Clean and grease the caliper slides
- Insert the caliper slides
- Tighten the caliper slides to between 25 – 30 foot-pounds
- Remove the place-holding lug nut
-
step 7 :Reattaching the Wheel
- Slide the wheel into place
- Start the lug nuts by hand
- Tighten the lug nuts preliminarily
- Lower the vehicle to the ground
- Tighten the hub nut to 118 foot-pounds
- Tighten the lug nuts to between 90 – 100 foot-pounds in a crossing or star pattern
- Reattach the center cap
-
step 8 :Testing the Brakes
- Pump your brakes repeatedly
- Test your brakes at very low speed
- Road test the vehicle
Tools needed
-
13mm Socket
A Piece of Pipe (for leverage)
Large C-Clamp
Socket Extensions
Torque Wrench
15mm Socket
Jack Stands
19mm Socket
Flat Blade Screwdriver
34mm Socket
Large Hammer
Ratchet
Wire Brush
Floor Jack
1/2 Inch Breaker Bar
3/8 Inch Socket
Brought to you by 1AAuto.com, your source for quality replacement parts and the best service on the Internet.
This is Part 2 of installing a hub on this 1997 Deville, same as any '97 to '99. The tools you'll need for this, just a little refresher. Hopefully, if you've already gotten it out, you've already got all these tools together.
Okay, now you want to unseat the hub. You want to be careful not to damage this backing plate. Then they come off pretty easy. As they start to come out, push your axle kind of to the side and feed the harness clip through. New hub from 1AAuto: exactly the same. Just take your ABS clip out of there. You want to feed this in with the ABS clip kind of up that way. This goes on like that. Put the hub on, put the clip through, push it through, push on it a little bit. Four bolts probably the easiest one here feed it through, through the backing plate and into the hub. Start it. Use my socket ratchet extension. I'm not going to tighten it up a lot, just get that bolt going for you a bit. Make sure it's in there properly. Then you take your top one, same thing. Feed it through, through the backing plate. Push on the hub some. Start the bolt. Okay, we'll fast forward as we put in those two front bolts and then spin it over to the rear.
Okay, take my clip, clip it on, and plug in my ABS lead. Now, my third bolt, I'm going to tighten up most of the way so it's snug. Now, the rear we're going to tighten up, we're going to snug it up, and then do the same thing for the other ones. Then we'll torque them afterwards. Okay, now I'm going to tighten these to 70 foot-pounds. Then, I'm going to put my hub nut on here and I'm just going to use my impact wrench to get it seated. I'm not going to tighten it yet. I'm going to torque it when it's all back together. What I like to do is I just put one lug nut on, just to kind of help hold it in place.
The bracket goes between the knuckle and the rotor. Then the bolt goes in with the space around the back. We'll speed it up here, as we just put those bolts in and tighten them up preliminarily. Tighten them up to 85 foot-pounds.
You're going to want to use a wire brush. You're going to actually take these slides off, and you'll want to clean out where the pads move back and forth. Now, your pads. Obviously, I'm not putting new pads in, because mine are fine. All this vehicle really needed was a new hub. So put the pads back in and start placing them, like that.
If you're putting new pads on, you'll need to . you can see my cylinder is out of the caliper some . so, you'll need to push that cylinder back in. You can do that with a large C-clamp. Now, that can go right down like that.
Okay, put the slides back in, make sure they're nice and clean and have some grease on them. Tighten them up with your ratchet and socket, and pull them nice and snug. They should be probably about 25 to 30 foot-pounds. Then remove that lug nut.
Now we can put our tire back on. Start the lug nuts by hand, tighten them up preliminarily with your wrench, and then you'll do the rest of the tightening when the car's on the ground. Now we want to tighten this to 118 foot-pounds. And now here with the car on the ground, tighten the lug nuts up to 90 to 100 foot-pounds using a star pattern. And then, most important is the last step. Make sure whenever you take your brakes apart, pump your brakes a bunch of times first. Do a test stop from five and then ten miles an hour.
We hope this helps you out. Brought to you by www.1AAuto.com, your source for quality replacement parts and the best service on the Internet. Please feel free to call us toll-free, 888-844-3393. We're the company that's here for you on the Internet and in person.
Shop Products

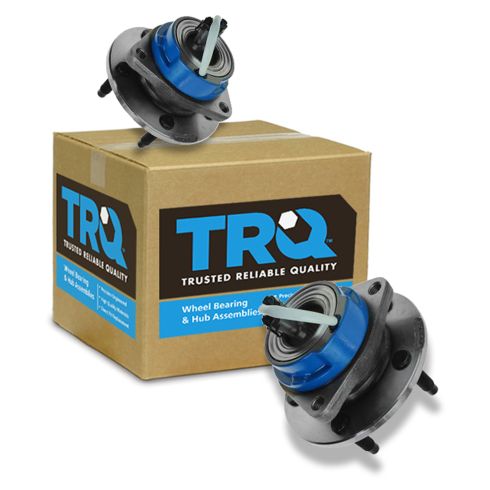
Driver & Passenger Side 2 Piece Wheel Bearing & Hub Assembly Set TRQ BHA50039
Part Details:
- 2 Piece
- Ball
- (1) Driver Side Wheel Bearing & Hub Assembly
- (1) Passenger Side Wheel Bearing & Hub Assembly
How to Replace Wheel Bearing Hub Part 1 1997-99 Cadillac Deville
Check out part one in this instructional video series showing you how to replace the front wheel bearing and hub on a 97-99 Cadillac Deville.
