How to Replace Wheel Bearing Hub Assembly 1999-2005 Pontiac Grand Am
Created on: 2010-03-19
Watch this video to learn how to replace the wheel bearing & hub assembly in this 99-05 Pontiac Grand Am.
-
step 1 :Install the hub
- Thread through the ABS harness.
- Start the bolts and make sure the shield plate is in the correct place.
- Turn the wheel as needed to get better access to thread in the bolts.
- Torque the bolts between 55-60 foot pounds.
- Connect the ABS harness and clip the bracket in place.
-
step 2 :Reassemble the brakes.
- Put the rotor back on.
- Secure the caliper onto the brake disk.
- Bolt into place and torque to 55 ft lbs.
-
step 3 :Put the wheel back on
- Torque the lug nuts to 75 ft lbs.
- The center hub nut should be torqued to 85 ft lbs.
Tools needed
-
35mm Socket
13mm Socket
Socket Extensions
Torque Wrench
Jack Stands
19mm Socket
32mm Socket
Flat Blade Screwdriver
34mm Socket
Lug Wrench
Ratchet
Floor Jack
1/2 Inch Breaker Bar
Brought to you by 1AAuto.com, your source for quality replacement parts and the best service on the internet.
Hi, I'm Mike Green. I'm one of the owners of 1A Auto. I want to help you save time and money repairing or maintaining your vehicle. I'm going to use my 20 plus years experience restoring and repairing cars and trucks like this to show you the correct way to install parts from 1AAuto.com. The right parts, installed correctly, that's going to save you time and money. Thank you and enjoy the video.
Okay, so part two, replacing and installing the hub on this '99 Pontiac Grand Am. This video will help you with just about any GM front-wheel drive car from about '93 to present. Maybe the parts are a little different, maybe the size of the wrench is a little different, but the procedure is about the same, and again we cover removing the hub in our other videos, same name, just part one.
Okay, here's a list of tools you're going to need. You are going to need 3/8'' drive tools because it's a little hard to reach one of the bolts in the hub, and you are going to need to use torque wrenches because you want to make sure you get these, these are all Driveline parts, so you want to make sure everything's put back together correctly.
This connector here needs to go in this way so we push that through. This bottom one is our easiest one, I'm just pushing the bolt through and pushing the hub on and getting this bolt started in. Obviously you want to make sure this plate's in the right place. Going to swap around here, and I'm going to get the bottom, the rear bottom bolt in, push it through, and thread it on. Then I'm going to go around to the other side and I'm going to turn the wheel and now I can get this top on in and through. Push on the hub so it's back against the steering knuckle that prevents you from cross turning anything. Okay, so now I've got my socket and 13 millimeter wrench and I'll get each one of them somewhat tight first then I'll tighten them up. These should be between 55 and 60 foot-pounds. This center hub nut should be between 75 and 85 foot-pounds. I did put my hub on and I tightened it with an impact wrench but then I loosened it up a half-turn or so, so it's not exactly tight. You actually have to wait until you put the tire on the ground to torque that up.
Now I'm going to torque my three hub mounting bolts and I'm torqueing them to 55 foot-pounds. In fact I can actually reach this one pretty well from the backside here, so I will. I can reach it but I can't see it. There it is. Okay, and now I'm going to connect my ABS sensor, take my harness from the hub, and I'm going to click it on to the bracket here which sounds easy but is just a little bit weird here. Okay, kind of clicked the wrong part on. There it is, clipped on and now I'm going to plug in the ABS harness from the car. So now I'll put the rotor back on. Now be careful not to touch the rotor with your dirty fingers. Then we're going to bring the brake caliper back down and gently take some force to press it back down on to the disc. Put those bolts back in. I'll put my two bolts back in, tighten those up, those are about 55 foot-pounds, going to put my wheel back on and then I'll lower it to the ground and go from there.
So what I'm doing here is before I put the wheel on, I'm just popping off this center cap, that way I'll be able to get through there. So I'll quickly run through, three bolts in the back of the hub, we torque those. ABS sensor is plugged in, brake caliper is on and torqued, and now I'm going to put the wheel on and the next thing you'll see is it down on the ground and we'll be torqueing up the lug nuts and the center bolt.
We've got the car on the ground; I'm going to go 85 pounds with this center nut as you can see. Then I'm going to back off to 75 pounds for the lug nuts, you want to do those in a star pattern. Put our center cap back on, and we're all set.
Brought to you by www.1AAuto.com, your source for quality replacement parts and the best service on the internet. Feel free to call us toll free (888)844-3393, the company that's here for you on the internet and in person. Thank you.
Shop Products


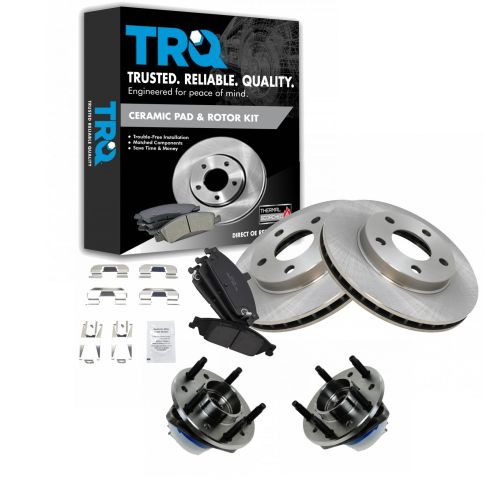
Chevrolet Pontiac Olds Front Ceramic Brake Pad & Rotor Kit with Wheel Bearings TRQ BKA52047
Part Details:
- Ceramic
- Ball Bearing
- (2) Front Brake Rotors
- (2) Front Wheel Bearing & Hub Assemblies
- (1) Front Ceramic Brake Pad Set

How to Replace Front Wheel HubBearing 1999-2004 Jeep Grand Cherokee PART 2
Check out this video to learn how to replace the front hub and bearing on your 99-04 Jeep Grand Cherokee. This is Part 2.
