How to Replace Wheel Bearing Hub Assembly 1999-2004 Oldsmobile Alero
Created on: 2012-02-11
Check out this video to learn how to replace the wheel hub and bearing assembly on your 99-04 Oldsmobile Alero. 1A Auto shows you how step by step.
-
step 1 :Remove the wheel
- Remove the hub cap
- Loosen the lug nuts
- Raise and secure the vehicle
- Remove the lug nuts and set the wheel aside.
- Turn the wheels for easier access to the calipers.
-
step 2 :Remove the brakes
- Remove the two 12mm bolts with a socket and breaker bar.
- Use a C-Clamp to compress the caliper piston.
- Pull the caliper off.
- Remove the brake pads and check the life of them.
- Observe the rotors; prepare a new rotor with brake cleaner if it is in need of replacement.
- Use a 13mm socket and breaker bar to remove the caliper bracket bolts.
- Remove the rotor.
-
step 3 :Remove the hub
- Disconnect the ABS sensor.
- Remove the 35mm socket to remove the hub nut.
- Put the wheel back on and lower the car to break the hub nut loose if necessary.
- Use a 13mm socket and breaker bar to loosen the three nuts on the back side securing the hub.
- Put an axle puller onto the hub and axle to break the axle free from the hub.
- Sometimes a solid thwack with a hammer is enough to break the axle loose, taking care not to hit it hard enough to damage the CV joint.
- Remove the 13mm nuts all the way and pull the hub off.
-
step 4 :install the new hub
- Thread the ABS harness through and line the axle up into the center of the hub.
- Evenly tighten the three 13 mm bolts.
- Connect the ABS sensor harness.
- Torque the 13mm bolts to 65 ft lbs
- Put the hub nut on, put the wheel on, lower the car, and torque it to 173 foot pounds.
- Raise and secure the car, remove the wheel and continue.
-
step 5 :Put the brakes on
- Put your rotor on the hub.
- Mount the caliper bracket and torque the 15 mm bolts to 65 ft lbs.
- Install the brake pads.
- Dab a little anti-seize grease onto the edges of the brake pads and insert them into the brackets
- Install the caliper, and torque the caliper bolts to 15-18 ft lbs.
-
step 6 :put the wheel back on
- Put the wheel on and hand tighten the lug nuts.
- Lower the vehicle and torque the lug nuts to 90-100 ft-lbs in a star pattern.
- Pump your brakes and do a couple test stops before driving your car anywhere.
Tools needed
-
12mm Socket
35mm Socket
13mm Socket
Large C-Clamp
Socket Extensions
Pitman Arm Puller
Torque Wrench
19mm Socket
Ratchet
Wire Brush
1/2 Inch Breaker Bar
Brought to you by 1AAuto.com, your source for quality replacement parts and the best service on the internet. Hi, I'm Mike from 1AAuto. I hope this how to video helps you out, and next time you need parts for your vehicle, think of 1AAuto.com. In this video, I want to show you how to replace a front hub on this 2000 Olds Alero, this is a two door. Hub replacement is the same for any '99-'04 two or four door. Tools you need are jack and jack stands, 12, 13, 19, and a 35 millimeter socket. That 35 millimeter is one that a lot of people aren't going to have. You'll need a ratchet and a breaker bar or maybe a pipe for some extra leverage. Large c-clamp, wire brush, torque wrench, and possibly an axle puller.
Start off by removing your hub cap. If you don't have air tools, you'll want to loosen your lug nuts, then raise and support your vehicle, then remove the lug nuts and the wheel. Turn the wheel for easier access, back the caliper. If you went in behind your calipers are held on by two 12 millimeter bolts, one there and one there. This should come off for you easily. We'll fast forward here as I remove those bolts the rest of the way. In order to get the caliper off, you might need to reduce some pressure on the brakes. You put your c-clamp right against your brake pad there, and then on the caliper there. Now, you can turn and loose, the caliper comes right off, and now you can just put the caliper right up here. Now, you can take your pads right now. You could see that they have wear marks and these pads are still in pretty good shape, and then, just use your finger and kind of run up on the ... run your finger on the disks, and if you don't feel any really deep grooves, they're probably okay.
To get our disks off, we're going to remove this caliper bracket, which is two bolts here, then one over here. These bolts are 15 millimeters and you're going to want like a breaker bar or use a piece of pipe on a ratchet, so these will be tight. I'll just fast forward as I change over to a ratchet and remove those bolts the rest of the way. The bracket's off here. Rotor comes right off. On the backside, you've got your ABS connector. Just pull back on this little tab, unplug that, and then, you'll want to use Phillips screwdriver, and remove that. Now, your hub is held on by three bolts. One here at the top, one down here, and then there's one over on the opposite side. Using an impact wrench, you want to probably loosen this at the start. You can actually put your wheel back on here right now, lower down on the ground, then use a big breaker bar or something to remove it to 35 millimeter. Now, I'm using 3/8 inch drive tools and just makes it a little easier to get back in there. A longer bar, because generally these are pretty tough, and the 13 millimeter, it came off pretty easily. I'll just fast forward here as I loosen but I don't remove the three bolt yet.
Here in this picture, you can see I've put a axle press or puller onto my hub, so there's the two kind of hands that reach behind the hub and hold it while they ... the bolt through the middle pushes the axle through. Quite honestly, I've done a lot of these hubs, and usually, what you can do is take a hammer and just give that axle a quick whack and they'll break it free. This is the first one in about a hundred that I actually had to use the press on. I'll just speed up here as I remove the bolts the rest of the way. The bolt's out. Pull the hub. Now, you may have to push your axle back in order to get the parts, we're able to kind of push the axle to the side. That comes out. A new hub from 1AAuto. It's got the ABS pigtail and everything, just like the original. Fit it in. Make sure that that connect to those screw. I'm going to speed it up. Basically, you just push it on and you might need to twist it just a little bit just to get it to line up with the axle, and then push it back and start one of the bolts in, then start the other two bolts. I don't tight them up all the way. You definitely want to start all three bolts first, then tighten them up most of the way, and then we will hook up our ABS lead, and then you need to torque those bolts on. Then, you want to torque this to 65 foot pound and I'll start with the back one. I'll put this parts in place. I got this bolt torqued up, and then, my harness back in place and my connector reconnected. I'll fast forward as I just change the position of the wheel, and then torque those other two bolts again 65 foot pounds.
Put the rotor back on, and just to help me get it back again, I usually put a lug nut on. Before we but this bracket on, it has stainless steel slides. Use a wire brush and clean this out really well. The other thing to check before you put this back together is make sure that this slide back and forth, in and out pretty easily. Put this on. The bolts that hold the bracket, you also want to tighten to 65 foot pounds. Basically, you could see my old pads are still in pretty good shape. This is a wear indicator that's grooved right here and it's still there, there is no life left in the pads. On the rear pods, you always want to put ... there is a tab here and you always want to put that towards the back side as far as the rotation go. Push that pads in. This is your ... your piston's already been reset. Put the brake down real nice and easy and just tighten these two bolts in.
Now, these two bolts, you only want to do between 15 and 18 foot pounds. I'm going put my center nut on there, and I'm just going to tighten it up preliminarily. Let's just speed up here as I use an extension and then tighten that top one up. Speed through here as we straighten that out, remove that lug nut, put the wheel entire back on, and then we'll just preliminarily tighten those lug nuts with our impact wrench and torque them when we get them on the ground. We'll tighten the lug nuts between 90 and a 100 foot pound. Now, you want to torque this center nut to a 173 foot pounds, and last but not least, line up the valves in with the wheel cover, put it on, and use your 19 millimeter socket just to tighten the caps by hand. Any time you take your brakes part, make sure you pump them a lot of times, and then do test stops from 5 and 10 miles an hour before you road test the vehicle.
We hope this helps you out, brought to you by www.1AAuto.com, your source for quality replacement parts and the best service on the internet. Please feel free to call us toll-free, 888-844-3393. We're the company that's here for you on the internet and in person.
Shop Products


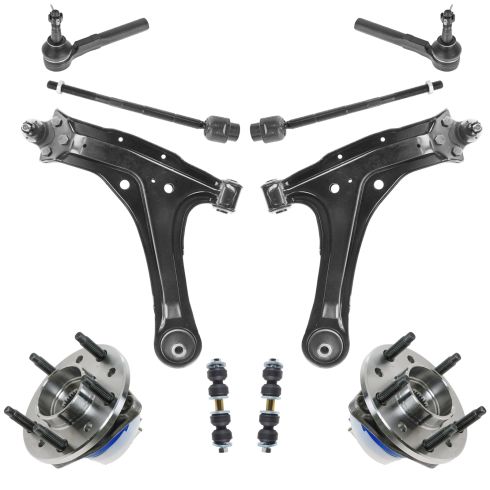
Chevrolet Pontiac Olds Front 10 Piece Steering, Suspension, & Drivetrain Kit TRQ PSA63530
Part Details:
- (2) Front Sway Bar Links
- (2) Front Lower Control Arms with Ball Joints
- Ball Bearing
- 10 Piece
- (2) Front Wheel Bearing & Hub Assemblies
- (2) Front Outer Tie Rods
- (2) Front Inner Tie Rods
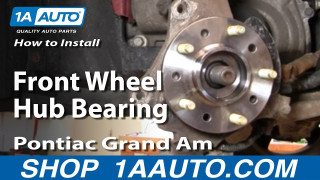
How to Replace Wheel Bearing Hub Assembly 1999-2005 Pontiac Grand Am
Watch this video to learn how to replace the wheel bearing & hub assembly in this 99-05 Pontiac Grand Am.
