
How to Replace Wheel Bearing Hub 2010-16 Cadillac SRX
Created on: 2019-01-27
How to repair, install, fix, change or replace a worn out, vibrating or groaning front wheel bearing hubon 10, 11, 12, 13, 14, 15, 16 Cadillac SRX
-
step 1 :Removing the Wheel
- Loosen the lug nuts with the vehicle on the ground with a 22 mm or 7/8 in socket
- Raise the vehicle with a floor jack
- Secure the vehicle on jack stands
- Remove the lug nuts
- Pull off the wheel
-
step 2 :Removing the Brake Caliper and Bracket
- Remove the two 18 mm bolts from the brake caliper bracket
- Slide the brake caliper and brake caliper bracket off the rotor
- Hang the brake caliper from the coil spring with a bungee cord
-
step 3 :Removing the Brake Rotor
- Remove the T30 screw from the center of the brake rotor
- Pull the rotor off
- If the rotor will not come off, thread the lug nuts and strike the hub area of the rotor with the ball end of a ball peen hammer
-
step 4 :Removing the Wheel Hub
- Spray rust penetrant on any rusty bolts on the wheel hub
- Set a pry bar between the wheel hub splines to secure it
- Remove the 1 and 1/4 in axle nut from the wheel hub, using air tools if necessary
- If the axle is still, tap a center punch into the center with a hammer to loosen it
- Remove the 10 mm bolt from the speed sensor
- Loosen the 18 mm bolts from the wheel hub
- Gently tap the rear of the hub with a hammer to loosen it
- Remove the hub
-
step 5 :Installing the Wheel Hub
- Clean the backing shield
- Clean the mating surface with a wire brush
- Coat the spacer with brake grease
- Put the backing plate into place
- Put the wheel hub on and tighten the 18 mm bolts by hand
- Tighten the 18 mm bolts with a socket and ratchet
- Torque the 18 mm bolts to 125 foot-pounds
- Tighten the 10 mm bolt to the speed sensor
- Insert the axle nut into place and tighten it with a 1 and 1/4 in socket and ratchet and pry bar
- Torque the axle nut to 184 foot-pounds
-
step 6 :Installing the Brake Rotor
- Remove any rust from the backside of the rotor with a wire brush
- Insert the rotor into place
- Tighten the T30 Torx bolt to the rotor
-
step 7 :Installing the Brake Caliper and Bracket
- Remove the brake caliper and bracket from the bungee cord
- Place the brake caliper and bracket on the rotor
- Tighten the 18 mm bolts to the brake caliper bracket
- Torque the 18 mm bolts to 148 foot-pounds
-
step 8 :Reinstalling the Wheel
- Slide the wheel into place
- Start the 22 mm lug nuts by hand
- Tighten the lug nuts preliminarily
- Lower the vehicle to the ground
- Tighten the lug nuts to 140 foot-pounds in a crossing or star pattern
Tools needed
-
Socket Extensions
Torque Wrench
Hammer
Rust Penetrant
Jack Stands
18mm Socket
Brake Parts Cleaner
T30 Driver
7/8 Inch Socket
1-1/4 Inch Socket
Bungee Cord
Anti-Seize Grease
10mm Socket
Ratchet
Wire Brush
Floor Jack
Cloth Rags
1/2 Inch Breaker Bar
1/2 Inch Impact Gun
22mm Socket
Hi, I'm Mike from 1A Auto. We've been selling auto parts for over 30 years.
What's up, guys? I'm Andy from 1A Auto. In this video I'm going to be replacing this hub bearing on this 2013 Cadillac SRX. If you need this part or other parts for your vehicle, click the link in the description and head over to 1aauto.com.
We're going to remove this wheel. We'll take a 7/8 socket and a breaker bar. I'm going to crack these lug nuts free. You can also use a 22 millimeter. Now I'm going to raise and support the vehicle. We're using a two post lift. If you're doing this at your house, you can use jack and jack stands. I'll take the lug nuts off. I like to use the socket because it's easier. I can just grab on the lug nuts. Now I'm going to take the wheel off.
Next we're going to remove this brake caliper. I'm going to leave the caliper on the bracket because to do the hub, we're just going to take this off. I'm going to use a 18 millimeter socket. Take these two bolts out and a breaker bar. These are on pretty tight. Loosen these up. Take a 18 millimeter socket and a ratchet. Once those are broken free, I'm going to take these bolts out. Right now I'm going to take those bolts out. Oops. This bottom one is still pretty tight. Just going to support the caliper while I take this last bolt out. Then you're going to grab the caliper and bracket and slide it back. Just going to twist it side to side. That'll just compress the piston just a little bit so it's easier to pull it off. And when I pull this off, I'm going to use this brake caliper hanger. Slide this through here.
Then I'm going to hang this from the coil spring on top. We actually sell these hangers from 1aauto.com. So position that like that. That way, there's no tension on the brake hose. So it's not going to break. Next thing I'm going to take this screw out. It's a T-30. I'm just going to use that T-30 socket and a ratchet. Take this one out. Take that screw out. And then we want to grab the rotor. If the rotor doesn't come off, we can take a hammer and just hammer in this areas right here. And it just popped off.
Sometimes it's harder to get it off, but just keep hammering. And it's just a rust ridge which causes that to stay on there. Before I go any further, I want to spray some rust penetrant on the backsides of these bolts. There's bolts that go through the knuckle right here, so we want to spray those down because they're pretty rusty. We'll just use some rust penetrant on there, on those three. Just going to spray a little rust penetrant on this axle nut. Make it easier to come off. Then we want to loosen up this axle nut and take it off. I'm going to use a 1-1/4 socket and a breaker bar. I also need a pry bar to prevent the hub from spinning. So I'm going to set this pry bar like this. Now we lowered the vehicle so that the pry bar can be up against the ground. Set up like this.
Put the socket on there and loosen it up. So if the nut doesn't come off, you may need to use an air tool. So I'm just going to use a 1/2" air gun and loosen this up. Once that's loose with that, then you can use a breaker bar. And it's loose. All right, so once that's broken free, we can use a ratchet, take the nut the rest of the way off. All right, next we want to make sure this axle is loose from the hub. We'll just take a center punch and a hammer, and just give it a tap. And just make sure you see the axle move. We don't have to go any further than that. Just wanted to make sure it's loose. When we go to pull the hub off, we're just going to make sure that separates from the hub. Before we take the back hub bolts out, we're going to remove this wheel speed sensor so we don't break it. We're going to use a 10 millimeter socket and a ratchet.
Take this bolt out. You can grab the sensor and just slide it out and set it aside. Next we're going to remove these three bolts that holds the hub to the knuckle. They're an 18 millimeter socket we're going to use and a breaker bar. Loosen them up. Once they're all broken free with the breaker bar, then you can switch to a socket and a ratchet.
Take that bolt out. GM recommends that you replace these bolts. They do have a threadlocker on them. We're going to reuse them. We can put some more threadlocker on when we replace the hub. Now this bolt, it's just going to sit in there. Just keep in mind when we go to put the hub back on the new one, make sure the bolt is sitting in the right position. Because the way the axle is, the bolt won't come out. And now we're going to take this last bolt out. Loosen it up with the breaker bar. Once it's loose, switch to the ratchet. And pull that bolt out. So if there wasn't any corrosion on this vehicle, this hub should come right off. Generally you have to tap it a little bit with the hammer. We'll just take a hammer, just tap it from the side right here.
You can see over here if you move the backing shield, the backing plate. Then there is some a little bit of an air gap in there. So it is moving, so we just have to keep doing that. We can add a little more rust penetrant and that'll help a little bit. Just let that soak for a little bit and then we'll hammer it some more. You just want to tap on that axle a little bit. Just not too hard because I don't want to mushroom the end of it, otherwise the nut won't go on. And it's pretty loose.
And just slide it straight out, just like that. Here's our old hub. Here's our new hub from 1aauto.com. As you can see, the machine surfaces are the same. The bolt holes are in the same positions. The wheel on the back of the hub is the same for the ABS. Flip it over. It's got the same amount of studs. Everything's machined correct. It's the same height. Get yours at 1aauto.com and you'd be ready to rock and roll.
Before we install the hub, I'm just going to take the backing shield--just wipe this off. There's not too much corrosion on this, so that's not too bad. Just check the back side. It looks good. There is a shim right here, so we're going to reinstall that when we go to put it together. But before I do that, I'm just going to take a wire brush and just clean this area so the new hub goes on a little easier.
So if you're going to replace these bolts, you can pull this bolt out this time and we're just going to clean ours up. And we're just going to put a little bit of threadlocker on there. We'll reuse it. Just put a little bit on the threads, and then I'm going to position this bolt back here before we install the new hub bearing. Just to leave it like that. We want to install this spacer. Because this is just floating there, I'm going to use a little bit of grease. Just put some grease on here and then it will stick to the axle.
Put a bunch of grease on there, then it'll stick right there in the proper position and it'll be easier to install the hub. Take a little wire brush and clean up the axle a little bit. There's a little bit of rust on there. Before I install it, we'll just take this backing plate and slide this in position. And take the hub bearing and slide this on. And it's good. Let's take that bolt on top and get that started. And wiggle it around a little bit. Take these other bolts and put some more threadlocker on these. Let me get these started. Once all those bolts are in, we can start to tighten them down with a socket and a ratchet. Might be easier to use a little extension when you're tightening the bolts with a ratchet. I'm going to use a torque wrench and I'm going to torque these bolts to 125 foot-pounds. So we can install the speed sensor next. Just line that up in the hole. Take the bolt. Get that started. Snug that up.
Next we can install this nut. Get that started by hand. Take the 1-1/4" socket and a ratchet. Start to tighten it down. Put that pry bar in place. All right, once it stops, then we're going to torque it with a torque wrench. Using the same axle nut and the pry bar, I'm going to torque this to 184 foot-pounds.
All right. Now we're going to install the rotor. You want to check the back side of the rotor if there's some rust on there. We don't want to sand down that rust. And just take a wire brush, just get some of this rust off. Okay. Then we're going to line this up. You know, line up the hole with the threads. On this hub is one screw hole, so we want to line that up. And then we'll take the screw and get that started. We'll take the T-30 socket. I'm just to going put this in. You don't want this too tight, just snug. Then take the ratchet. Just slight, very slight. Now we're going to remove the brake caliper and bracket from the hanger. Make sure the brake pads are spread apart. Slide the brake caliper over the rotor. All right, I'm just going to take these bolts and put a little bit of threadlocker on them.
Get this bottom one started. Get the top one started. I'll take a 18 millimeter socket, extension and a ratchet and start to tighten these bolts up. I'm going to use a torque wrench and tighten these two bolts to 148 foot-pounds. Then we're going to reinstall the tire. Take the lug nuts. Get those on. All right, at this point, I'm going to lower the vehicle so that the wheel is just touching the ground. And then I'm going to tighten up the lug nuts with a torque wrench. We're going to tighten these to 140 foot-pounds in a star pattern or a cross pattern. The reason why you do it in a cross pattern is so you tighten up the wheel evenly. We'll go around again just to double check.
Thanks for watching. Visit us at 1aauto.com for quality auto parts, fast and free shipping, and the best customer service in the industry.
Shop Products
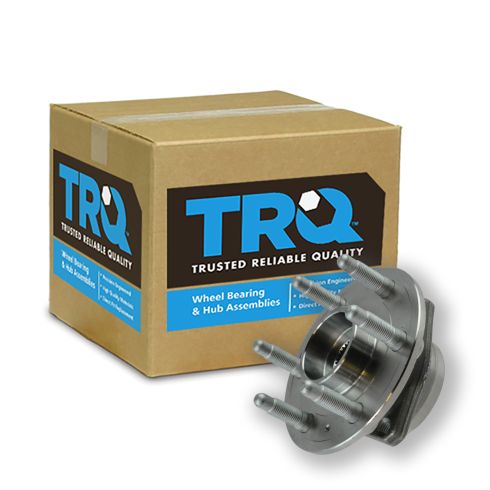
Cadillac SRX Saab 9-4X Wheel Bearing & Hub Assembly TRQ BHA54129
Part Details:
- 6
- 2.65 in
- 67 mm
- 2.63 in
- 67 mm
- M14
- No
- Yes
- 30
- Triangle
- No
- 120 mm
- 4.72 in
- 3
- 6.18 in
- 157 mm
- Ball
- Gen 3
- 4.57 in
- No
- 116 mm

How to Replace Wheel Bearing Hub Assembly 2005-11 Toyota Camry
Check out this video to learn how to replace the wheel hub on your 05-11 Toyota Camry. You can do it yourself, and 1A Auto shows you how!
