How to Replace Wheel Bearing Hub 1991-2002 Ford Escort
Created on: 2013-06-06
How to repair, install, fix, change or replace a worn out, vibrating or groaning rear wheel bearing hubon 1998-03 Ford Escort ZX2
-
step 1 :Removing the Wheel
- Loosen the lug nuts with the vehicle on the ground
- Raise the vehicle with a floor jack
- Secure the vehicle on jack stands
- Remove the lug nuts
- Pull off the wheel
-
step 2 :Removing the Brake Drum
- Remove the two Phillips head screws from the brake drum with an impact screwdriver and a hammer
- Apply rust penetrant to the wheel studs
- Strike the drum with a hammer to loosen it
- Tighten an M12 bolt into the drum to pull it off
- Strike the drum with a hammer to loosen it
- Pull off the drum
-
step 3 :Removing the Hub
- Remove the hub nut cap with a hammer and flat blade screwdriver
- Remove the 32mm hub nut
- Pull off the hub
-
step 4 :Installing the Hub
- Put the new hub into place
- Start the hub nut by hand
- Tighten the hub nut to 152 foot-pounds of torque
-
step 5 :Installing the Brake Drum
- Slide on the brake drum
- Tap the drum into place with a hammer
- Insert the two Phillips screws into the brake drum
- Tap on the hub nut cap with a hammer
-
step 6 :Reattaching the Wheel
- Slide the wheel into place
- Start the lug nuts by hand
- Tighten the lug nuts preliminarily
- Lower the vehicle to the ground
- Tighten the lug nuts to 100 foot-pounds in a crossing or star pattern
Tools needed
-
32mm Socket
Flat Blade Screwdriver
Torque Wrench
Phillips Head Screwdriver
Rust Penetrant
Jack Stands
Center Punch
Chisel
Ratchet
Floor Jack
1/2 Inch Breaker Bar
22mm Socket
Brought to you by 1AAuto.com, your source for quality replacement parts and the best service on the Internet.
Hi, I'm Mike from 1A Auto. I hope this how-to video helps you out, and next time you need parts for your vehicle, think of 1AAuto.com. Thanks.
In this video, we're going to show you to replace a rear hub. We show you the passenger's side; the driver side is the same procedure. Really the hardest part of this is removing the drum from the brakes. You'll needed jack and jack stands, your lug wrench or 22mm socket with a breaker bar, impact screwdriver, threaded bolt, hammer, 32mm socket and you'll need a breaker bar or ratchet and pipe for some leverage, a torque wrench and a punch or cold chisel.
Start up by removing the rear wheel. If you don't have the benefit of impact tools, you want to loosen the lug nuts for the vehicle on the ground then raise and secure the vehicle, and remove your lug nuts wheel and tire. When that's off, then pull off the wheel and tire.
Using an impact driver, take off the two Philips head screws that are holding the drum on. That impact driver is a pretty important tool. Basically what it does is you put it into the screw head, turn it counter clockwise and hit it with the hammer and it both drives the screwdriver bit in and it turns it a little bit counter clockwise to loosen it up. I'm going to use a threaded bolt here to push it in and help get the rotor of the drum. You'll need to acquire the correct size threaded bolt. I believe it's a M12 regular threaded bolt. Thread that in and then use a hammer to help you loosen it up and bring it the rest of the way out.
Using a screwdriver and a hammer, take the cap off here. It's pretty basic. Use a screwdriver and a hammer and you can see we actually shift to a smaller screwdriver to get it started and just keep prying out, and keep hitting different parts of the cap until you get it broken loose and coming out. I've got a 32mm socket and we use a ratchet and a pipe for extra leverage.
Here's the old part and the new parts from 1A Auto and it's identical. I'm going to torque the nut to 152 foot-pounds. There is a notch in the spindle here. I'm going to use a little bit of a wedge punch to roll over the nut into it and keep it from unscrewing itself.
I'm going to put the drum back on. I want to make sure I align the two holes to the hub here. I'm reinstalling the two Philips head screws in the drum. Put my cap back on and I'll fast forward here as we put the wheel and tire back on and put the lug nuts on and tighten them preliminary and torque the wheel in a star pattern to 100 foot-pounds.
We hope this video helps you out. Brought to you by www.1AAuto.com, your source for quality replacement parts and the best service on the Internet. Please feel free to call us toll-free, 888-844-3393. We're the company that's here for you on the Internet and in person.
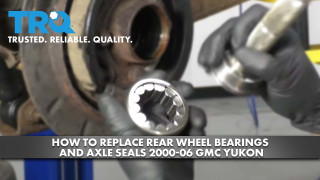
How to Replace Rear Wheel Bearings and Axle Seals 2000-06 GMC Yukon
Learn how to install a new TRQ axle seal and bearing in your 2000-06 GMC Yukon by watching this video.
