How to Replace Wheel Bearing Hub Assembly 1997-2002 Mercury Grand Marquis
Created on: 2012-05-21
Check out this video on how to remove and replace the front hub bearing assembly on your 97-02 Mercury Grand Marquis.
-
step 1 :Remove the wheel
- Pry off the center cap
- Use the hub cap key to remove the hub cap.
- Loosen the lug nuts.
- Raise and secure the vehicle
- Remove the lug nuts and the wheel.
- For extra security, put the wheel under your car should your jack stands fail.
-
step 2 :disassemble the brakes
- Remove the 13 mm caliper bolts.
- Use a screwdriver to pry between the caliper and caliper bracket to pry the caliper up and off.
- Secure the caliper with wire ties up out of the way.
- Using an 18 mm socket and a breaker bar or pipe for leverage, remove the caliper bracket bolts.
- Remove the brake disc.
-
step 3 :Un-install the hub
- Remove the dust cover from the hub nut.
- Using a breaker bar, maybe even a pipe for leverage in addition, remove the 35 mm hub nut.
- Remove the hub.
-
step 4 :Install the new hub
- Clean up the area to insure a smooth fit.
- Put the hub on, and replace the hub nut and torque it to 220 ft lbs.
-
step 5 :Reassemble the brakes
- Put the brake rotor/disc back on the hub.
- Examine the brake rotor/disc for gouges or signs of excessive wear.
- Replace the rotor if needed, remember to clean the rotor with warm soapy water or brake cleaner before installation, and prevent contact with oil and grease.
- Check the condition of the brake pistons; make sure they slide in and out smoothly and freely.
- Mount the caliper brackets and torque the 18 mm bolts to 90 ft lbs.
- Check the condition of your brake pads and install new ones if needed.
- Slide the brake pads into the brackets.
- Compress the caliper and slide it onto the bracket and pads.
- Bolt the caliper in, and torque the 13 mm bolts to 15-16 ft lbs.
-
step 6 :Replace the wheel
- Reinstall the small center cap and hub cap keeper.
- Replace the lug nuts and lower the car, torque them in a star pattern to 100 ft lbs.
- Put the hub cap back on and replace the safety nut and the final center cap back in place.
- Place your hub cap key in back in your glove box for safekeeping.
- Make sure you pump your brakes a few times before road testing to recompress the calipers.
Tools needed
-
35mm Socket
13mm Socket
A Piece of Pipe (for leverage)
Socket Extensions
Torque Wrench
Rust Penetrant
Jack Stands
18mm Socket
21mm Socket
Flat Blade Screwdriver
Anti-Seize Grease
Chisel
Wire Ties
Ratchet
Wire Brush
Floor Jack
1/2 Inch Breaker Bar
Brought to you by 1AAuto.com, your source for quality replacement parts and the best service on the internet. HI, I'm Mike from 1A Auto. I hope this how-to video helps you out. Next time you need parts for your vehicle, think of 1AAuto.com. Thanks.
In this video we're going to show you how to remove and replace a front hub bearing on this 2000 Mercury Grand Marquis. We do the passenger side. Obviously, the driver's side is the same as well. This procedure is generally the same for any '98 to 2011 Grand Marquis as well as the Ford Crown Victoria. Tools you'll need are a new hub from 1A Auto, jack and jack stands, 13, 18, 21 millimeter sockets with a ratchet and extension. You will need a breaker bar or a pipe for some extra leverage or impact tools as I use in the video, large screwdriver, wire brush, torque wrench and a 35 millimeter socket. That's not one that's usually found in many sets, so you'll need to go out and get that specially.
Start out by removing the wheel cover. You pry off the center cap. There should be a key somewhere in your car, in the glove compartment, and remove the center nut and then pry the wheel cover off. If you don't have air tools, you'll want to loosen the lug nuts with the wheel on the ground, then raise and support the vehicle and remove them. I'm going to fast forward here as I just remove those lug nuts, set aside that bracket that holds the hub cap and take the wheel and tire off. What you're going to do is remove this bolt and this bolt first. These bolts are 13 millimeters and they should come apart fairly easily. I'm just going to speed up as I remove the lower bolts and then I remove the upper bolts. Take those bolts off, take a screwdriver, put it right under here, pry between your caliper and the caliper bracket and bring the caliper up and off. Actually kind of put it right up in here just for the time being.
Now you want to remove two larger bolts, one here and one down here. These bolts are 18 millimeter and you're either going to want to use your breaker bar or, if all you have is a ratchet, put your ratchet on here and a piece of pipe. You put the pipe on the ratchet and then pull nice and easy until the bolt starts breaking loose. I'll fast forward again as I loosen up that bolt as well as loosen up the top bolt and then remove them both. Once that bracket is off, the rotor comes right off. You want to remove this cap. Just use a chisel or a screwdriver would work too. Now there's a 35 millimeter nut that holds the hub on. I have the benefit of air tools. If you don't have air tools, you'll need your 35 millimeter socket with your ratchet and a pipe for leverage. Probably even if you have a breaker bar, you might still need the pipe as this is on tight. Obviously air tools are the best method. Now your hub comes right off.
New hub from 1A Auto comes with the ABS ring. If your car doesn't have ABS, obviously this can bolt right on without any problem. There's a little bit of dirt on the backside here. Make sure it's a nice clean contact between the back of the hub and the axle. It goes right on. We're going to put the nut back on. Then just going to put it on preliminarily with our impact wrench. Now you need to torque this to 220 foot pounds.
You have a rotor from 1A Auto and it goes right on. I like to just put a lug nut on just to kind of hold things in place. The other thing on this is you want to make sure that these slide in and out freely, because that's actually what your caliper slides on. So put this between the steering knuckle and the rotor. Take your bolt, push it in from the outside, and kind of push it towards the bracket and start turning it clockwise to get it to go in. Get one started, put the other one in and get that started. I'm just going to speed up here as I use socket and ratchet to preliminarily tighten those bolts.
Now tighten and torque these bolts to 90 foot pounds. New pads from 1A Auto. The little kind of notches go up actually, put it in, push it into place. Take a caliper; you might have to push the slides in a little bit. Put the caliper down, push that in, squeeze this one in and down into place. These bolts that hold the calipers in place go in. Again just kind of push it in and start turning. Push it in and start turning. Speed up the film here again as again I just preliminarily tighten those bolts.
Here I use a torque wrench and you want to make sure that these are tightened to anywhere between about 15 and 16 foot pounds. So I can pull that lug nut back off and I put my wheel and tire back on. Then you want to start two of the lug nuts that oppose each other, tighten them up. Put the hub cap, the small center cap back on, then put the keeper for your hub cap back on and those three bolts. Tighten everything up preliminarily, then put the car on the ground, tighten the lug nuts to 100 foots pounds kind of using a alternating star pattern.
Then put your hub cap back on, put the safety net back in the center, tighten it up, make sure that the hub caps all seat all the way around, and then put the small center cap back on. Obviously put your key back into the glove compartment so you can find it next time. Before you road test whenever you've had the brakes apart, just pump the pedal a bunch of times, make sure you have good brake pressure on the pedal, and then do test stops from 5 and 10 miles an hour before you go out and road test the car.
We hope this helps you out. Brought to you by www.1AAuto.com, your source for quality replacements parts and the best service on the internet. Please feel free to call us toll free, 888-844-3393. We're the company that's here for you on the internet and in person.
Shop Products


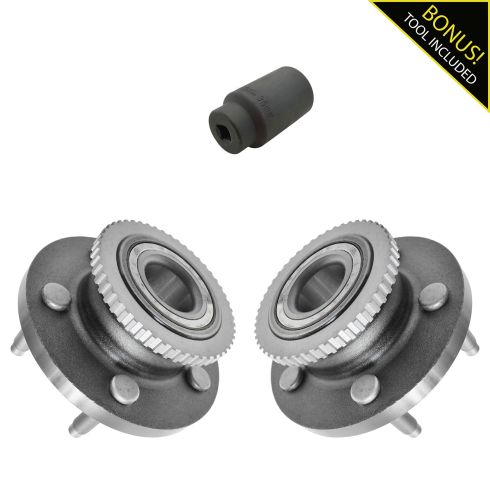
Ford Lincoln Mercury Front Driver & Passenger Side 3 Piece Wheel Bearing & Axle Socket Kit TRQ BHA84998
- (1) 36mm Axle Nut Socket
- (2) Front Wheel Bearing & Hub Assemblies
- Ball
- 3 Piece

How to Replace Front Wheel Hub Bearing 2005-10 Pontiac G6 Saturn Aura
Watch this video to find out how to replace the wheel bearing on your Pontiac G6. 1A Auto will guide you step by step.

