
How To Replace Water Pump 1997-2004 5-4L V8 Ford F150 F250
Created on: 2011-11-28
Find out how to replace a broken, bad, or leaking water pump from the help of the 1A mechanics with this how-to video
-
step 1 :Drain the Radiator
- Put a catch pan under the radiator
- Use a wrench to open the valve and drain the radiator
- Replace the cap
- Put the catch pan under the middle front of the engine
-
step 2 :Remove the Serpentine Belt
- Insert the ratchet into the tensioner
- Push clockwise on the tensioner and remove the belt from the alternator
- Slowly release back on the tensioner
- Remove the belt from the water pump pulley and set it aside
-
step 3 :Remove the Cooling Fan
- Place a belt wrench on the cooling fan pulley
- Use an adjustable wrench on the large bolt holding the fan
- Remove the fan
-
step 4 :Removing the Water Pump
- Place the belt wrench on the water pump pulley
- Remove the four 10mm bolts securing the pulley
- Use a flat blade screwdriver to pry from the back of the water pump pulley. Turn it and continue to pry till it comes off
- Remove the four 10mm bolts securing the water pump
- Use a hammer to hit the side of the water pump shaft. When it starts to separate use a flat blade screwdriver to help get the pump free
- Use a sponge and wire brush to clean up the area
-
step 5 :Installing the New Water Pump
- Put penetrating oil on the water pump
- Line it up and push it into place
- Replace the four 10mm bolts. Hand tighten each of them and work your way around. Tighten incrementally. Then tighten them to 19ft/lbs
- Replace the pulley and replace the four 10mm bolts. Tighten to 20ft/lbs
- Turn the cooling fan back in to place and replace the bolt
- Replace the belt around the crankshaft
- Loosen the tensioner
- Put the belt over the alternator
- Tighten the tensioner
- Make sure the belt is properly in place
-
step 6 :Refilling the Antifreeze
- Fill the truck back up with antifreeze
- Start the vehicle to circulate the antifreeze
- Fill the antifreeze back to the line
- Drive the vehicle
- Let it cool then fill to the line again
Tools needed
-
Adjustable Wrench
Sponge
Hammer
Socket Extensions
Flat Blade Screwdriver
Belt Wrench
Drain Pan
10mm Socket
Ratchet
Wire Brush
1/2 Inch Breaker Bar
Brought to you by 1AAuto.com, your source for quality replacement parts and the best service on the internet.
Hi, I'm Mike Green. I'm one of the owners of 1A Auto. I want to help you save time and money repairing and maintaining your vehicle. I'm going to use my 20 plus years of experience restoring and repairing cars and trucks like this to show you the correct way to install parts from 1A Auto.com. The right parts installed correctly that's going to save you time and money. Thank you and enjoy the video.
In this video we're going to show you water pump replacement on this 2003 F250. This truck has the 5.4 liter gas V8. This procedure is the same for a lot of Ford trucks and SUVs as well as vans with the 4.6 liter and the 5.4 liter V8 engines. The tools you'll need for this job are a large adjustable wrench, a catch pan, half- inch drive breaker bar or a ratchet with a pipe for leverage that's to get the serpentine belt off, a belt wrench, a 10-mm socket with a ratchet and extension, a hammer, a large flat wedge screwdriver, small wire brush, rags, or a sponge or paper towels, and two or three gallons of fresh antifreeze or coolant, and also as anybody knows on these trucks if you have a stool you'll need it to stand on to reach over that big grill.
Okay, looking at the engine compartment right here the fan is attached to a pulley that is attached to your water pump. So indicators that your water pump is your problem is when your vehicle is running you will smell the kind of a sweet smell of the coolant. You'll also probably see some steam coming from this area of the engine and then underneath you may see some water. Actually my truck's already leaked it all out so there's no water underneath here but you may see some water or green coolant on the ground underneath your truck and then as you look up at the bottom of the engine okay, you can see that the front bottom of my engine is damp. It is has coolant on it. I'll zoom in here a little bit to see the coolant right there dripping off the front of the engine. That means that the coolant is leaking out of the water pump.
Okay, so what we're actually going to do is right under here this is my radiator and this is my drain. I'm going to use a wrench, put a catch pan underneath, open this up, and drain. You don't have to drain all the coolant out but you want to drain some of the coolant out of the radiator to bring the level down some. Okay, so now that is tightened up that drain and I just position my pan underneath the middle of the front of the engine. Okay, now you're going to remove your serpentine belt. I'm taking a half-inch drive ratchet, inserting it into my tensioner and I put the pipe on that helps me get leverage. Push clockwise on the tensioner and then you can slide the belt right off of the alternator and then slowly release back on the tensioner and you take your ratchet and pipe off and you can take your belt and then just kind of remove it from that side and just pull it over here.
Okay, with the belt out of way it's very easy to see right there is your weep hole so you look for coolant coming up and out of there. And even in this shot it appears to be dry. That's only because my truck was so low on coolant because the coolant leaked out of the water pump so quickly. You can see how it stained, the rust-colored stain. That water pump is aluminum so that rust-colored stain basically indicates some coolant came up out of the cast iron block and deposited some rust so we can be 100% sure now that the water pump is the problem.
I need to remove my cooling fan. I've got a belt wrench and you want to put the belt down around the pulley. Now you can see here I've got my belt wrench on. I'm using it. I'm actually pressing it against the alternator to hold it in place. I'm going to put my large adjustable wrench down in there and a large and remove a large bolt that holds the fan. Once you have that loosened up then you basically can just kind of spin the fan right off. I'm just going to want to let the fan rest right in there.
Now using a 10-mm socket with a ratchet remove the two bolts that hold the pulley and we're just going to fast forward this so you're doing the same thing. Use that belt wrench around the water pump pulley, hold it in place, and then the 10mm socket and ratchet. Remove those four bolts that hold the pulley in place. Okay, here you can see I just disconnected that up radiator hose to give you a better view. You don't have to do that but use a flat blade screwdriver and just pry against the water pump, keep turning the pulley a few degrees, and keep prying until it comes off. Now your water pump's held on by four 10mm bolts. You can see one and two, there's the third one here, and one underneath over here that you can't really see. I got that one underneath first.
I'm going to fast forward as I remove the four bolts that hold the water pump in place. These four bolts come out fairly easily once you get them started with a wrench. After a couple turns they basically come right out with your fingers. Okay, now what you want to do is take a good-sized hammer and basically hit the side of the water pump shaft and you can see it's starting to move back and forth. Once you get it and actually if you look just below the radiator hose you'll see a little crack opening up. Once you get it to move quite a bit then use a screwdriver, force it into the crack, and then hit the opposite side.
Okay, and then I'll move back and forth between hitting one side and the screwdriver until the pump comes out. Okay, so I'm moving it back and forth, changing position of the screwdriver. You can see the pump comes out and some more antifreeze will drain out of your engine. Take a nice absorbent sponge and try and just kind of sop of some of the coolant down here and take a wire brush and just carefully clean it up a little bit. Just take your sponge and just kind of wipe out and make sure you don't leave anything in there. New pump. Got my O-ring installed. I put some penetrating oil on it so it'll slide in nicely and I'm going to have my weep hole up and that's pretty much well in place. All right. The bolt's in. Okay, I'm going to fast forward here. This is kind of a long process this part of it. You want to put each bolt in by hand first and you want to basically push in firmly on the pump and get all the bolts kind of hand tight. You need to make sure that you force your pump in nice and straight so basically get all the bolts in by hand first, then tighten one of them a few turns. Go to the opposite one, tighten that a few turns, one of the other ones, tighten a few turns, opposite one a few turns until you have all of the bolts basically snug. Now we're going to tighten these bolts to 19 foot pounds. I'm going to start with the top one and then go to the bottom one. Okay, I'm going to fast forward through quite a bit of the reassembly here.
Put that pulley back on, start all four bolts. When I put it on I actually put one bolt through, get that one started, get the pulley in place, then start the other three bolts, then you can put your belt wrench back on the opposite way. Again, put it against the alternator so it holds it in place and tighten up the bolts. You want to have them probably about 20-foot pounds. They don't have to be extremely tight, just on there snug. Don't over tighten them because you don't want to stretch them or break them.
Now re-install the cooling fan. You basically lift it up into place, push it onto the shaft, and just keep turning it slowly until you get it on there. Be careful not to cross-thread it. Get it into place. Then use your large adjustable wrench with the belt wrench and tighten it up. I'll take our belt and make sure it's still down around the crank shaft. Okay, take it down and around this pulley here. Okay, now it's all on there with the exception of the alternator. The ratchet put it in the tensioner, the pipe, the ratchet and pipe. Pull the tensioner over and put the belt over the alternator. And then release the ratchet and make sure your belts all on there.
We're going to refill the anti-freeze, got a filter in there. Your minimum cold fill line is right here. Depending on how much you drained your radiator it's probably going to take 2 -3 gallons. Make sure its properly mixed fluid. As you can see I filled it up and if you really watched close it is kind of draining down. I'm going to start the engine for just a minute and get that fluid circulating through the truck a little bit. Ok I'll get it back up to that minimum line. We'll drive it around a little bit. Let it cool down and check. And fill as needed.
So now you can see with the truck idling and up to temperature. No leaks underneath nice and dry. And you can see our fluid went down some we'll shut it off let it cool off, recheck that fluid and go from there.
We hope this helps you out. Brought to you by www.1AAuto.com, your source for quality replacement parts and the best service on the internet. Please feel free to call us toll-free, 888-844-3393. We're the company that's here you on the internet and in person.
Shop Products


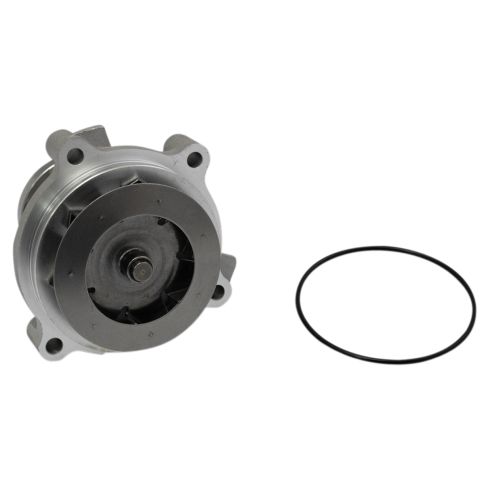
Ford Lincoln Mercury Engine Water Pump TRQ WPA07168
- 3.43 in
- 4
- 7
- Standard
- No
- 4
- 80 mm
- Aluminum
- No
- 2
- No
- No
- No
- Cold Rolled Steel

Top 5 Problems Ram Truck 1500 4th Generation 2009-17
Watch this video to learn the top problems facing the 2009-17 Ram 1500 truck.

