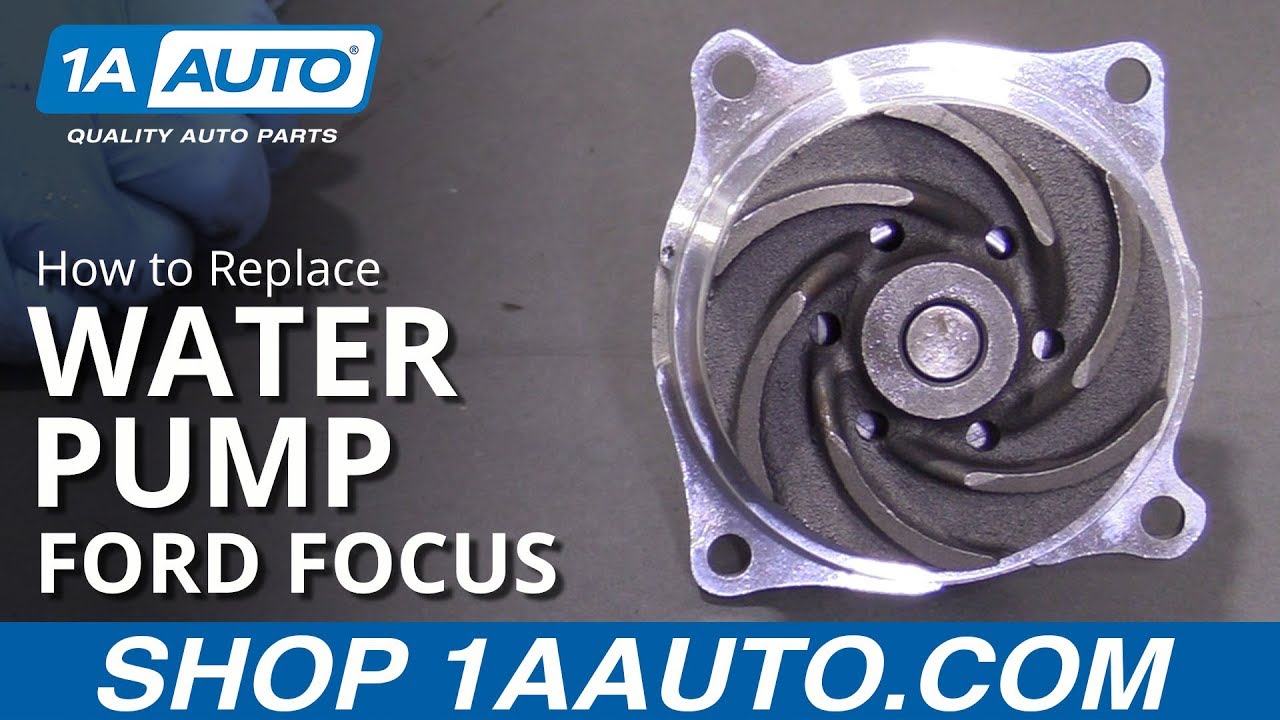
How to Replace Water Pump 2000-04 Ford Focus
Created on: 2019-08-20
Learn how to replace the water pump on your 00-04 Ford Focus, 1A Auto shows you how to do it yourself with step by step instructions in this video!
-
step 1 :Draining the Radiator
- Raise and support the vehicle if necessary
- Locate the radiator petcock at the lower driver side corner
- Twist counter clockwise to open the petcock
- Allow the coolant to drain into a drain pan
-
step 2 :Removing the Wheel
- Loosen the 19 mm lug nuts
- Raise and support the vehicle
- Remove the lug nuts
- Remove the wheel
- You may replace one lug nut and pry the wheel from behind if it is difficult to remove
-
step 3 :Removing the Water Pump
- Remove 10 mm coolant reservoir mounting bracket bolt
- Move the coolant reservoir aside
- Support the engine from below with a floor jack
- Remove the two 18 mm motor mount nuts
- Remove the three 15 mm motor mount bracket bolts
- Loosen the three 10 mm water pump pulley bolts
- Turn the serpentine belt tensioner counter clockwise using a 14 mm wrench to remove tension from the belt
- Remove the serpentine belt
- Remove the three water pump pulley bolts
- Remove the water pump pulley
- Remove the four 8 mm water pump bolts
- Remove the water pump, hammering lightly using a punch, if necessary
- Raise or lower the engine as necessary to remove the water pump and pulley
-
step 4 :Installing the Water Pump
- Install the new rubber seal on the water pump
- Check and clean the water pump housing
- Install the water pump into the housing
- Install the four 8 mm water pump bolts
- Torque the 8 mm water pump bolts to 12-15 ft-lb, in a crossing pattern
- Clean the water pump pulley if necessary
- Install the water pump pulley
- Install the three 10 mm water pump pulley bolts
- Install the serpentine belt
- Route the belt under the crank and power steering pulleys, over the AC condenser pulley, under the idler pulley, around the alternator and water pump pulleys, with the slack held near the tensioner pulley
- Turn the belt tensioner counter clockwise to fit the belt over the tensioner
- Release the tensioner
- Torque the 10 mm water pump pulley bolts to 18 ft-lb
- Position the motor mount
- Install the two 18 mm motor mount nuts
- Install the three 15 mm motor mount bracket bolts
- Torque the nuts and bolts to 80 Nm or 59 ft-lb
- Reposition the coolant reservoir
- Reinstall the 10 mm reservoir mounting bracket bolt
-
step 5 :Refilling the Coolant
- Use coolant specified by the manufacturer
- Fill the coolant through the reservoir
- Keep the level below the MAX line
- Run the vehicle until the coolant comes to operating temperature
- Top off the coolant as necessary once it cools
-
step 6 :Installing the Wheel
- Install the wheel onto the wheel studs
- Install the 19 mm lug nuts
- Tighten the lug nuts by hand in a crossing pattern
- Lower the vehicle with minimal weight on the wheel
- Torque the lug nuts to 94 ft-lb in a crossing pattern
Tools needed
-
Socket Extensions
Torque Wrench
Hammer
15mm Socket
Pry Bar
18mm Socket
19mm Socket
8mm Socket
10mm Socket
Drain Pan
Brass Punch
Ratchet
1/2 Inch Breaker Bar
Hey, everyone. Sue here from 1A Auto and today I have a 2001 Ford Focus in the shop with a 2.0 dual overhead cam. I'm going to show you how to do the water pump. So if you need this part or any other part for your car, click on the link below and head on over to 1aauto.com.
So the first thing I like to do before I do a water pump is drain the actual radiator. So good thing is, this radiator has a petcock on it. So I'm going to put my bucket right underneath it and catch my fluid. Then I'm going to lower the vehicle and support my engine and do the water mount and take the water pump out.
First thing I'm going to do is take a 10 millimeter socket and I take this mounting bolt out. This is the coolant reservoir tank. See actually the only way to fill this car up is through this reservoir tank. There is no cover on the radiator. It has one mount here with a bolt. And then set that aside, and you're going to have bracket over here. You're going to lift up, see the little piton and do the hoses and you're going to want to move this over this way. Let's undo the power steering line clip. There you go. Now that's where we're nice and out of the way. You can see everything in here. Next step is I'm going to remove this upper cover. Looks like an eight millimeter socket. Three bolts total holding it, one on the front. Let's see if I could feel one down there. Nope. One here, one back there and then one in the bottom. Last one down here. So like I said, two in the back and one in the front. You can see the ears of the plastic cover.
Get them on done and get them out of the way. Grab onto the cover and lift it up. Nope, I lied. There's four total, two in the front, two in the back. Okay. Now all the bolts of the cover are off. I'm going to get a jack with a rubber stopper on it or a piece of wood. You're going to roll it underneath, put it on the oil pan, support the engine, and then I can take off this timing mount modem out. It's on the timing belt side and take this mount out of the way and support the engine with the jack. Support that. Now I can get my socket and ratchet, and undo the bolts of the mount. Now with the engine supported with the floor jack, I've got an 18 millimeter socket. I'm going to release these two motor nuts that hold it onto the front of the timing cover area. Just going to use a half inch breaker bar.
Make sure you have a good support on the engine. If it's not jacked up tight, that would've just dropped a little bit. And a you don't want to cross thread or jam those nuts onto the studs. As you can see, the motor is starting to sink a little bit. It's just a slight, it's not tons of pressure. So I can still turn this by hand. Look at the whole stud came with it. That's going to happen. It's not uncommon. So now we have one stud left in there and so it's easy. Now that I have it disconnected from the engine. I'm going to take three bracket bolts out. So 15 millimeter socket. I'm using my half inch.
Make sure they all break free. Last one. It's hard to see it from down there, but it's a triangle style mounting. Now we should be able to lift it right up, lift it right out of there. Before I take the serp belt off, I have to take the water pump pulley off to get access to the bottom cover. So with the belt on I like to leave the tension on so I can put a 10 millimeter socket on the water pump bolt and then I'm going to take a long screwdriver or pry bar and I'm going to hold the other two bolts in place. There's a little trick if you don't have certain way of doing it tools. So I'm going to put pressure on it clockwise so I can loosen the bolt counterclockwise. I just need to loosen it.
Don't take it all the way out because this is a three bolt system, so I'm going to need that other bolt to pry against. This serp belt is so tight. Look like I can loosen the water pump pulley, but I showed you how to do the first one in case you have a belt that's spinning in place or any other time you need to pry something that has no way of holding it. I like to use a pry bar. You can use a long screwdriver. Let's see if they're loose enough to come off by hand.
Yeah. So now I'm going to take the tension off the belt and remove the drive belt. So now the Serp belt tensioner is below right below the alternator. You can get that to the fender well if you have access to go through that way. You're going to anyways, you need to go through that way. But I have plenty of room up here so I'm going to put a 14 millimeter box end on there and I'm going to push down to release the pressure of the belt like that. And now I can slide this serp belt right off. Bring the tension back up. And if need be we also have the engine is just on the jack so we can jack the engine up a little bit more if we needed to get our hands down there.
So we can set this aside. If we need to replace it, replace it. Always check your belt. Even if you think, "Oh I replaced that a year ago." You don't know the kind of road material that gets up in there and causes damage, cracks. Any oil leaks that you didn't have a year ago if that hit the belt, coolant, it will do damage to it. So always just examine it real quick. There's no need to do the job twice. When it's out, put a new one in. Take that out. I'm going to grab this water pump pulley and take it off. I've already loosened up the bolts so it's easy. Sometimes you have to take a screwdriver and just pry on that. Just enough to pop it off.Now with the car up in the air and the engine has dropped down. I can take the water pump pulley out with ease.
Now that we've had the coolant system draining and all the coolant is on that end, hopefully drained out. There should be a little bit of residual left inside the water pump housing, but eight millimeter socket for four bolts here and I'm going to start loosening them. Turn them counterclockwise. This four bolt and right below the power steering pump pulley, and there's going to be one way down below here, right about five o'clock. If you can't get it from the top here, you can always get it from down below. Lower the engine or raise the car up. I got it right there and I'm just going to use my hand. Pull those bolts out. We might have to tap this with a hammer just to loosen it. It's pretty thick aluminum housing. You just remove the rest of the bolts by hand. Okay now I'm going to just take a brass punch and just give it a tap. Now as you can see someone put black RTV all around it. Must be the same person that did the valve cover. Yeah, you don't have to do that, all that.
So we're going to have to lower the engine to get pass this stuff . So I raise the vehicle up and it's definitely easier to access the water pump from down here. I've got a catch basin right underneath it and then we go. Just four bolts, pull that puppy in. And there should be a rubber O-ring right in here. It's underneath all this black RTV. So we're going to clean up the housing now because someone put RTV oil in there. That's going to be a difficult situation. That's an aluminum housing, so you don't want to use a grinder. That's where the seal actually sits. So I'm going to just use a little bit of hand sandpaper, like a emory cloth. See if I can get in there and break this all up and get it out of there.
Here we have the water pump we just took out of our 2001 Ford Focus and here we have a water pump replacement from 1A Auto. And see they look identical in shape. Four mounting bolts. Three water pulley bolts. On the backside, the difference is, this is cast metal. Cast metal blades to push the water around. And this is composite plastic. That's the word I'm looking for. This actually wears down. As you can see, the fins have got a bit of an edge to them, so you're going to have to check your aluminum housing for this. And these are also known for breaking free on the shaft. There are lightweight, that's why they did it, but they also fail a lot. So the upgrade, this is the one from 1A Auto is cast metal. It's pressed on that shaft. It won't break down and it will stay strong and make sure your water flow and circulation is keeping your car going. So if you need this part or any other part for your car, click on the link below and head on over to 1aauto.com.
Now we're going to put the gasket on the new water pump. The gasket does come with it. It's a rubber seal. You do not want to put any RTV on this. That's a guaranteed failure. If you use a new water pump and you put the new seal on it and you put it in and it leaks after, you better check your housing. That's where the problem's going to lie. Always check your housing. Like I said, I just cleaned this. We made it nice and smooth. There's no gasket left in there. And always check the back housing where the actual propellers bride and make sure they're not grooved or eaten. Because if that shaft came loose and the bearing let go, you can wear out the actual seat to that housing and it should get replaced. Now we're going to put the water pump back up in there.
You're going to line the bolt holes up. Seat's nice and firm. You can add our four bolts. Start them by hand. Then we'll end up torquing this. Then we'll do it up in the air like this. It's easy to get everything in there, the torque wrench. Only thing you need for this is that rubber seal. You do not need a paper gasket or RTV. I'm just going to snug the bolts before I torque it. Don't really, rank on it. Don't tighten them too much because the torque on this is like 12 to 15 foot pounds. I'm going to double check that. So eight millimeter socket and I've got my torque wrench set to 15. It is 12 to 15 foot pounds. I'm going to the max and I'm going to go criss cross, so back and forth from one side to the other. I would say East, West, North, South. And then we're going to double check just like we always do with torquing.
Start in the same position and then go from there. Here we go. So here we have the water pump pulley that the serp belt's going to ride on and you can see all the road dirt stuck in there. That does cause unbalance, believe it or not, even though it's bolted, it can cause a wobble, which would cause premature wear on the bearing shaft to that water pump. So I'm just going to clean that out, get that mud stuff out of there. Let's put the water pump pulley on. Line up those three bolt holes, that's it. Little eight millimeter bolts thread wise. I do believe it's a 10 millimeter socket or wrench.
So now we're going to install the serp belts, reinstall it. On this particular car, it's going to go S around, around the water pump and the crank like this. It's going to go down on the tensioner, up on the alternator, vertically challenged like me. Up over the power steering pump. So I'm going to take it back off the water pump to get it to go run the AC unit and now I can get to slide it right on that water pump. So now I have my 14 millimeter on the tensioner. I can put my hand right here on the belt around the water pump and I'm going to give the belt some slack and slide it around the water pump pulley. Now we haven't torqued the water pump pulley bolts yet, that has to happen, but I'm using the belt to help me center it to give us some strength. Double check your belt, make sure it's in all the grooves and all the pulleys. It's not off the ridge. Looks good. Okay, let's tighten up the water pump bolts.
So the water pump pulley bolts is 24 newton meters or 18 foot pounds. So I'm going to take my 10 millimeter socket and my torque wrench, and I'm going to use a flat head pry bar or a screwdriver, whatever you have handy. And I'm going to use that to wedge it to hold these actual bolts if this pulley starts to spin, just like that. So you're just wedging it between two bolts. Let's see if we can get it right here. Like that. Now with that in that position, I can hold the pulley. So I've got one. Rotate it. Get it in position for the next one. Okay, one more.
There you go. All three water pump pulley bolts tightened to 24 newton meters. So now we've lowered the car back down and we still have a jack on the engine supporting it and we're going to put our timing belt area motor mount on with the bracket. Slide it right through there, bring it right over those two studs that go on the motor mount. Everything lines up pretty good. Here we go. Then we're going to put the two nuts on, on the engine side. It's a 18 millimeter socket and that is torqued to 80 newton meters. I'll give you the foot pounds in a second. So I'm just going to hand tighten these two nuts down here and then it's torque is 80 newton meters which comes out to 59 foot pounds. And it looks like I'm definitely going to be lined up with everything once I lower this, so I can feel confident enough to tighten these and not worry about having to loosen them back up.
Now I'm going to lower the jack with the engine on it to line up the bolts holes on the actual sub frame so I can start them. It's 15 millimeter socket. Get the other two in place. Might need a bigger extension. Mow I'm going to put the power steering reservoir back in place. There we go. There's three rubber bushings on here. You want to make sure they're lined up in the little slots that are cut out for them. Here we go. So there's one down below, one here and one in the back. And I'll just pop right down. Let's get the overflow tank repositioned. So you've got these plastic clips that hold the actual lines together. Get that clicked in. Now there is a plastic liner lineup tool on this side, right on the strut tower that's going to go there, and it lines up that ear for the one bolt left. It's a little sheet metal bolt or screw sorry. So I just put the bolt on an extension.
It is a 10 millimeter socket. There you go. Just going to snug it down. Don't worry about torquing anything like this. No, we can get our coolant. Fill up our overflow. I'm going to use a vacuum device to sucks all the hoses flat, gets all the air pockets out of the system. Then it forces the fluid back in. Tries to make sure there is 0.0 air in the system. Now I'm going to fill the coolant. This is the overflow tank. It is the only fill for this car, so you don't want to bring it right up to the top. You want to keep it right about this level. It's hard to tell with this, is the max line in the min because it's so old and stained. I'm right there. So I'm going to put my cover on.
Then I'm going to start her up. Start my car. Look at that. First try. So now with the car running, I know my ... Get my coolant temp right up there. Then I'm going to let it run on the lift. Get my fan going. If this is what you have, a fender skirt, go ahead and put it in. This car missing. So I'm going to put the tire back on so you can put your fender screw in, then your tire on while you're letting the coolant get to the temp. And we're going to torque the wheels to 94 foot pounds and that is the manufacturer specifications. It's a 19 millimeter socket. Double check. Now let's take this thing for a road test.
Thanks for watching. Visit 1aauto.com, your place for DIY auto repairs, for great parts, great service, and more content.
Shop Products
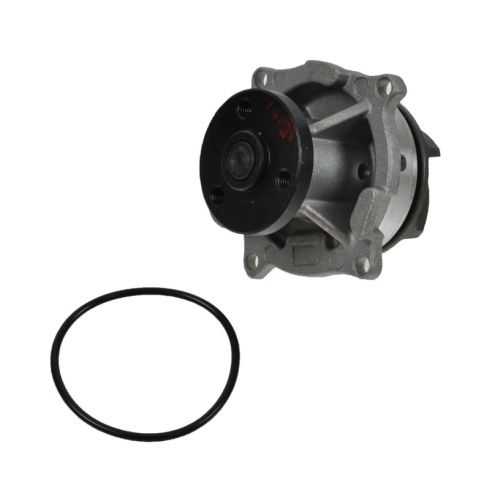
Ford Mercury Engine Water Pump TRQ WPA07338
Part Details:
- 6
- 4
- 1.57 in
- Standard
- 3
- No
- 80 mm
- Aluminum
- No
- 2
- No
- No
- Yes
- Aluminum

How to Replace Water Pump 2007-09 Toyota FJ
Check out this video to learn how to replace the water pump in your 07-09 Toyota FJ Cruiser. 1A Auto shows you how to do it yourself and save money!
