How to Replace Washer Bottle 2005-11 Honda Civic
Created on: 2017-11-22
How to repair, install, fix, change or replace a broken, damaged, split or leaking windshield washer bottle / reservoir on 09 Honda Civic.
-
step 1 :Removing the Front Bumper
- Pop out the clips from the splash shield beneath the bumper cover
- Remove the Phillips screw from the opening on the wheel well edge
- Pry up the push clips from the radiator shield
- Pull the lip of the radiator shield back from the grille
- Remove the pins from the side trim to slide the shield out
- Remove the shield
- Remove the T35 Torx from the grille
- Pry out the sides of the bumper cover
- Remove the bumper cover
-
step 2 :Removing the Washer Fluid Pump
- Have a drain pan ready
- Pull the pump out
- Let the fluid drain
- Disconnect the wiring harness
- Disconnect the fluid hose
-
step 3 :Removing the Washer Fluid Reservoir
- Remove the 10mm bolts from the reservoir
- Pull the lower part of the reservoir down and out from the car
- Pull the neck out of the car
-
step 4 :Installing the Washer Fluid Reservoir
- Insert the bottle up into place
- Tighten the 10mm bolts to the reservoir
-
step 5 :Installing the Washer Fluid Pump
- Press the pump into the washer fluid reservoir
- Connect the hose
- Connect the wiring harness
- Insert the neck and clip into place
- Refill the reservoir with fluid
-
step 6 :Installing the Front Bumper
- Lift the bumper cover up into place
- Snap the bumper cover into place
- Tighten the T35 Torx bolts to the grille
- Push on the radiator shield
- Press on the clips to the side trim
- Press on the clips to the shield
- Tighten the Phillips screw in the opening on the wheel well edge
- Pop on the clips from the splash shield beneath the bumper cover
Tools needed
-
Windshield Washer Fluid
Socket Extensions
Flat Blade Screwdriver
Phillips Head Screwdriver
Rust Penetrant
T35 Torx Socket
Jack Stands
Drain Pan
10mm Socket
Ratchet
Floor Jack
Trim Tool Set
Hi, I’m Mike from 1A Auto. We’ve been selling auto parts for over 30 years!
To remove the front bumper, you can do this on the ground. We just have it up in the air so you can see what we're doing. But you need to come under here and pop out all of these clips. These are holding on the front bumper. There's a couple back here, over here. Just got to look for all these clips. Some of yours might be missing or broken. But you just want to take those out first before you go up top to start to remove the bumper.
We use a clip removal tool. That's actually supposed to go under the clip. Pry it down, and pull that clip out. Go on and do the same for all of them. Sometimes they get stuck with dirt. Might need a smaller, thinner screwdriver. They get stuck, and get bound up with dirt. Pop them out. I'm going to go along and do this for the whole bumper. Pull the last one out of here, and your bumper is loose at the bottom. Go up top, and finish removing it.
There's a Phillips head screw inside this opening here in the splash shield. Got to remove that. Going to repeat this for the other side. We're going to remove this plastic air guide in the engine compartment. It's got some push clips. Use a small flat-bladed screwdriver to work those up. Going to use my trim tool. Pop them out. Do the same with the other one. This is actually clipped underneath this little piece of trim here. You can pull up, just pop it out, and do the same on this side. Just pull it up. Pop that pin out. Push it this way a little bit. Lift that up. It's got a lip that's pushed into the grill, so just pull out.
Going to pull this trim out. I need to pull that clip out. Just going to pop this one up, just so I can move this trim a little better. Just need to slide it over like that. Then we're going to pull this out from behind the grill. Going to slide it up and off of the hood latch. Flex it off. Spray a little rust penetrant on these. These are T-35 Torx. Break them free. We'll do this for the one on the other side. With all the bolts and clips removed from the bumper, you should be able to pull it out of the clips that it snaps into. It snaps into, just like that, into these brackets. You're going to pull it out. It's going to sound like it's breaking, but it's really just breaking free of the clips. I'm just going to pop it just like that. Do the same for the other side. Reach your hand in here. Just give it a swift tug. Pop it right off. Then we can put this aside.
You need to drain your windshield washer reservoir. Going to put a bucket underneath it. Stay on the side. Pull on the pump. It's sitting in a rubber grommet. You're just going to kind of work it out. Going to unplug the pump, pushing in the lock tab here. Pulling it off, then you can remove it from the washer fluid hose.
Spray some rust penetrant on the back of these bolts, one in the front of the car, and there's two in the back. One here, and then one up in here. These are 10mm. I'm using a very long extension. It looks long for the front, but I'm going to need it to get to the back one. Get the top rear one, carefully pull it out with the bolt. The washer tank is in two parts, so the neck should stay up top, and you can pull it down, disconnect any wiring that might be stuck to it. Just kind of feed it out of the body of the car.
This is through here. Slide that out. That's the lower part. Drain out the remaining washer fluid. After you take this clip out, you can feed the top of the neck out of here, and then lift it right out. Now feed our new bottle up into place, up through the fender liner.
Actually, before I do that, I'm going to run our hose that was through here, squish it, and it goes right in. Pull that down, and I'm just going to feed the bottle up into place. Get the front bolt lined up, and install that in place. Just finger tight, so I can move it around. Line up the other ones. Get the bolt on the end of my extension, reach in, and install the top rear bolt. Perfect. Feed this hose, loop this hose out and around the harness, just like that. Pop this harness back in where it was, so our hose lines up where the motor's going to go.
Reinstall our pump, push it into place so it seals up. It's got a bit of spring to the rubber grommet that you kind of have to work it in there. Sometimes you can spin it around as you push it in. That's in there nice and tight. Plug the washer hose back onto it and reconnect the electrical connector. Going to reinstall the top neck. Put that on there, just going to slide it down into place, get it lined up.
At the same time, try to line it into that opening there, and it should seat. And it's got a line molded on the top neck and a line molded on the bottom neck, right there. And when they're lined up, you know it's perfectly aligned. Reinstall the clip, then we can refill the reservoir with fluid. Fill it with fresh washer fluid. When you've topped off the washer fluid, just replace the cap.
Going to reinstall our bumper. Going to push it straight in and line it up with the brackets. Slide it up into place. Feed the fender liner underneath it. Then pull it up and push it out of the bracket. Push it onto the bracket under the headlight. Go to the other side. Do the same. Going to line up the other side. This under liner is caught. Push it in there. Just pull that all into place. Push the under liner to the inside of the bumper here. It's OK if that pops back out. Just pop that back in. When the bumper's clicked into place, you can reinstall the screws and all the clips.
Reinstall the self-tapping screws. Hold the end of the bumper on. Just repeat that for the other side. Reinstall these screws. Going to reinstall this air guide. It's flexible, so just going to slide it up and over. You got to fit it over these little rubber bump stops. These tabs actually go underneath the fender. Then this lip goes behind the grille. Flex it into place, just like that. Bring this up and slide this over. Fold this up. It goes like that. Do the same for the other side. Flip this in. Push it in. Flip this over. Put this under the plastic trim. Reinstall the clip that was here. Going to reinstall this clip on this side and repeat that for the other side. Reinstall these push clips, and do the same for both sides. Replace all the push clips. Just go along the bumper and reinstall all your push clips.
Thanks for watching. Visit us at 1AAuto.com for quality auto parts, fast and free shipping, and the best customer service in the industry.
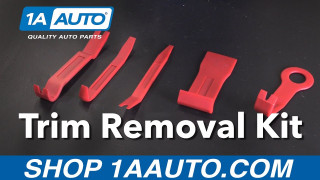
Buy Interior Trim Removal Kit from 1A Auto
1A Auto shows you some tools that can make your door panel removal easy.
