How to Replace Turbocharger Elbow 2010-14 Volkswagen GTI
Created on: 2018-05-08
How to replace a blown or leaking turbocharger elbow on 10, 11, 12, 13, 14 Volswagen GTI.
-
step 1 :Removing the Wheel
- Loosen the lug nut covers with the hook found in the kit in the trunk
- Loosen the 17mm lug nuts with the vehicle on the ground
- Raise the vehicle with a floor jack
- Secure the vehicle on jack stands
- Remove the lug nuts
- Pull off the wheel
-
step 2 :Removing the Intercooler Line
- Remove the T25 Torx fasteners from the fender liner/splash shield
- Loosen the two captioned T30 Torx from the intercooler line
- Pry out the lock rings from the intercooler line
- Remove the intercooler line
-
step 3 :Removing the Turbocharger Elbow
- Remove the two 5mm Allen bolts from the turbocharger elbow
- Remove the T30 Torx bolt from the bracket on the noise tube
- Pry up the clip from the noise tube with a flat blade screwdriver
- Disconnect the hose and set it aside
- Remove the two 4mm Allen bolts from the boost control valve
- Remove the third 5mm Allen bolt from the turbocharger elbow
- Remove the turbocharger elbow
- Check that the o-ring is still in place on the engine
-
step 4 :Installing the Turbocharger Elbow
- Insert the turbocharger elbow into place
- Tighten the three 5mm Allen bolts to the elbow
- Torque the Allen bolts to 9 newton metres or 80 inch pounds
- Insert the 4mm Allen bolts to the boost control valve
- Insert the noise tube into place
- Tighten the T30 bolt to the noise tube bracket
-
step 5 :Reinstalling the Intercooler Line
- Insert the intercooler line into place
- Clasp the lock rings
- Tighten the two captioned T30 Torx bolts
- Tighten the T25 Torx bolts to the fender liner
-
step 6 :Reattaching the Wheel
- Slide the wheel into place
- Start the lug nuts by hand
- Tighten the lug nuts preliminarily
- Lower the vehicle to the ground
- Tighten the lug nuts to 120 Newton meters in a crossing or star pattern
- Tighten the lug nut covers
Tools needed
-
5mm Hex Wrench
Socket Extensions
Torque Wrench
T30 Driver
17mm Socket
Jack Stands
Ratchet
Floor Jack
4mm Hex Wrench
1/2 Inch Breaker Bar
T25 Torx Driver
Hi, I’m Mike from 1A Auto. We’ve been selling auto parts for over 30 years!
We're gonna pull a wheel off, these normally have caps over it, so on your vehicle you may have those. You're gonna use a tool from the kit in the trunk. It's got a hook on it, you put it in the center of the cap and you pull straight up. This vehicle does not have that, so I'm just gonna take them off, 17 millimeter socket and a breaker bar. Just gonna break them free. This is the passengers side of the vehicle. We're using a two post lift to raise and lower the vehicle. At your house, you can use a jack and jack stands. Alright I'm gonna take these lug studs out. Volkswagen uses lug studs or lug bolts, not lug nuts. For this one, when you get to the last one, you're gonna want make sure you put pressure on the wheel because the lug studs, the wheel will fall. And grab the wheel.
To access the front of the motor, we're gonna take this panel out and we're gonna start by taking these T-25's out, one at a time. So there's one fastener here, there's one here, one here, there's two right here. And underneath there's one right here, one here, one here, one here, there's two right here and this one's missing one but there's normally one right there.
Next we're gonna take this inter cooler pipe out, this comes off the turbo and goes to the inter cooler. We're gonna take these two torx out, that's a T-30 and ratchet. These bolts are captions so they won't pull out, they'll just stay there. We're gonna pull this inter cooler pipe out, there's a little lock ring here and we're gonna pull it straight out, just hold it, should be able to wiggle it right out. And we're gonna do the same up here, another little lock right there, pull it up. Comes out of the way. You can separate it there but there's no need since we're able to separate it in these two spots. That gives us the most room to work.
We're gonna use a five millimeter allen. There's three of the five millimeter allen bolts. You get to the last bolt on the turbo charger elbow, we need to reach down in here. So move this T-30 and that stays with it.
We're gonna take a flat blade screwdriver, pry up on this clip and pull out on this noise tube, pulls right out. These lines off and pull that out of the way.
This boost control valve is blocking the bolt so we need to remove it, push it out of the way. With that removed, we can push it out of the way so that we can access the last five millimeter allen bolt. That last bolt, pulled it out. And able to pull this out. There is a O ring right here, we're gonna make sure that stays there. Don't wanna lose that.
We're gonna make sure this O ring didn't fall out when you're putting it back together. If the O ring looks like it's been damaged, you're gonna want to replace it. This looks pretty good so we're gonna reuse it. We're gonna put the elbow back in. On these bolts on you're in, just put a little bit of thread sealant and reinstall the bolts. So we're gonna snug these bolts up. The five millimeter allen. Hard to get a torque wrench up here, but the torques back on these bolts is nine Newton meters or 80 inch pounds. I'm gonna reach around on the backside of that turbo outlet and put these little four millimeter allen bolts into the turbo boost control valve. Now you can tighten up the bolts from up top, it's gonna be easier. And we're gonna reinstall the hose, push that clip down and push it to lock it in, hook these hoses up. Bolt it. Tighten down this T-30.
Now we're gonna reinstall our inter cooler pipe, make sure these clips are pushed down. On this one you can see it's out. What we're gonna do, is push it in. Ready to push it in. Give it a little force till it clicks. Install these two T-30's, we're gonna use a T-30 socket and a ratchet, snug these down.
We're gonna install this side panel shield, install of your T-25 bolts. Now we can install the tire and put the holes and hold it. And we're gonna use a 17 millimeter socket to put our lug studs on or lug bolts, whatever you call it. Now we're gonna torque the lug studs to 120 Newton meters in a star pattern. When you do it in a star pattern, makes the wheel go flush to the brake rotor properly.
Thanks for watching. Visit us at 1AAuto.com for quality auto parts, fast and free shipping, and the best customer service in the industry.
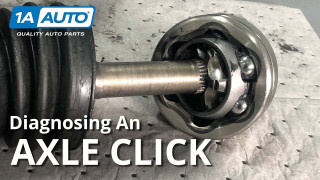
Why Does My Car Axle Click Diagnosing and Explaining Axle Noises
Watch this video to learn about CV axles, and why they may click when damaged or worn.
