How to Replace Trunk Lid Pull Down Motor with Gear 1986-91 Chevy Camaro
Created on: 2011-07-19
Learn how to replace the rear hatch pull down motor on your 86-91 Chevy Camaro with this step-by-step instructional video.
-
step 1 :Accessing the Hatch Pull Down Motor
- Remove the plastic pins from the trunk liner with a flat blade screwdriver
- Remove the Phillips head screws from the top of the trunk liner
- Gently pry out the trunk light with a flat blade screwdriver
- Disconnect the light from its wiring harness
- Pull off the trunk liner
- Disconnect the trunk light switch wiring harness
-
step 2 :Removing the Pull Down Motor
- Remove the three 11mm bolts from the motor
- Slide the motor assembly down and out, off its tracks
- Remove the plastic bushings from the motor assembly
- Disconnect the wiring harness from the motor
- Remove the Phillips screw that connects the casing to the housing
- Pry out the tab that connects the casing
- Remove two bolts from the motor
- Pull off the housing and motor
- Separate the housing from the motor
-
step 3 :Installing the New Motor
- If replacing the housing only, attach the new housing to the motor
- Clip the housing into place
- Insert the bolts into the housing
- You may hear a cracking sound as the bolts thread
- Clip the casing back into place
- Insert the Phillips screw into the casing
- Apply white grease to the motor assembly tracks
- Put the bushings on the motor assembly brackets with the thinner side on the outside
- Being sure not to let the bushings fall off, slide the motor assembly on to its tracks
- Insert the 10mm bolts that holds the motor
- Reconnect the wiring harness to the motor
-
step 4 :Reinstalling the Trunk Liner
- Reconnect the wiring harness to the trunk light switch
- Push the trunk liner into place
- Insert the Phillips screws into the trunk liner
- Connect the light to the wiring harness
- Insert the clips into the trunk liner
Tools needed
-
12mm Socket
Flat Blade Screwdriver
Phillips Head Screwdriver
White Grease
Ratchet
12mm Wrench
Brought to you by 1AAuto.com, your source for quality replacement parts and the best service on the Internet.
Hi, I'm Mike Green. I'm one of the owners of 1A Auto. I want to help you save time and money repairing or maintaining your vehicle. I'm going to use my 20-plus years experience restoring and repairing cars and trucks like this to show you the correct way to install parts from 1AAuto.com. The right parts installed correctly: that's going to save you time and money. Thank you and enjoy the video.
In this video, we're going to show you how to replace the rear hatch pull down motor on this 1986 Chevy Camaro Iroc-Z. Same as any '82-'92 Camaro or Firebird or Trans Am Formula. The only tools you'll need are a Phillips screwdriver, a flat blade screwdriver and a 12 mm socket and ratchet or a wrench.
A properly working hatch on one of these cars, you put it down, nice and easy and then the motor sucks it down. Then when it pops up, you can see right here that's coming up. First take the flat blade screwdriver. There are four of these plastic pins. You can see I've already taken the trim out of this side. It's not necessary to take that piece of trim out. It's just something I did in a previous video. Take a Phillips screwdriver. There are two screws on top. We'll fast forward through removing those screws. Then, before you can actually take this light out, just gently pry out one side and it comes out like that. Then just pull the connector off. It has a couple of ears and you want to gently pry those because this is usually pretty brittle. Pry and pull at the same time and that light comes off. The switch is still hooked up. I'm just going to pull the switch connector right off. There's the switch connector. This can stay just like that. Looking closer here, here's the pull down motor.
At 1A Auto we sell a new pull down motor assembly with the housing. We also sell the housing on its own. Generally if the motor burns out when you lower or pop your trunk lid you won't hear any noise. What else can happen, is the plastic housing can break and when that breaks usually you'll hear a noise and a clicking or grinding noise. If you're hearing the noise that means the motors working and probably your housing's broken. Either way, the next step to get this apart is to take an 11 mm socket with ratchet and there are three bolts over here. There's one, there's two right close to each other right here, and then one further down here. We'll remove those. We'll just speed it up here as all I'm doing is undoing those bolts. You can see that I'm removing those things that are loosening up. Once you remove those you can pull your motor out and this whole assembly can slide down and out and then what I would tell you to do is take these plastic things off and put them aside because they will fall off. A better term for the plastic things is plastic bushings. You can see on mine one is broken. If just one's broken, you're probably OK enough to slide on.
Now what you want to do is flip this around. Actually before you do that actually probably one of the first things you do really is disconnect the motor here. Just pry up on a little tab and disconnect there. Flip it up and over and there is a Phillips screw right here that goes into the motor and you can actually see my housing right here is cracked right around that screw which is kind of the beginning of a problem. Remove this Phillips screw. Now go back to your regular screwdriver. There's a little tab here your pry out on and push this whole housing off. What that now enables, is there are two bolts on top here that you need to remove.
There's your housing out or your motor assembly out. If you're just going to replace your plastic housing it simply pulls off like that and your new one goes on. Obviously if you're going to put your new motor on, then you just bolt it in place. I'm going to use the new housing. My motor is working fine for now. So I'll put a new housing on with the existing motor.
I've got it upside down. You want to put the motor on. Make sure that this goes on and lines up there. You might have to just kind of force it on there a little bit. It went on OK. Start this bolt here. When you first put these bolts in you will hear a little bit of a cracking and feel a little bit of cracking sound. That's the bolts threading their way into the plastic. You're not breaking anything. It's just how they work. We'll fast forward through putting that bolt in the rest of the way and then start that other bolt that goes up and in the same way and tighten it up.
Now you want to take this and it has to go into the casing here on this side. This goes onto the motor so then it clicks down on. Put our Phillips screw back on. I'll fast forward as we put that screw in. Just a note, this screw does thread itself as well and it's probably one of the tougher screws to get in. You see me change position a little bit to try and get some more leverage on it. Grease up the tracks with some white grease. Now you want to put these bushings back on. There's a groove in them. The thinner side goes out. The most fun part is actually getting it into the tracks with those all intact so make sure our upper ones are on there
well. This guy already wants to fall off. That ones on there. They're going in nicely. The little one on this side are fine. Got this broken one on this, but that's going to right up in there. Once they're in it slides nicely. I'm going to push it up into place and then start our bolts that hold the motor. Start one. Now I'll speed it up here as I start the other two. Then I slowly tighten them up and when you get them tight you want them snug or firm. You don't have to tighten them up. You don't want to over tighten them and break the plastic housing. Plug that in. I'm really going to speed it up here as I connect that switch then just make sure the harness for the light is through. Put it up into place. Put those two Phillips screws back in. Then make sure that those pins are back in. Hook up the light.
We hope this helps you out. Brought to you by www.1AAuto.com, your source for quality replacement parts and the best service on the Internet. Please feel free to call us toll-free, 888-844-3393. We're the company that's here for you on the Internet and in person.
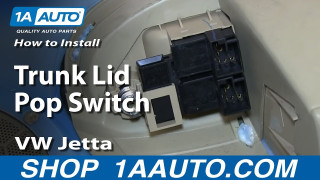
How to Replace Trunk Lid Switch 1999-2006 Volkswagen Jetta
How to repair, install, fix, change or replace a damaged, worn out, faulty or shorted power trunk pop switchon 99, 00, 01, 02, 03, 04, 05, 06, Volkswagen Jetta.
