How to Replace Transmission Cooler Lines 2001-04 Chrysler Sebring
Created on: 2013-10-31
Learn how to replace the transmission cooler lines in your 01-04 Chrysler Sebring in this instructional video.
-
step 1 :Removing the Air Intake Box
- Loosen the air intake hose clamp with a flat blade screwdriver
- Press in the intake hose tabs
- Pull the intake hose off
- Remove the nut from the air box stud
-
step 2 :Removing the Transmission Cooler Lines from the Transmission
- Have a drain pan ready
- Loosen the hose clamps with a 7mm socket and ratchet
- If necessary, cut off the hose clamps with wire cutters
- Pull the transmission lines off the transmission
- If necessary, cut the hoses lengthwise with a razor blade
-
step 3 :Removing the Headlight
- Remove the two 7mm bolts from the headlight
- Pull the headlight aside
-
step 4 :Removing the Transmission Lines from the Cooler
- Have a drain pan ready
- Loosen the hose clamps with a 7mm socket and ratchet
- If necessary, cut off the hose clamps with wire cutters
- Pull the transmission lines off the cooler
- If necessary, cut the hoses lengthwise with a razor blade
-
step 5 :Installing the New Transmission Lines
- Push on the passenger side transmission line
- Slide the hose clamp into place
- Slide the hose clamp onto the line
- Push the hose onto the lower fitting
- Slide the hose clamp into place
- Push on the driver side transmission line
- Slide the hose clamp into place
- Slide the hose clamp onto the line
- Push the hose onto the upper fitting
- Slide the hose clamp into place
- Tighten the hose clamps with a 7mm socket and ratchet
-
step 6 :Reinstalling the Headlight
- Push the headlight into place
- Insert the two 7mm bolts into the headlight
-
step 7 :Reinstalling the Air Box
- Push the air box into place using the locating tabs
- Push the intake hose into place
- Tighten the intake hose clamp with a flat blade screwdriver
- Fasten the nut onto the air box stud
Tools needed
-
Razor Blade / Gasket Scraper
Socket Extensions
Flat Blade Screwdriver
7mm Socket
Drain Pan
Ratchet
Wire Cutters
Brought to you by 1AAuto.com, your source for quality replacement parts and the best service on the Internet.
Hi, I'm Don from 1A Auto. I hope this how-to video helps you out, and next time you need parts for your vehicle, think of 1AAuto.com. Thanks.
In this video, we're going to show you how to replace the transmission lines on this 2004 Chrysler Sebring. The only tools you're going to need for this repair is a 7mm socket and ratchet, a flat blade screwdriver and a razor blade.
To access your transmission lines, you're first going to have to remove this air intake box. To do that you want to start off by just loosening up this clamp right here. Where the air intake hose goes into the box there are a couple tabs. Press those in towards the hose. Pull the hose back out. There's also another bolt, there's a little stud right over where you see that finned aluminum thing. You'll need to remove that nut first. It was missing on our vehicle, but then you can pull the box up and out.
Your transmission lines are right here. They're held in with hose clamps. The passenger side one is the lower one on this side and the driver side one is the upper one. When these hoses get old, they harden up and they don't seal as properly. Then you have transmission fluid leaking out like this. You want to slide a drip pan underneath the hoses. Our car has conventional type clamps that have a 7mm bolt head so we're using a 7mm socket and a ratchet to loosen them. I'm not sure if these are original equipment. You may encounter something different, either a pinch clamp that you have to pinch with a pair of pliers or even a band clamp that you might have to cut. The best thing to use is either a pair of wire cutters or bull nose wire cutters.
Here, we've got the clamps loose, but the hoses have hardened to the shape of the fitting so they're not pulling off. Because they've hardened, the only way to actually get them off, for us anyway, is to actually cut them off. Using a razor blade you just want to cut down the side of them and they pulled right off.
To get the other end of these hoses, you can see you can't really get to the clamps, you can't fit a socket and ratchet in there. What we have to do is remove the headlight which is held in right here by two 7mm bolts. We're just going to fast forward as Don removes these. Your headlight should just pull out and you can just set that aside. Now you can see you have great access to these 2 clips here.
We're just going to fast forward here as Don loosens up those clamps and slides them back. We'll continue to fast forward as he uses the razor blade again to cut those hoses off.
Clean the fittings off before installing the new hoses. You just want to slide the clamp on and push the transmission line into place and slide the clamp down into place. You want to do the same thing with the other end. Just slide that clamp on, put the hose in place then slide the clamp up. Remember, the passenger side one is the lower hose. Now, for the driver side one, do the same thing. Clamp on, connect the hose, slide the clamp forward. Do the same up here. Connect it to the top. You just want to tighten up those clamps.
Now, that you're all set with those, you can reconnect your headlight. You just want to push it into place and replace those two 7mm bolts.
You want to line up your air intake box with these two holes here and then line up the hole on the air intake box with that pin right there. We're going to fast forward as he reinstalls the air intake box. Reconnect the air intake hose, and then, tighten up the clamp on the air intake hose. Then, you're all set.
We hope this video helps you out. Brought to you by www.1AAuto.com, your source for quality replacement parts and the best service on the Internet. Please feel free to call us toll-free, 888-844-3393. We're the company that's here for you on the Internet and in person.
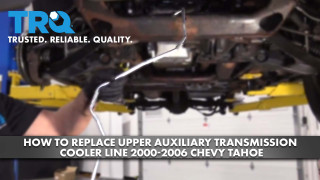
How To Replace Upper Auxiliary Transmission Cooler Line 2000-06 Chevy Tahoe
This video shows you how to install new lines from TRQ that are made to fit the specifications of your 2000-2006 Chevy Tahoe.
