How to Replace Transmission Cooler Line 1999-2007 Chevy Silverado
Created on: 2020-06-25
Watch this video to learn how to install a new TRQ transmission cooler line on your 1999-2007 Chevy Silverado.
Tools needed
-
Gloves
Trim Tool Set
Safety Glasses
Electrical Tape
Hammer
Center Punch
Drain Pan
Needle nose pliers
Pocket Screwdriver
Okay, friends, to get started on doing the training line, we can do it one of two ways. We can either climb underneath the vehicle and reach right on up behind this area. Which you can do, it's easy access. It's just a little bit harder to get to all the way up here. Or you can do it the way I'm gonna show you and remove the front grill. That's gonna be very easy. We're gonna take off this plastic cover first. You're gonna notice all along the top cover, there's all these little push clips. Remove the centers. I'll show you. Come right under with a little forkey tool or a screwdriver, lift up the center, and then you can lift up the outer portion. We'll do the same to all, this off of here. Now, let's go ahead and grab onto these. Give them a little wiggle, pull them right out of there.
Lift up your headlamp assembly. Set that aside. You can see one of the little clips. I'm gonna go over and do the same to the other headlight assembly first, and then we'll start removing the clips. So now if you grab the plastic, you can tell that it's attached here, here, and there's a couple more down the line. If you were to take some long nose pliers, grab on along the backside here, you're gonna have to imagine it until I can show you in one second. I'm gonna squeeze those two tabs together, and I'm gonna try to draw this out from the body. There we are, you can see the two tabs. This is all I did. Just grab it, squeeze it and try to draw it out. We're gonna do the same to all of them.
And down here, here we are, and the same on the other side. Now that those are all out, let's get this out of here. So now with that out of the way, we have a clear view of our transmission cooler here. We wanna double-check to make sure that we're gonna be removing the correct line. So, to do that, I'll just climb underneath there, take a look at the piece I've got, make sure it's correct to what I need and then we'll continue. Just looking at the line that we have, we can tell that we have the angle and it's a short area here. Looking at this one, I have the angle in a nice short area. It's very obvious that this is not the one.
The next thing we're gonna do is get this plastic piece off of here. The plastic is just gonna break away and then behind that you're gonna find your locking clip. Right behind here, I'm gonna spray down this area with some penetrant. Let it sit for a second. Now it's time to get the line clip out of here. There is a special tool you can get that would slide around this line, slide up into this area right here and you'd be able to take the clip off fairly easily. Not everybody has access to that tool, so I prefer to use a pick.
If you were to take your pick and feel along inside the grooves, you're gonna feel some little ears for where the clip is gonna be. Once I get it out of here, I'll show you what it looks like so you'll have a much better idea of what's going on. But I'm gonna grab onto the ear with my pick and then I'm gonna use a small pocket screwdriver, grab onto the other side and just pull it right out. That's what the clip looks like. And it sits right inside the grooves.
Before we go ahead and take this line out of here, let's go ahead and put a nice collection bucket under there so we can make sure we recycle that fluid. Now it's gonna be time to get the line out of here. I'm just gonna use a punch and my hammer and see if I can help it along. There it is. Now that we've got that loose, let's go ahead and get the line out of its bracket. Just make sure you follow that line, find exactly where it goes. This one comes right up here to the top. We're gonna remove this the same way we did the other one. Get the plastic out of the way.
Now we'll get the clip off of there. There it is. Grab that line, give it a little wiggle, and pull it out. So we just made our way underneath the vehicle real quick. And I took off the front skid plate, which you don't necessarily need to do. But if you wanted to, you could just remove some of the 15 millimeter bolts that hold it up. I'm gonna wiggle this around and then I'm just gonna try to see if I can get it to wanna spin and then wanna come out of here.
I'm just gonna twist it, move it around until it wants to slide out of here, there we are. Now, before we get started on installing our new line, we wanna make sure that we tape this end up. The reason why is because it's very dirty underneath these vehicles and we don't want anything to get inside. I like to use a little bit of electrical tape. I'm just kind of go over the end and then give it a couple of quick wraps just to make sure it can't fall off on its own.
Now I'm gonna put the side that's gonna be going up towards the radiator, which of course we taped off the end up in through here first. You'll notice that it's nice and flexible. That's nice. Come up like this. And we're just gonna kind of curve it up and around. And at this point, what we're gonna try to pay attention to is this end because this is the hard end. This is the area that we can't necessarily bend. So we'll just see if we can get everything working the way that it should. And hopefully, it'll work its way up and around the frame like it needs to. That should be going up along the top. You just wanna make sure you get that line going up so it's gonna be going along the radiator.
Okay. I'm just gonna put this in there so it holds it for me for now. Actually take that out this up there. Now we'll press it in so it'll hold, perfect. Now it's gonna be time to insert our little clippy-dos into the grommets there. We just wanna make it so the ears into the little groove. Obviously you can't hang loose like that. There we are. I just heard a click in, I can see that it's sitting perfectly. Now I'm gonna remove all my tape here and we'll get ready to insert this. Let's go ahead and get the line up in here. That's the little wiggle.
Make sure it's completely in there. You wanna look at that clip and see if it looks like it's pushed out and away from the adapter. If it looks like it's pushed out, more than likely the line isn't completely in. This looks good. We'll take the lock, slide that over it, and that's gonna ensure that the clip does not come out. Let's do the same to the other side of the line.
There we are. Slide it up, click it in. Make sure you give it a nice tug. You need to ensure that this cannot come loose. If it falls right out, it's gonna come loose when you start the vehicle. That feels good. Grab the plastic lock, slide it on over that. There we are. Go ahead and clean down the area. Same thing up there.
Once the areas that we just cleaned down are nice and dry, the next thing that I like to do is start up the vehicle and check the transmission fluid. We know we lost a little bit of fluid, so we need to make sure that it's topped off. Also, we need to make sure that we don't have any leaks coming from the areas that we connected the line in. If you see fluid coming out right here, obviously it's not set in there the way it needs to be, and the same up along the radiator. Now, once we've confirmed that everything's good, let's start putting it all back together here.
Let's get that right back in here. Let's get the cover back on here. Take all your little push clips, slide them in, lock them down. Okay, we've got this all back together now. One last thing is just to double check your transmission fluid once it's warm, make sure it's full. You don't wanna road test it until it's definitely where it needs to be in the operating range. Once you've done that, go ahead and take it for a road test.
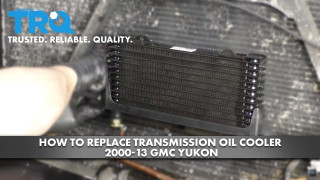
How to Replace Transmission Oil Cooler 2000-13 GMC Yukon
Watch this video to learn how to install a new transmission oil cooler on your 2000-06 GMC Yukon.
