How to Replace Track Bar 2000-13 Chevy Suburban
Created on: 2017-09-14
How to replace a loose or damaged track bar or panhard rod on 00, 01, 02, 03, 04, 05, 06, 07, 08, 09, 10, 11, 12, 13 Chevy Suburban.
-
step 1 :Removing the Track Bar
- Pop off the e-brake cable bracket with a flat blade screwdriver
- Lift the e-brake cable out of the hooked bracket
- Counter hold the passenger 21mm nut with a 21mm wrench
- Loosen the 21mm bolt from the track bar
- Break the driver side 21mm bolt free with a breaker bar
- Remove the 21mm driver side bolt
- Counter hold the upper bolt on the sway bar link with a wrench
- Remove the upper 18mm bolt from the sway bar link
- Remove the track bar
-
step 2 :Installing the Track Bar
- Insert the track bar with the tabs facing the front of the vehicle
- Thread in the drive side bolt with the captured nut
- Thread in the passenger side bolt
- Counter hold the back end and tighten the bolts
- Insert the sway bar link into place
- Counter hold and tighten the 18mm bolt
- Insert the e-brake cable into the hooked bracket
- Press on the clips to the track bar and e-brake cable
Tools needed
-
21mm Socket
Socket Extensions
Flat Blade Screwdriver
Rust Penetrant
Jack Stands
18mm Socket
Center Punch
Ratchet
Floor Jack
1/2 Inch Breaker Bar
Hi, I’m Mike from 1A Auto. We’ve been selling auto parts for over 30 years!
We're going to replace the track bar, also known as the panhard rod. The E-brake cable is clipped to it. I'm going to pop these off to begin with just using a flat bladed screwdriver. Just prying them off, they're a bit rusty. Let's see if I can get that free. Pry this down and it'll pop off. Once one side is loose, the other side will pop off. I'm going to put this aside so I don't lose it.
Also, going to move it off of this bracket, E-brake cable. Lets you have a little more space because I need to get to this bolt here for this side. I'm going to take some rust penetrant and spray the back side. I will also spray the other one while I'm at it. It is located up here by the axle.
We've got the vehicle raised and supported on a two post lift. You don't have to support the rear axle. This is not holding up the rear axle. I just have it supported just to keep the vehicle level while it's on the two post lift, and we work back here. I'm going to take a 21 millimeter socket and ratchet with an extension. The sway bar link is here. Try to find the, there it is. I need to push this direction and try to break it free. All right. So that's going to move fairly easily.
Using a ratchet and extension, make it around the sway bar. That is turning but it is also turning the bolt on the back side. I wanted to make sure it was free. I will counter hold with a 21 millimeter wrench. And as I counter hold it I use my ratchet and socket, take it off. It doesn't quite fit 'cause the sway bar link is there, but it's pretty well enough. Then I get this pretty loose, but I before I remove it completely, I will stop. This side, the back side of the bolt is held in with a welded nut and this tap so it doesn't spin. Take a breaker bar and a 21 millimeter socket and break it free.
You can see that tab spun, it's going to push against the other side. Now I feel it's loose, so I'm going to switch to a ratchet. This bolt can come all the way off because the track bar will just sit in this slot. This is where our link has to come out of here so we can pull the bolt out otherwise it will hit. Undo the upper sway bar, upper part of the sway bar link. Spray some rust penetrant. I'm going to counter hold this bolt from the outside. Take my breaker bar and 18 millimeter socket, free up the bolt that's going through the upper link. Counter hold the outside nut.
I've got it really loose, and now I'm just going to take it out by hand. Swing this sway bar mount out of the way. Unhook the bolts and we'll that away. I'm going to hold the track bar so it doesn't fall. Going to lift it out off of this mount and out of the vehicle.
These are our old track bar from the vehicle and our new one from 1AAuto.com. You can see it's got the same tabs here. These are where those E-brake clips are going to connect to. The mounting holes are in the same position with the bushings. Same style rubber bushings. This'll fit in your vehicle nicely and make a great replacement.
Place the new track bar in the vehicle. Make sure you have these tabs facing the front 'cause our E-brake cable's going to sit in this channel. Going to slide up this way. Lay it into the bracket on the rear axle, place it up, the mount the body. Place the bolts that came out. That's our capture nut, it's going to go on this side.
Move this arm around. I need to use a big punch to align it. So I'm going to put the bolt in, work it in, and get the socket and ratchet. You can actually push on the axle a little bit. Find the hole and thread it in. Our captured nut, place it up there. Just get it threaded in for now. Do the same thing, take the ratchet.
Reinstall the nut and snug these down. And snug this bolt down. And hold the tab, captured nut. Just going to make sure there's some weight on the rear axle by lifting the jack up slightly. Tighten this one down. Counterhold this bolt and make it tight.
Reinstall the sway bar link. Pull it from the inside out. Tighten the sway bar link, and counterhold the bolts or the nut on one side. Reinstall the E-brake cable on this metal bracket. Reinstall the clips that were holding this to the track bar. Clip it on here. There's a locating tab on the top and the bottom that are going to go between these. Catch the top ones first. Push them over. Catch this side, clip it in. Track bar is replaced.
Thanks for watching. Visit us at 1AAuto.com for quality auto parts, fast and free shipping, and the best customer service in the industry.
Shop Products


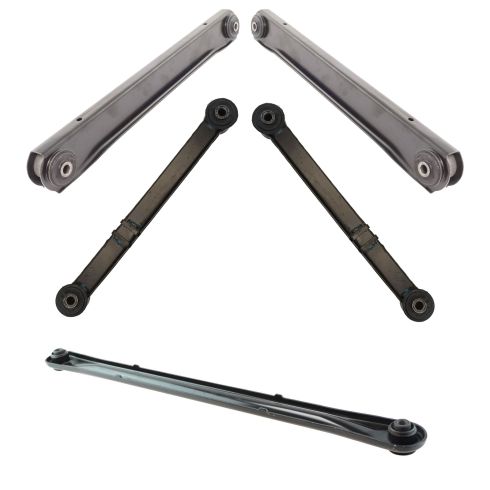
Chevrolet GMC Cadillac Rear 5 Piece Suspension Kit TRQ PSA65086
Part Details:
- (2) Rear Upper Control Arms
- (2) Rear Lower Control Arms
- (1) Rear Track Bar
- 5 Piece

How to Replace Sway Bar Link 2001-06 Hyundai Elantra
If the sway bar link is rattling or broken, this video will show what steps and tools are needed to replace it
