How to Replace Tie Rod 1994-97 Honda Accord
Created on: 2010-09-29
Watch this video to learn how to replace the outer steering tie rod in a 94-97 Honda Accord.
-
step 1 :Remove the wheels
- Loosen the lug nuts
- Raise and secure the vehicle
- Remove the wheel
-
step 2 :Remove the tie rod
- Mark the alignment on the tie rod with a sharpie.
- Use two wrenches to loosen up the tie rod nut.
- Remove the cotter pin and remove the 16 mm nut.
- Use a tie rod puller to pry out the tie rod.
- Unscrew the tie rod.
-
step 3 :Install the new tie rod
- Adjust the new locking nut to the same spot that the old one was (where you made your mark)
- Screw in the new tie rod.
- Install the cotter pin and bolt on the 17mm nut.
- Install the cotterpin.
- Use a grease gun to fill the joint.
-
step 4 :Replace the wheel
- Put the wheel on and hand tighten the lug nuts
- Lower the car and torque the lug nuts to 80 ft lbs.
Tools needed
-
Adjustable Wrench
Torque Wrench
16mm Socket
17mm Socket
Jack Stands
18mm Socket
19mm Socket
Grease Gun
Tie Rod Puller
Ratchet
Floor Jack
Needle nose pliers
1/2 Inch Breaker Bar
Marker / Writing Utensil
Brought to you by 1AAuto.com, your source for quality replacement parts and the best service on the internet.
Hi, I'm Mike Green. I'm one of the owners of 1AAuto. I want to help you save time and money repairing and maintaining your vehicle. I'm going to use my 20 plus years experience restoring and repairing cars and trucks like this to show you the correct way to install parts from 1aauto.com. The right parts installed correctly, that's going to save you time and money. Thank you, and enjoy the video.
In this video, we will be replacing the passenger side outer tie rod on this '95 Accord. It's the same for the driver's side, and really the same procedure for most vehicles. The tools we use on this Accord: jack and jack stands, 16 to 19 mm sockets with ratchet, a couple of large adjustable wrenches, and needle nose pliers.
Start on these aluminum wheels by removing the center cap. Next, if you don't have the benefit of air tools, you want to loosen your lug nuts while your car is still on the ground. Then after you loosen the lug nuts, jack it up and support it. You always want to use a jack and you want to use the jack stand. Then remove the lug nuts and the wheel. These are 19 mm bolts.
Once you have your wheel off, what you want to do is come back here. I'm looking right at the tie rod. I'm taking a Sharpie marker and I'm marking really well right where that bolt is. I'm going to use that mark to place my bolt on my new tie rod.
Now what you want to do - I'm sure there's a particular size for these, but I just use two large adjustable wrenches. I have one that I put on the tie rod, and then the other one on this nut here. Make sure they're nice and tight. Then pull and loosen up that nut. Next, you want to pull this Cotter pin out. Then on this car, this is a 16 mm nut. It could be different on yours. Remove that.
There's two ways you can go about this. If you're replacing your tie rod, you can just bring your nut up to here right flush with the top of that, and then use a hammer and bang it down and it'll release it. The correct way to do it though is to use a tie rod and ball joint removal tool. You basically just put this on and tighten it up. This one will use a 19 mm socket. It pops it right down. Now you can release your nut there off the way. Then your tie rod spins off.
So you can see here that the new part from 1A Auto is just a hair shorter than the original tie rod end. So the new tie rod comes with a new locking nut. So here's where making that mark comes into play. We want to undo the old one. Then we know that our new tie rod is just probably about a sixteenth of an inch shorter than the old one. So when we put the new lock nut on, we'll leave maybe one or two threads between the new lock nut and where our mark was, and that'll lengthen out the tie rod a little bit and give us a good preliminary alignment. But then we'll actually go and have the car aligned. You should always have your car aligned after you do any steering linkage or any major suspension work.
So that tie rod goes right on. The new tie rod is a little stiff. I'm just going to use the hammer to kind of tap it so that it lines up better with the steering linkage here. So now that I have the tie rod just kind of bolted into the steering knuckle, I'm going to use my two big adjustable wrenches again to tighten up that locking nut that holds the tie rod to the steering shaft. Or bolt has a little bit larger 17 mm nut on it. Nice and tight. Then I can see my hole is right there. Tighten it up a little bit more so you know you can get the Cotter pin through. Put the pin in through, and then up and around. Now we can put the wheel back on and we're all set.
Again, I'm just going to use my impact wrench to tighten them up a little bit. Then once you have the car down on the ground, use a nice big wrench and generally lug nuts you want to tighten up between 75 and 85 foot-pounds. I usually just use a breaker bar. Get them tight. Take your cap and put that back on.
We hope this helps you out. Brought to you by www.1AAuto.com, your source for quality replacement parts and the best service on the internet. Please feel free to call us toll free 888-844-3393. We're the company that's here for you on the internet and in person.
Shop Products


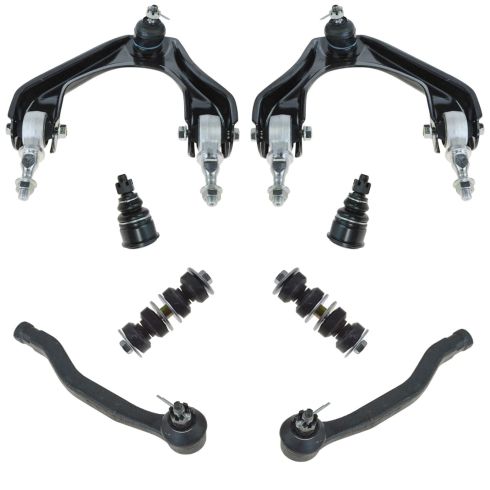
Honda Acura Isuzu Front 8 Piece Steering & Suspension Kit TRQ PSA56189
Part Details:
- (2) Front Sway Bar Links
- (2) Front Lower Ball Joints
- (2) Front Outer Tie Rods
- (2) Front Upper Control Arms with Ball Joints
- 8 Piece
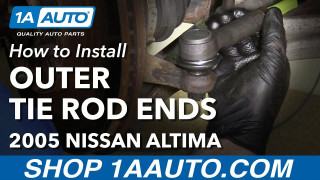
How to Replace Front Outer Tie Rod Ends 2002-06 Nissan Altima
How to repair, install, fix, change or replace a broken, busted, bad, loose, or damaged tie rod on 02, 03, 04, 05, 06 Nissan Altima.
