How to Replace Tie Rod 1998-2005 Ford Explorer
Created on: 2010-10-13
This video will show a few methods for removing the tie rod and will show how to properly replace it. We recommend getting an alignment after this repair
-
step 1 :Remove the wheel
- Loosen the lug nuts
- Raise and secure the vehicle
- Remove the lug nuts and set the wheel aside.
- Put the wheel under the vehicle for added security in the event of a jack failure.
-
step 2 :Remove the brakes
- Remove the 13 mm sockets anchoring the caliper.
- Wire tie the caliper up out of the way.
- Use a 15mm socket to remove the caliper bracket
- Remove the rotor
- Remove the dust shield with your 8 mm socket and ratchet
-
step 3 :Remove the outer tie rod
- Use your pliers to remove the cotter pin from the tie rod
- Remove the nut with your 21 mm socket and ratchet
- Pull apart the tie rod with a tie rod puller.
- Use a paint marker to mark where the top nut on the tie rod is.
- Use two adjustable wrenches to remove the tie rod.
-
step 4 :Install the new tie rod
- Apply a little loctite to the inner tie rod
- Screw on the outer tie rod to the inner tie rod up to your paint marker mark.
- Fill the dust boot with grease
- Reassemble the tie rod end, replacing the nut and cotter pin.
- Reassemble the brakes and wheel.
- See our other videos for more detailed instructions.
Tools needed
-
13mm Socket
15mm Socket
Rust Penetrant
Jack Stands
Liquid Thread Locker
21mm Socket
Flat Blade Screwdriver
Tie Rod Puller
8mm Socket
Wire Ties
Lug Wrench
Ratchet
Floor Jack
Needle nose pliers
1/2 Inch Breaker Bar
Wire Cutters
Marker / Writing Utensil
Brought to you by 1AAuto.com, your source for quality replacement parts and the best service on the internet.
Hi, I'm Mike Green. I'm one of the owners of 1A Auto. I want to help you save time and money repairing and maintaining your vehicle. I'm going to use my 20+ year's experience restoring and repairing cars and trucks like this to show you the correct way to install parts from 1AAuto.com. The right parts installed correctly that's going to save you time and money. Thank you and enjoy the video.
In this video we'll be replacing the tie rod on this '98 Explorer same as any '95 to '01 Explorer, Navajo, and Ranger, Mazda B Series pickup, and really this is a procedure that is similar for most cars.
Tools you'll need on the Explorer: jack and jack stands, 8mm, 13mm, 15mm, 19mm, which I forgot there, 21mm sockets and ratchet, pliers, a tie rod puller which is the right way to do it. You can use a hammer but you have to be careful. Loctite, a red or black marker, and two large adjustable wrenches.
So obviously you're going to want to jack up and secure your vehicle. You can just work a screwdriver in there to pry off your cap, and these are 19mm. If you don't have impact tools, loosen your lug nuts on the ground, then raise your vehicle and secure it with a jack stand, and then remove the lug nuts. Once the lug nuts are off just pull the tire right off, and there's four bolts that basically hold the brakes on. There's one here 13mm, and one up here, and those just hold the calipers to this big bracket. There's also a 15mm bolt here, and a 15mm bolt right up here. We're just going to speed through removing those four bolts, and you pull the caliper up and off and you can wire tie it up top and then that bracket comes off with the 15mm bolts, and we'll pick it up from there.
This bracket then comes right off, and your rotor comes right off. You're going to want to take off this dust shield and its 8mm bolts. Remove this cotter pin with a pair of pliers. Needle nose usually works best but usually the best thing to do is just grab hold and break off the pin on this side. It's a 21mm bolt, and actually give it a good tug. It does come easy. We'll put our puller on there. Now you could just use a big hammer and pound this through, but we want be very careful. If you go that route, you don't want to mushroom the end of this, and then it actually won't go through your steering knuckle. Now really this is using the tie rod ball joint puller is the best way, and you'll end up tightening this up good, and pretty soon it will pop. There it goes. A couple of big adjustable wrenches here. I'll fast forward a little here as I try and mess with it to try and get the best angle to both get a good pull on the wrenches and still be able to see it with the camera.
So that's off so now I'll lock this one onto here. The new tie rod does come with a new nut here so what I'm going to do is mark really well where this nut was so that when I put the new one on I know to go right up to where I put the red marks. I'm going to put just a little bit of Loctite on here, some down here, and put the new nut on. You can tell pretty well where it was. What you want to take into account is if either this nut or the length of your new tie rod is any different, you want to adjust the position of this nut. So if your tie rod is a little shorter, you adjust it out a little bit, or if the tie rod was a little longer than your original adjust it back in. So that's about where my old one was.
Now I'll put the new tie rod on, and you want to make sure you hold this. You don't want this twisting because that is adjustment as well, and if you do this this should give you a pretty good initial alignment. I recommend you go get an alignment so you don't wear out your tires too quickly or end up wearing out the new tie rod or wearing out your ball joints or anything like that if you car's not aligned correctly. Start my bolt down here to hold this in place. Now I want to tighten the lock nut up here really good. So I'm going to now tighten up this nut to about 75 foot pounds, and tighten it up a little more to get that and get my cotter pin right through there. The cotter pin you just take it and yank it right around. Then last but not least we'll put in our grease fitting and take our pliers and tighten that up. It comes pre-greased, but you can fill it up with grease, and now we can put everything back together.
We'll kind of fast forward putting that brake shield back up and tightening up those three 8 mm bolts. We'll also fly through putting the brakes back together and your wheel back on. A couple of notes, again, you probably would want to get a alignment after you've done any steering or suspension work like this, and then also just the first time you drive your car just be very careful. You've worked on the brakes. You've worked on the steering. So make sure your car is stopping before you go fast, and make sure that there is no looseness or anything in the steering before you road test it.
If you do want to see putting your brakes back together in regular motion, just check out our front brake video. We'll put the wheel back on. Put your lug nuts on. Get them snug then lower your car to the ground. Torque them up to 90 to 100 foot pounds. Replace your cap, and you're in business.
We hope this helps you out. Brought to you by www.1AAuto.com, your source for quality replacement parts and the best service on the internet. Please feel free to call us toll free, 888-844-3393. We're the company that's here for you on the internet and in person
Shop Products


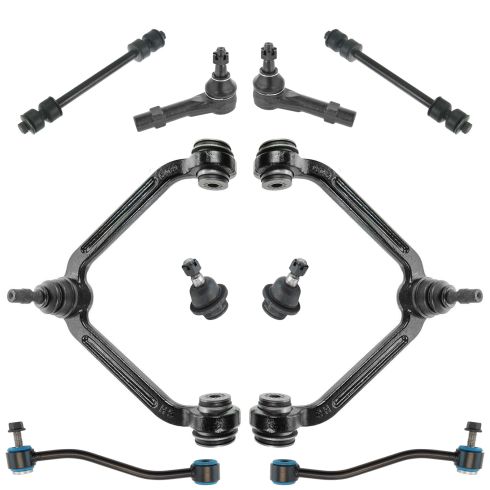
2001-05 Ford Explorer Sport Trac Front & Rear 10 Piece Steering & Suspension Kit TRQ PSA63432
Part Details:
- (2) Front Sway Bar Links
- (2) Rear Sway Bar Links
- (2) Front Lower Ball Joints
- (2) Front Outer Tie Rods
- (2) Front Upper Control Arms with Ball Joints
- 10 Piece
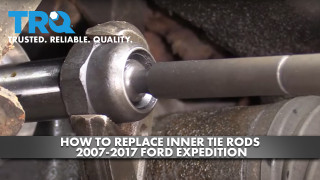
How to Replace Inner Tie Rods 2007-17 Ford Expedition
This video shows you how to replace the inner tie rods on your 2007-2017 Ford Expedition.
