How to Replace Throttle Position Sensor 1997-2003 Ford F-150
Created on: 2017-06-29
This video will show how to remove the air intake to access and replace the throttle position sensor to the 97-03 Ford F-150
-
step 1 :Removing the Air Intake
- Remove the two 10mm bolts from the throttle body cover
- Lift the cover
- Loosen the hose clamp on the air intake near the throttle body
- Disconnect the breather hoses
- Lift the intake tubing
- Loosen the latch on the housing
- Disconnect the two sensors on the air intake
- Lift the air intake up and out
-
step 2 :Removing the Throttle Position Sensor
- Remove the box in front of the sensor
- Disconnect the wiring harness
- Remove the two Phillips screws
- Remove the sensor
-
step 3 :Installing the Throttle Position Sensor
- Place thread sealant on the screws
- Insert the screws to the sensor
- Insert the sensor into place
- Tighten the two Phillips screws to the sensor
- Connect the sensor wiring harness
-
step 4 :Installing the Air Intake
- Insert the air intake into place
- Close the housing hatch
- Connect the two sensor
- Connect the two breather hoses
- Tighten the hose clamp to the air intake hose
- Place the throttle body cover over the throttle body
- Tighten the two 10mm bolts to the cover
Tools needed
-
Flat Blade Screwdriver
Phillips Head Screwdriver
10mm Socket
Ratchet
Hi, I'm Mike from 1A Auto. We've been selling auto parts for over 30 years. We're dedicated to delivering quality auto parts, expert customer service, fast and free shipping, all backed by our 100% satisfaction guarantee. Visit us at 1AAuto.com, your trusted source for quality auto parts.
I'm going to remove this cover. Two 10-millimeter bolts on this side and one over on the passenger's side. Remove those with a 10-millimeter socket and ratchet. Loosen the throttle body clamp with a flat blade screwdriver, and you just kind of pull up and down on it that whole ducting. There are tubes that go in the side. Once you pull it off the throttle body, you can twist a little bit and pull those tubes free.
Clamp for the air filter, pull that off. There's two connectors, one easy to see here. Press down on the tab and disconnect. You may press on the tab. Use your screwdriver, pry a little bit, help loosen it up. Connectors off. Then, there's another connector. Pres the tab and disconnect, and the intake tube comes up and out. You want to move this little intake box out. Just twist and pull, and then throttle position sensors right in behind. Remove the lead by pressing on a tab. It's held in by two Phillips screws. These screws, you may want to, maybe a good idea tap in the screwdriver in, tap with a hammer. Then, turn counterclockwise and tap with the hammer at the same time to get them loose.
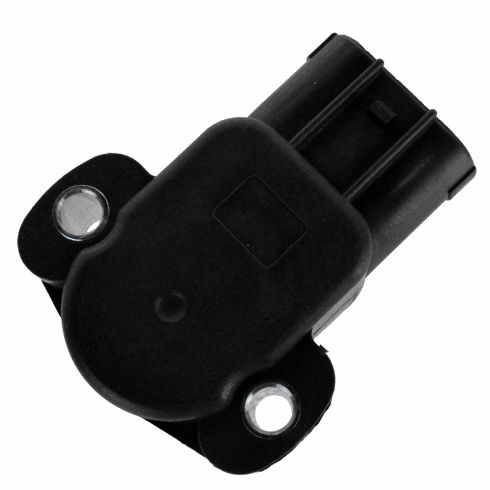
Here’s the old sensor from the vehicle. Here’s the new sensor from 1A Auto. You can see they're exactly the same dimensionally. It's going to bolt in and go in. If you're getting bad readings to your engine from your throttle position sensor, then this will fix your problem.
For reinstalling, put some thread sealant on the screws. Tap on in. Put the sensor in place. Make sure it goes on to the arm inside, and then put your two Philips screws back in again with some thread sealant and tighten them up. Got on nice and firm, and then reconnect your lead.
Put your air intake in place. In place over here, tab winds up there and this clamp goes on. Just reach down, make sure nothing's getting pinched. Lock that down into place and that's your flow connection, reconnect it, reconnect this connector. Then, put this back in here, tube down there goes in, in there. Flat blade screwdriver to tighten up the clamp that holds it onto the throttle body. Put the tall body cover back in place. These fit kind of… Move it around a little bit. Figure out where the bolt hole is on that. I'm actually cheating. Just looking right through here. I can see there. Start it up, and then push this side down into place. Start my two bolts over there, and then tighten them up.
Thanks for watching. Visit us at 1AAuto.com for quality auto parts, fast and free shipping, and the best customer service in the industry.
Shop Products

How to Replace Throttle Position Sensor 2000-03 Chevy Suburban
This video will show how to remove the alternator and the throttle position sensor to help you safely replace it yourself
