How to Replace Throttle Body 2014-19 Chevy Silverado
Created on: 2019-05-30
Watch this video to learn how to remove and install the throttle body on your 14-19 Chevy Silverado
-
step 1 :Removing the Throttle Body
- Disconnect the battery negative cable with a 10 mm socket
- Loosen the worm clamp connecting the intake snorkel to the intake air filter box
- Loosen the worm clamp connecting the intake air box to the throttle body
- Disconnect the hose on each side of the intake air box
- Remove the intake air box and snorkel
- Disconnect the throttle body electrical connector
- Remove the four 10 mm bolts securing the throttle body to the intake plenum
- Remove the throttle body carefully, as the electric components are delicate
- Remove the four 10 mm bolts
-
step 2 :Installing the Throttle Body
- Check and clean or replace the throttle body gasket on the intake plenum
- Mount the throttle body on the intake plenum
- Secure the throttle body with the four 10 mm bolts
- Torque the four 10 mm bolts to 89 in-lb
- Reconnect the throttle body electrical connector
- Reposition the intake air box onto the throttle body
- Slide the snorkel onto the intake air filter box
- Tighten the worm clamp on the throttle body
- Tighten the worm clamp on the air filter box
- Reconnect the two hoses to the intake air box
- Reconnect the negative battery cable and tighten it with a 10 mm socket
-
step 3 :Setting the Idle Relearn
- If you have a capable scan tool, you can set the idle relearn with the tool.
- If you don't have a scan tool:
- Start the vehicle and let it run for three minutes
- Shut the vehicle off and let it sit for one minute
- Start the vehicle and let it run for another three minutes
- Rev the engine to see that it is responding properly
- Drive the vehicle around a parking lot and if it feels safe take it on a road test
- If the vehicle is not idling properly you can take it on the road and do a series of acceleration and deceleration for about 10 minutes
- Then, shut off the vehicle and let it sit for a while, and clear any codes, and try again
Tools needed
-
Socket Extensions
Flat Blade Screwdriver
10mm Socket
Ratchet
What's up, guys? I'm Andy from 1A Auto. In this video, I'm going to show you how to remove and reinstall a throttle-body on this 2015 Chevy Silverado. If you need parts for your vehicle, click the link in the description and head over to 1aauto.com.
I want to disconnect the negative terminal on the battery. I'm going to use a 10-millimeter socket, extension, and a ratchet. Loosen this up. Grab the negative terminal. Slide it off and set it aside so it doesn't arc out by accident. Loosen up this worm clamp right here. Also, over here, there's a worm clamp back here near the throttle-body. Loosen this one up with the same straight blade screwdriver. I'll take this snorkel off this side off the air box. And over here there's two pipes on each side.
There's this little gray lock that you have to push down on the lock and then slide it out. Just like that. You have to do the same on the other side. This one, I'm pushing up from underneath and slide it up. And I can grab this and just slide it back. Wiggle it a little bit and the whole thing comes up. Disconnect this connector on the throttle-body. I'm just going to use a straight blade screwdriver. Push out on that lock. And then push down and pull the connector out. Just like that.
And I'll take a 10-millimeter socket, extension, and a ratchet. Take these four bolts out. I'm just going to leave these two bottom ones in slightly. And then take the other two out. I could do the top two slightly, either one. It's just so the throttle-body doesn't fall when I take these other bolts out. Support the throttle-body while you take the other two bolts out. And just grab it and pull it out.
All right. So, with the new electronics, you want to be careful with this. You don't want to drop it. These are very sensitive. If you drop it, generally, you have to replace the throttle-body. Now, you really don't want to take any cleaner to clean this out. You can, you just got to be careful. You don't want any of the cleaner to get into the electronics. You really don't want to be playing with the throttle blade, opening and closing it.
You definitely do not want to touch those two screws. Because if you loosen those up, the whole thing's going to be junk. It's a good idea to replace this throttle-body gasket. Or at least check it and make sure it looks like it's still raised up. If it's crushed at all, it definitely needs to be replaced. Ours looks okay. So, we'll take our throttle-body, take the screws, or the bolts. Get the bolts started. I'll get one started up top and then one down below.
Then we'll take a 10-millimeter socket, extension, and a ratchet and tighten these down. Now I'm going to torque this with a torque wrench with a 10-millimeter socket to 89 inch-pounds. Now we're going to slide this into position. Now there's a little bracket right here that's going to slide into that slot right there. So slide it on the mass on the throttle-body first. Get that lined up there. Now we can take and slide this on right here onto the air box. That's good.
I'm going to take a straight blade screwdriver. Tighten up this worm clamp right here on the throttle-body. And then tighten this one up as well. I'll take these hoses--these are going to clip in. Make sure they lock in place. The same on this side. Take the negative battery cable and hook it up to the negative side of the battery. I'm going to take a 10-millimeter socket, extension, and a ratchet, just snug this up. Grab the cable and just make sure it's nice and tight. Won't loosen up.
So, after you replace the throttle-body, or you pull the throttle-body out and clean it, what you're going to want to do is an idle relearn. Now, what you can do is if you have a scan tool, you're going to scan it. Clear the codes. And do an idle relearn if your scan tool does that. If it doesn't, you can do a manual relearn. What we're going to do is we're going to start the vehicle, let it run for three minutes. After it's run for three minutes, shut it off and let it sit for one minute.
After one minute, start it and let it run for another three minutes. At this point, make sure the check engine light is not on. If it is on, you're going to have to clear the code again. But, I would, with the engine running, accelerate and see if the RPMs are responding properly. If they're responding properly, drive around a parking lot, make sure it's good and safe. And then take it out on the road. Make sure it rides on the road safe. If it's still not idling properly, what you need to do is drive it around at about 44 miles per hour. You need to do a bunch of accelerations and decelerations, multiple times for about 5-10 minutes, I would say.
And then bring the vehicle back and shut the vehicle off. Let it sit. Clear any codes that are present. And then try it again. Make sure the idle is working properly and then you'll be good to go.
Thanks for watching. Visit 1AAuto.com for quality auto parts shipped to your door. The place for DIY auto repair. And if you enjoyed this video, please click the subscribe button.
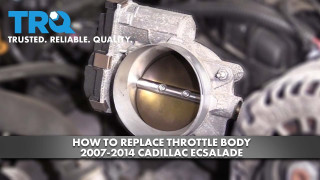
How To Replace Throttle Body 2007-14 Cadillac Escalade
Watch this video to learn how to install a new throttle body assembly in your 2007-14 Cadillac Escalade.
