How to Replace Tensioner 2007-09 Toyota FJ Cruiser
Created on: 2019-08-09
Learn how to replace the serpentine belt tensioner on your 07-14 Toyota FJ Cruiser. 1A Auto makes it easy with step by step instructions!
-
step 1 :Removing the Coolant Reservoir
- Remove the four 12 mm bolts to remove the rearward skidplate
- Remove the four 12 mm bolts to remove the forward skidplate
- Open the radiator petcock to drain the coolant into a drain pan
- Remove the radiator cap
- Remove the two 10 mm nuts to remove the engine cover
- Remove the push pin retainers to remove the radiator cover
- Remove the coolant reservoir cap
- Remove the three 10 mm bolts to remove the coolant reservoir
-
step 2 :Removing the Radiator Fan and Shroud
- Loosen the upper radiator hose clamp, and remove the hose from the radiator
- Loosen the four 12 mm nuts securing the fan to the water pump pulley
- Use a 14 mm socket to twist the serpentine belt tensioner counterclockwise to relieve belt tension
- Remove the serpentine belt from whichever pulley is easiest to reach
- Release the belt tensioner
- Remove the four 12 mm nuts securing the fan to the water pump pulley
- Separate the fan assembly from the water pump pulley
- Remove the hoses from the retaining bracket on the driver side of the fan shroud
- Remove the two 10 mm fan shroud bolts
- Remove the fan shroud and fan assembly
-
step 3 :Removing the Belt Tensioner Assembly
- Remove the serpentine belt
- Remove the water pump pulley
- Remove the 14 mm bottom alternator bolt
- Remove the 10 mm AC line bracket bolt below the crank pulley
- Remove the three 12 mm AC condenser bolts
- You may need to remove the driver side wheel to reach the third AC compressor bolt
- The AC condenser should not be removed
- Remove the 14 mm upper alternator bolt
- The alternator does not need to be fully removed
- Remove the five 14 mm belt tensioner assembly bolts
- As you remove the bolts, insert them into the corresponding position on the replacement tensioner assembly to maintain the correct position
- Remove the belt tensioner assembly
-
step 4 :Installing the Belt Tensioner Assembly
- Install the belt tensioner assembly
- Install the five 14 mm belt tensioner assembly bolts
- Position the alternator and install the top 14 mm alternator bolt
- Align the bottom of the alternator and install the bottom 14 mm bolt
- Reposition the AC condenser and install the three 12 mm bolts
- Reinstall the 10 mm AC line bracket bolt
- Position the water pump pulley onto the water pump studs
- Reposition the serpentine belt without tightening it
-
step 5 :Installing the Radiator Fan and Shroud
- Reposition the fan and fan shroud
- Install the fan assembly onto the water pump studs
- Install the four 12 mm fan bolts
- Use a 14 mm socket to twist the serpentine belt tensioner counterclockwise to relieve belt tension
- Set the serpentine belt on the remaining pulley
- Release the belt tensioner
- Apply additional pressure on the belt by turning the tensioner clockwise
- Tighten the 12 mm fan nuts while maintaining pressure on the belt
- Seat the fan shroud into the radiator mounting tabs
- Install the two 10 mm fan shroud bolts
- Reinstall the hose retaining bracket into the fan shroud
- Reinstall the radiator cover and secure it with the push pin retainers
- Reconnect the upper radiator hose to the radiator
- Reposition the upper radiator hose clamp using the grooves in the hose to guide its placement
-
step 6 :Installing the Coolant Reservoir
- Reposition the coolant reservoir
- Reinstall the three 10 mm reservoir bolts
- Install the reservoir cap and connect the hose to the radiator
- Install the engine cover inserting the rear tabs first and then lowering it
- Secure the engine cover with the two 10 mm nuts
- Position the rearward skidplate using the mounting hooks
- Install the four 12 mm skidplate bolts
- Position the forward skidplate using the mounting hooks
- Install the four 12 mm skidplate bolts
-
step 7 :Refilling the Coolant
- Refill the coolant system using a coolant funnel
- Run the engine until the fan comes on to fully burp the coolant
- Remove the coolant funnel, and close the radiator cap
- Fill the coolant reservoir to the max line
-
step 8 :Installing the Wheel
- Slide the wheel onto the wheel studs
- Replace and tighten the 21 mm lug nuts by hand
- Lower the vehicle with minimal weight on the wheel
- Torque the lug nuts to 85 ft-lb in a crossing pattern
- Lower the vehicle completely
Tools needed
-
12mm Socket
Socket Extensions
Torque Wrench
14mm Socket
Pry Bar
Jack Stands
19mm Socket
Trim Tool Set
Pliers
Coolant Funnel Set
Flat Blade Screwdriver
10mm Socket
Ratchet
Floor Jack
Hey friends, it's Len here at 1A Auto. Today, we're working on a 2007 Toyota FJ Cruiser, and we're going to be doing the serp belt tensioner. It's going to be a fairly easy job. I want to be the one that shows you how to do it. If you need this, or any other part, you can always check us out at 1AAuto.com. Thanks.
Okay. Going to remove both these skid plates. Using my 12 millimeter. Can use a ratchet, can use an airgun. Whatever you have access to, obviously. Air gun's a little bit quicker. There's four bolts, so I got three of them. I'm going to have one left here, so that means the skid plate's going to be ready to come down. So I'm going to get ready to hold that as soon as I get this on. There we are. Grab the skid plate, get that out of the way and set it aside.
So we'll do the forward skid plate now. There should be four bolts in this as well. One here, one there, one should be there, it's imaginary, one there also imaginary. On the front of this it has little hooks that go into the frame right here is one. Then the other one's right here. So, what you would do is you would start with the forward ones, take those out and then you work your way to these, okay. Once you remove these the skid plate can come down this way towards you, or towards the front. So you want to be careful for your face, but the hooks are going to make it so it can't completely fall straight down.
Okay. Bring it down and then slide it out towards the front of the vehicle. Should want to slide right out here. Just get this hook off of there. There it is. So here's the hooks I was talking about. They just go right up inside here.
Okay. Now that we've removed the skid plate we can access the petcock, which is right here. This is the drain for your cooling system. You want to, of course, make sure you drain it into a proper recycling receptacle so you can dispose of it properly. Wear your safety glasses and your hand protection. Just going to go ahead and turn that to the left till fluid starts coming out. There we are. All right. We'll let that completely drain out and then we can continue with our service from the top.
Okay. Now we've got that draining I'm just going to open up this radiator cap right here. We'll take a look at it. This one looks like it's original. It's been on there for awhile. I'm going to go ahead and replace this. I'll set this aside for now, though. So now I'm going to remove the cover right here. I'm going to use a 10 millimeter. Set those aside. Lift this up, pull it towards you, slides right off. We'll set this aside.
Okay. Next step we're going to remove these little push clips. Something as simple as a small pocket screwdriver will do that. What you do is you lift up the center part that unlocks these ears. Then you can slide it up. We'll set that aside. Do the same for all these push clips. There we are. All the push clips. Grab this out of the way, we'll set it aside.
All right. Get this off of here. That gives us access to get to right here. Use a 10 millimeter. One bolt. Set this aside. Grab this one. Bolt number two, same as number one. Set it aside. We have our last bolt right over here. Continuing with our 10 millimeter. Number three, same as the other two. Can't mix those up. We'll grab our reservoir, we'll set this aside.
We're just going to remove this hose. There we are. Set this aside.
We're going to remove this clamp right here. Shake it around a little bit, get it to break free. These pliers are great, except getting the exact right size for things sometimes can be a pain. Slide it down the hose. You're going to grab your hose, give it a little wiggle. If it doesn't seem like it wants to break free, this one almost kind of looks like it will. Yep, it's coming off. Okay. We'll set that aside. You can check your hose, make sure you don't see any dry rot cracks in there when you squeeze it. This hose still looks decent. Set it aside.
Okay. So what we're going to do now, we're going to try to remove these nuts right here. Okay. What I'm going to do first, though, is I'm just going to try to loosen them all up. Once I loosen them all up I'm going to remove the serpentine belt. These right here are 12 millimeter nuts. So you just take your wrench while the belt's still on. Set it on there, just give it a little shake to break it free. If you go slow it's just probably going to spin the pulley. So you just got to really kind of jam onto it. Try to snap it free, okay. Like I said, you don't want to fully remove these nuts. If you fully remove the nuts the pulley's going to be able to shift and it might throw the belt off. So, keep that in mind.
Okay. Got all four of those loose. Now we're going to go ahead and remove the serpentine belt. We'll get that out of the way and we can continue.
So, to get to the tensioner pulley which is located directly to the driver's side of the water pump pulley, or the fan clutch pulley, just going to go right here with your 14 millimeter socket. Lift up on it, that relieves tension on the belt. Take the belt off of whichever pulley you can easily reach, for me it was the power steering pump. We'll get our tool out of here. Okay. So now we have no tension on this. We can go ahead and take out all four of these bolts, or nuts I mean. That's what they look like. We'll remove all these and we'll move onto the next step.
Get our last nut off of here. Set it to the side with the other three. Now we can grab our assembly, pull it right off. Here we are. Set the fan aside. There it is. Cool. Now we'll move onto the next step.
We'll just remove this right here. That makes it so these hoses will come off of the fan shroud. There we are. Now those won't be holding us up. We're going to remove a 10 millimeter right here. That's what it looks like. We'll set this aside. Okay. We're going to remove the 10 millimeter on the other side of the engine, or the other side of the radiator. See if I can remove this. Same as the first. I'll put both of those together. Be easy to remember how they go together. We can grab our fan shroud and our fan assembly. We're going to pull them both up at the same time. Pull our fan assembly out, and there we are. There's our fan assembly. Okay. Grab the shroud. We'll remove that. Easy peasy.
So let's get this belt completely off of here. Just going to grab it. Take it like that. It's a good idea to have a picture of the way that this was on prior to taking it off. It's going to be a little easier. Get that pulley off of there. Nasty. Talk about that in a second. Okay. There's our serpentine belt. Cool.
So this is the back side of the water pump pulley right here. All these pink crusties that you see all around everywhere, and even the muck that's in there, that's from coolant. Okay. When the coolant dries up it turns into crusties, we got it all along the bottom side of the water pump there. This water pump is definitely no good. That means leaking out of a seal and under pressure the coolant's seeping out. So we're going to go ahead and replace this water pump.
So right down here, let's see if I can find it. Right there, that's our bolt that we're going to remove that I was telling you goes to the bottom of the alternator. 14 millimeter with an extension, 3/8 ratchet will get it done. You can use an air gun if that's what your preference is. It's completely up to you. Okay. Get this bolt out of here. That's what it looks like. We'll put this aside safely, and we'll move along.
So right here we have a little 10 millimeter headed bolt. That just holds this AC line in so it's nice and secure, can't move around. But, we're going to be removing the AC compressor, or not removing it but essentially unbolting it, unsecuring it. Kind of setting it aside so we need to have more slack here. So I'm going to remove this and that's going to give us some flexibility because we have our hose up there. Of course, these are pressurized lines so you don't want to put together much pressure on any of this stuff. So just bear that in mind when you're doing your work. Of course, don't disconnect any AC lines unless you have proper machinery. There's our bolt. There's our slack. Very cool, all right. Let's move ahead to the next step.
So the AC compressor to get it unsecured from the vehicle there's three bolts. There's one located up top, all the way up there. Then there's two along the bottom. There's one towards the front of the AC compressor right here. Then there's one towards the rear of the AC compressor pretty much lined up with it. Three bolts total, we'll have that unsecured from the vehicle. We can maneuver it a little bit.
Oh, yeah. 12 millimeter, short extension and I'm only using a 1/4" ratchet just because it's nice and small. I can get in here with it. Okay. Got that one pretty much loosened up here. I can grab it with my hand. Yeah. Just going to pull it out, I'll show you what it looks like, then I'm going to put it back in a couple threads. It's nice and long. That's what it looks like. Okay, just going to put it back in. Seems a little counterintuitive, but if you're just removing it and you don't need to see what the bolt looks like you can just leave it in a few threads. That's just so when we remove the lower ones the compressor can't come falling down, potentially hurt our hands by crushing them or anything like that, okay. We want to make sure you're safe.
I'm going to go for the next hardest one, which is all the way in the back there. Just reach my ratchet back with my 12 millimeter. Try to get it on the bolt. That's a tight one. Okay. So I got that one lose. Just going to break this one for you real quick, then I'm going to grab like a swivel and a longer extension and I should be able to get that rear one out a little quicker a different way now that it's broken free. Okay. Feels like it's nice and loose. Just going to get my stuff off of here. Okay. There we are. That bolt's ready to come out.
So here we go friends. I've got the vehicle supported off the ground. The wheel is just barely touching. So the majority of the weight is off of the wheel. I'm going to use my 21 millimeter socket and a long breaker bar. I'm just going to break all six of these lug nuts free. I don't want to loosen that up too much. I don't want to damage my studs by the wheel cocking off to the side or anything. There we are, all six. Now we can raise the vehicle. We'll make sure it's safely supported. We'll take off all the lug nuts and remove the wheel.
One lug nut left, we're going to hold the wheel so it can't move around. Come on baby. There it is. Set these aside and remove our wheel. Set it aside so it's safe.
So right down in here is where the last bolt is. That's a super long bolt. We're just going to leave it in the AC compressor. All right. Now since we're in here I'm just going to fully remove the forward bolt that we had in a couple threads. It's a little easier to get through, through here. Here we go, AC compressor can move around. At this point you want to be super careful not to break any of those lines, okay. It's compressed gas in there, if you do end up loosening any of them or breaking any of them or anything like that just clear the area and call the proper authorities, because it is a hazardous material. All right. Cool beans. Let's move along.
So, on the upper part of the alternator you have a 14 millimeter head bolt right there. I'm just going to put my ratchet and my 14 on there. Turn it to the left to break it free. Whoops. See if that's going to help me at all. Feels like a no. Bottom bolt's out. Okay. All right, so it really doesn't look like there's too much holding that so I'm going to grab my pry bar try to come from underneath. Just going to see if I can get that alternator to pivot at this point. Which it does, so that's nice.
So right along the bottom of the alternator you've got your rearward ear. You can see it with my little green tab. On that ear there's a little bushing. That bushing right there pulls in and goes up against the bracket when you tighten up your lower bolt. What we need to do now, spray this with some penetrant. Then use some sort of pry bar, or screwdriver, or whatever you've got and we need to drive that back through a little bit so it comes away. That's going to give us movement for when we put the alternator back in it'll slide in nice and easy. So I'm going to grab some penetrant, and my pry bar, and a small hammer and we'll give it a couple bonks.
So I've got a pry bar, my hammer. I'm going to go right up against that bushing. If I had a shorter pry bar with the hammer tip on it I would totally use that. But this is what I've got that has the hammerable end on it, so. Okay, let's see. Looks like we need to go a little further with it. So I'm going to try to come at an even harsher angle here. I need that to go in. All right. Just keep giving it a couple bonks here. Here we go, that did it. Very nice.
Now I'm going to go ahead and remove the upper bolt with my 14 millimeter wrench. You can continue with your ratchet and your socket, or whatever you want to do. But you're going to use a 14 millimeter to remove this bolt. Okay, bolt's ready to come out. Here we are. It's the upper alternator bolt. It's got a washer, doesn't come off so you can't lose it. We'll set this aside. Cool. All right. Now we can move the alternator around quite a bit. We need to pull it off of the lower area. If you're like me and you couldn't get that bushing to push back, well, it kind of isn't best but we'll just make due with what we can here.
There's wires going up here so you want to make sure that as you're pulling on this you're not really putting too much of a tug on anything. Obviously, I probably don't have to tell you too much about that. But essentially we need the alternator to come off the lower bracket which is almost there at this point. There we are. Cool. So now with the alternator off the bracket I can see the bolts for our tensioner.
So we're going to go ahead and remove those. So here's where the lower part of the alternator was. That's where we just pried the alternator off of, right. So now we have access to where our bolts are. We can see this one, this one, and this one, right. Easy peasy. Then these two right here they're still kind of hidden by the AC Compressor but if we move it around we should be able to get to those.
So I'm going to start with the upper bolt here. That's all the way up at the top of that tensioner assembly. Try and get that to break free. There we are. Cool. I'm going to remove this bolt. Once again this is the upper bolt on the tensioner assembly. 14 millimeter. That should be almost ready. There we are. That's the upper bolt. Goes through the top portion of the tensioning unit. I'm going to grab the tensioner. Just like that. I'm going to leave it in the new one so I know where it is.
We have our other two bolts. Just move the AC compressor a little bit. I can get to that one okay. Right down through here. It's on there. I'm going to switch to my air gun. It's just the 3/8 air gun. As you can tell, it's much quicker. Grab that bolt real quick. There it is. Super short. Right there. Okay. This one's a little harder to get to. See if I can finagle the AC compressor. Come in over it, then right down like that. There we are. Bolt number three, same as bolt number two. Okay. Easy peasy.
We have two more bolts left. Those two I'm going to get from underneath, and I should be able to shift this AC compressor out of my way to be able to get to them. So our other two bolts are right up in here. So to get to those we're just going to have to try to pry our AC compressor away. So, use your pry bar, or whatever you've got, just try to wedge it in there. If you can get it wedged in that holds it away and now we can get to our bolts. We have one bolt, here's my thing right inside this. The second one, come back it's right there. 14 millimeter, 14 millimeter, pop it off. Okay, easy peasy.
Last bolt, or rearward lower bolt coming out. There it is. You just have to use whatever you can to move the compressor around to get it so you can get to the bolts, okay. We'll set this aside and we'll go ahead and get that last bolt out of there. Let me see if I can get my 14 millimeter. Okay, there's our bolt. It's ready to come out. Probably going to fall. Okay, there we are. Grab our tool. Last bolt, we'll set that in the tensioner. There we are. One, two, three, four, five.
See if we can get that tensioner to break free here. Alternator's still resting on it. There we are. They put plenty of stuff in the way here. There's our tensioner assembly.
Okay, friends, quick product comparison for you. Over here we have our tensioner out of our 2007 Toyota FJ Cruiser. Over here we have our quality 1A Auto part. They're both the exact same, okay. We've got one, two, three, four, five mounting holes. One, two, three, four, five mounting holes. We've got the area for where our alternator goes on. Same. Three holes right here for the compressor, and of course we have the fourth hole in the engine. One, two, three holes there for the compressor. We've got everything we need on our brand new tensioner assembly. With that said, I don't see any reason why this wouldn't be a quality part to install into the vehicle, so I'm going to go ahead and do it.
If you need or any other part you can always check us out at 1AAuto.com. Thanks.
Okay. So now if you wanted to you could go ahead and transfer over the bolts from inside our new assembly to the old assembly. Just so you know where they are when you're reinstalling. But it's actually pretty easy. You don't even have to do that because this, this, this and this are all the same size bolts. This one right here is much longer than the others. So, as long as you remember that the one that has this large area right here has a long bolt in it you're pretty much good to go. Okay. Even if you tried to do it wrong ... Well, I'm sure you could figure it out.
I just wanted to let you know, transfer them over if you're worried about forgetting. If you're not worried about forgetting because they're all the same and you've got one long bolt, then just go ahead and you do you booboo. Just take them all out.
So we've got our tensioner assembly. We're just going to get it back up in here. Just like this, okay. It sits with the carving facing towards the driver side. That's where the AC compressor's going to sit. Just get it back up into its location. Just have to do a little bit of maneuvering, move some stuff around. Do whatever you got to do to get it back into its spot, okay. Your situation at this point's probably going to be a little bit different than mine because it depends on where everything's resting for you.
Mm-hmm. Very nice. So, now we're going to get all these bolts started before we tighten any of them down. So you're going to grab all five of your bolts. Start them in, at least a few threads, once they're started in you can go ahead and bottom them out. Then we'll try to tighten them up.
Okay, I've got my long bolt, which is the top bolt, getting ready to go up. It's going through the tensioner assembly and starting into the engine at this point. I'm starting with that one. It's pretty hard to get to so I figured why not. All right. Now I'm just going to get the rest of these started and move along.
Just keep turning, just keep turning. This is the last bolt. All of them at this point are started. So I'm going to go ahead and tighten this down. I'm going to grab the torque spec real quick, and any bolts that I can reach with the torque wrench I'm going to do that way. The ones that I can't reach with the torque wrench I'm just going to try to get it as close as possible.
Okay, they're all started. We're just going to snug them up. There's one. All right. Let's move ahead and do the rest of them real quick. All right, all the bolts are started so we're just going to go around and tighten all five bolts. The four shorter ones, and the one longer one up along the top. It's bottomed out. Just give it a little bit more, and that's it. Make sure you count all five. That's one. Okay. There we go, that's our last one here. Nice and tight.
Okay, all five bolts of the tensioner assembly are nice and tight. We're clear to move ahead to the next step.
All right, we have our upper alternator bolt here. What we're going to do is we're going to lift up the alternator, bring it up to this area right here. Then we're going to put our bolt through and that's going to hold the alternator up and away so we can get the AC compressor in and mounted. So I'm just going to lift this up. See if I can give it a little twist. There we are. All right, I'm just going to grab my 14 millimeter. I'll start that in a few more threads here. We'll tighten it up after.
So right here on the alternator is where the lower bolt's going to go. That's going to go right through the tensioner assembly. So you just want to try to line up those holes. Just give it a little wiggle. The tensioner assembly has like a block, we'll say it's a solid block like this, right. Has a hole through the middle. But anyway, the alternator has got those two ears. So what we're looking at from the front is this ear with the hole, we're trying to slide it but if you remember we were trying to push back the bushing that was on this side and it didn't really want to push back, right. So what we're trying to do now is just slide those two over and it's very close. They're, like, super close to where they're going to connect to the tensioner. So it's just going to give us a little bit of an issue. We'll give it a try. Just give it a couple loving bonks and see if we can get it in there. Yeah. Let's do it.
Looks like it's starting to go. I'll just show you the ear that I'm going on here. Right up along here. I'm just trying to give it a couple bonks down. As I bonk it down it should be trying to twist the alternator into its position. If we could get that bushing pushed back like we originally tried to this would just drop right in easy peasy. But, nothing's ever easy. Keep on bonk.
Got our upper bolt. Just going to install it. Okay. Get my 14 millimeter extension, and a ratchet of course.
Since we have the other one already started I'm just going to go ahead and tighten this one right up. Okay, it's bottomed out. Just give it a little bit. Now we're going to tighten up the top. Same thing.
Okay, bottomed out. Little bit more just so that we know that it's nice and snug. Cool. Grab that, off we go. Next step.
So right on the bracket for the tensioner they've got these little ears. That's where your AC compressors going to sit onto, okay. So once you lift it up into the general position of where it's going to go those ears are going to help you hold it up there. So, the hard part is getting it up there. There we are, now I'm just going to hold it with one hand. I'm going to maneuver it around and push on the upper bolt until hopefully it goes into on of its holes. Or, its hole not one of its holes, it's one. We don't want a hole it goes into. Use my 12 millimeter, short extension. My 1/4 inch ratchet. Just going to see if I can get this bolt started. Once I have one bolt started at least a few threads I'll move along and I'll start doing the other three bolts.
Okay, we've got a few good threads. Just going to get this off of here. Give my compressor a wiggle and make sure that it is actually started in. Awesome. Now we're going to start the other three bolts. That one in there. That one in there. Get that top one back there. This bolt's easiest through the wheel well. 12 millimeter, 1/4 inch ratchet. This one here. Okay, snug. Tight. All right, let's do the two lower. Okay. Bottomed out. Just going to go ahead and snug it up now, just give it a little bit. Come on baby. Oh, yeah. Tight. Okay, last bolt. Okay. Bottom, little bit more. That's it. All four bolts are nice and tight. Let's move along to the next step.
Okay, so we've got our bolt that holds the bracket for the AC line to the engine. Just a small 10 millimeter headed bolt. Start it right in there. Use my 10 on my 1/4 inch ratchet. I don't need too much pressure on this. Once I bottom it out I'm just going to give it a little extra and that's it. Okay, bottom. Tight. Let's move along to the next step.
Okay, so I just wanted to show you the inside of the water pump pulley. As you can tell the water pump was leaking for quite a while. We got a lot of crusties in there. We want to go ahead and clean that up the best we can before we reinstall. We definitely want to make sure the surface along the back right here is nice and clean. That's where it's going to go up against the new water pump. So, we'll get this cleaned up then we'll move along to the next step.
Okay. So we got the inside of the pulley cleaned up as well as we can. You don't have to spend all day doing it or anything. But as long as you don't have too much crusties in there, and the area where it connects to the water pump is nice and clean you're doing all right.
Something else to pay attention to is the ribbed area of the pulleys. A lot of times you'll see some gunk in there, okay. Just use a small brush like this and a little bit of parts cleaner. Generally speaking you can get the majority of it out of there. As long as it's clean for the most part, of course wear some safety glasses and everything. You're doing all right, okay. If you have any big chunks of anything in there you want to make sure you get them out. You're also going to check the rest of your pulleys. Anything that has the ribbed areas, like these right here. You can see its got crud in there, falls in when we're working. You want to make sure you get it out of there, okay. So any of these pullies that have ribs just make sure you get out as much crud as possible. I'm going to go ahead and do that real quick and then we'll move along to the next step.
So we'll just get this on here, just like that. We'll have it sitting there. Now we're going to move ... Okay. So we get the belt coming around. Goes around this pulley right here, idler. Underneath the water pump pulley. Up over the top of this idler. Around your power steering. Then up completely over the top and over. From the bottom you go under the crank. Up over the lower pulley, lower idler pulley. Around the AC. Up over the alternator there. Then it goes under that one, and then across the top of the water pump.
Okay. So now that we've got everything so it's semi lined up, we can't, obviously, put it on completely yet because we have to get the fan on here. Then we can use the tensioner and put the belt on. But we got it all semi lined up. So it looks like we should be good to go to continue on to the next stop.
Okay. It's time to install our cooling shroud and fan. I'm just going to get the shroud so it's down in there waiting for me. I'll get my fan lined up. Let's see, I'm going to try and pull it away is you can hopefully see a little bit. Get that down in there. There we are. Okay, I've got four of these nuts right up here. So, I'm just going to ... I'll get them started on. We'll tighten them down in a minute. There's one.
I'm going to use my ratchet with my 14 millimeter. I'm going to maneuver the tensioner so it releases tension on the belt. Gives me more slack essentially and I can put my belt over all my pullies. I'm just going to get my ratchet out of here. Before I go any further I'm just going to double check to make sure the belt's on all my pullies. Beautiful. Okay. Keep going with my double checking here. All right. At this point without starting up the vehicle it looks as though I'm on all my pullies. We'll double check it again after we have a chance to start the vehicle. We can move ahead to the next step.
Okay. Using our same 14 millimeter socket and ratchet that we were using we're going to go back on the tensioner. We're going to apply opposite pressure. I'm pushing down at this point, that's applying pressure to the belt and it's going to prevent this pulley from spinning while I tighten up these nuts. Nice and tight. All right, it's nice and tight. Get this one, nice and tight. There we are. All four are nice and tight. We can move along to the next step.
Okay, it's time to get this lined up at the bottom, right down here, you have a little hooky-do that comes off the radiator. Comes like this. Then, the shroud slides down in it like that. Okay. So you need to try to get the bottom pressed up against the radiator, and then slide it down into its little grove down there. Once it seems like it's in you can just go ahead and give it a little bonk, just like that. Little loving bonk makes the world go round. Over here, there we are.
Okay. Inside with the radiator you got these little square nuts here. They just go right inside these slots. Go right up in the top just like that, it slides right in the side. That just makes it so the bolt has something to go into. I'll do the same on the other side. Okay, got one of our bolts started in there. We'll leave it loose for the second, till I start this one. There we are. Once it feels like it bottoms out, like that, just going to give it a tiny bit more. Give it a wiggle, feels good. Do the same thing over here. You don't want to apply too much pressure on these because the radiator's plastic, right.
Okay. Bottomed out. Little more. Give her a nice wiggle. The bottom doesn't separate from the radiator, that means we did a good job getting the fan shroud into the little hooky-do's down there.
On this side over here we have that little clamp, or clip that held the hoses. So, just going to go like that. See if I can get it to plug in there. Here we are. That just makes it so they can't wobble around, go to far, cause an issue. Let's move along to the next step.
Okay. So we've got our little push clips here. You just want to take it while they're open, or the center's lifted out, push in the outer ring then push in the center. Okay, you can start from the center, you can start from one side. You do you booboo. Going to put that one there, I'll find it later. Grab that. See if I can push through the center. Some of these are in pretty poor condition. Maybe I'll get some and replace those. You can watch the video on that. There we are. Those are all in, can move ahead to the next step.
Okay, so we're going to take our hose, slide it back on right there. You want to make sure it's twisted to the point that it's going to line back up with your radiator the way you took it off. Okay, this is going to line up perfect. We'll grab our clamp, we're going to bring it right back down to where the grooves are from where the clamp was originally. You want to try to line it up as best you can. It was there for a long time, it likes it there. Bring that down. Give it a little tug, that feels good. Can move along to the next step.
Okay, I'm going to grab this clamp with my pliers, hopefully. There we are. Slide the hose over the radiator. Try and get my pliers on there, there we go. Bring this over. Give it a nice little tug. It's going no where. Can move ahead to the next step.
So here we go. We're going to install our coolant reservoir. Just line up the holes. We've got our three bolts. I'm going to start them all in before I go ahead and tighten any of them down. There we are. We'll tighten these down. Again, start with the hardest one to get to because why not. Feels like it's getting close. Okay, bottomed. Tiny bit. There we go. Just going to grab the other two. Bottomed. There it is. Let's move to the next step.
Time to install this. This hose lines up with this. Slides right on there. This is going to close right up. Of course we're going to fill it first. But, just to show you, clips on there. Easy peasy.
Okay. It's time to install our engine cover. We've got two little hooky-do's like this. One's going to go here, one's going to go there. This is going to set flat down, and then we've got a little peton there. One there, and to go in there. Line them up, bring it down, line up the studs with the holes. We've got two nuts. Tight. Tight. Looking good.
Okay, it's time to get the skid plate back up. We've got a little hook right there, that's going to go right in this hole right here, okay. What that's going to do is make it so if you had to you could let go, right. And or, you can hold towards the front and you don't have to worry about holding up the whole weight of the skid plate. So I'm just going to take my bolts for the forward end of it get it started in the hole there. Not going to tighten it down until I get all four started. All right. Nice and easy here. Let's come around, see if I can see up there. And this one. Perfect. Let's move ahead.
All right, so we've got our forward skid plate. We've got our little hooks on the skid plate. They go right up inside the slots, okay. You got two hooks, you got two slots. So, just bring it so it's straight up and down. Line the hooks up with the slots. Now at this point you can release the front, assuming you have both hooks there, and you can move along to the back where we can get this in and situated. All right. Should be wanting to go up in there. There we go, that one's started. There we go. Just going to blast them up in there. Theoretically most of these skid plates have four, right. Two up here too, so if you have those two up there you're going to want to make sure you start those before you tighten these. There we go, tight. Tight. Very nice.
Okay, friends. So, I just wanted to show you this real quick. Something you can buy right at 1AAuto.com, it's a little spill proof funnel. This is really great because it's got pretty much every accessory that you might need inside of it. Doesn't matter what kind of vehicle you're working on, more than likely we have an adapter for it right in there. So, for the Toyotas it's green. Right there. You can grab the small cap, goes right on like this. Then of course we got all these adapters like I said.
So, if you end up needed any of those for a different type of vehicle you can, of course, use something like that. Got our funnel. You're going to want to make sure you have access to this. This is a little plunger, or a plugger. So now what we'd want to do, we're just going to put some coolant in this. This is universal coolant, it's not green coolant just so you know. Looks a little green but it's not. Open up our little plunger here. It's going to burp out any air that's in there. We're going to add a little bit more as soon as this is done here.
All right. So now we're going to get all of our extra pieces out of the way here. Take this, just kind of set it ... Whatever. Wherever you want put it really so it's not going to fall. Now we're going to start up the vehicle, let it run for a few minutes. It's going to help burp out any air that's in there and as the air comes up the coolant's going to continue down. Once that's done running for a little while we're going to make sure that the cooling fans turn on. Once those turn on it should be fully burped out. At that point we'll be able to move ahead to the next step.
Okay. So this has been running for awhile now. We turned it off, let it sit for a minute. Now I'm just going grab the hose, it's going to be a little warm. Make it quick. There we are. I push the plunger down in, that's going to make it so I can lift up on this funnel, and I'm just going to put the excess right inside this overflow. After we put that in the overflow we'll top of the overflow to where it needs to be. Then we should be all se to move along. There's that. I'm going to grab a little bit more coolant for in there. Before we do that, it's warm. Get this off of here. There we are. All right, I'm just going to grab some more coolant to top this off and we'll be all set to move ahead.
All right. Get this up to our level there. There we are, just below the full line. I like to have it right in between the full and the low. That way there when the coolant expands, or contracts, it has space to go. So, there we are. We'll just grab our radiator cap. Put this back in here. Nice.
All right. So we'll get these back clipped in. There we are. This one right here. Should just peel away. There, there. Should be another clip for right here. I don't know where it is. There we are. Push that in. There we go. All right, let's move ahead to the next step.
All right. So we're going to grab the wheel, bring it to our leg. We're going to use our leg/ab muscles to lift the wheel up. We don't want to go like this and lift with our backs, okay. Save your back, use your ab muscles. That's what they're there for. Start that one lug nut on there so the wheel can't wobble around very much. There we are. Now we'll grab the other five lug nuts. We'll bottom them all out. Bring it down, and torque them down.
Okay, so we're going to use our 21 millimeter socket and we're going to torque these down to 85 foot pounds in a star/snowflake pattern. Okay. So essentially just go from one side, to the other, criss-cross. Never go around in a circle. You could torque your wheel down at an angle and it'll loosen right up as you drive down the road. So just bounce around. There you are. In case you feel like you maybe missed some, or you just want to go around again anyway, just go ahead and go around. Doesn't cost anything. You're already here. Booya.
Thanks for watching. Visit 1AAuto.com, your place for DIY auto repairs, for great parts, great service, and more content.
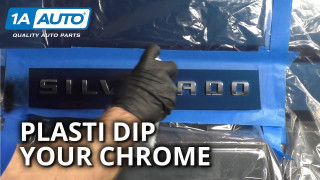
How to Cover Chrome Emblems or Badges on Your Truck with Plasti Dip
Say goodbye to chrome! Learn how to dip, or coat with special rubberized paint, any part of your vehicle you like!
