How to Replace Temperature Blend Door Actuator 1995-2002 Ford Explorer
Created on: 2010-10-19
Watch this video to learn how to fix your heat and A/C controls. The experts at 1A Auto show you how to replace the heat and A/C control panel on your 98-01 Ford Explorer, 05-07 Ford Ranger, and 98-01 Mercury Mountaineer.
-
step 1 :Pull down glove box
- Open up glove box.
- Push on the sides of the glove box and lower it.
- Protip: remove contents of glove box first.
-
step 2 :Unplug actuator
- Unplug your actuator by pushing on the little tab.
-
step 3 :Remove actuator.
- Use your wrench to remove the bolts and lift the actuator out.
-
step 4 :Test Actuator
- With the key on, rotate your temperature knob and the actuator should rotate in response.
-
step 5 :Plug in actuator
- Plug in the actuator with the key on, and the actuator will rotate itself into the correct position.
-
step 6 :Install new actuator
- Slide the actuator back in, making sure it is seated properly.
- Bolt it back in using your socket wrench.
-
step 7 :Replace glove box
- Push in on the sides to re-situate the glove box.
Tools needed
-
8mm Wrench
8mm Socket
Ratchet
Brought to you 1AAuto.com, your source for quality replacement parts and the best service on the internet.
Hi, I'm Mike Green. I'm one of the owners of 1A Auto. I want to help you save time and money repairing and maintaining your vehicle. I'm going to use my 20+ years' experience restoring and repairing cars and trucks like this to show you the correct way to install parts from 1aauto.com. The right parts installed correctly - that's going to save you time and money. Thank you, and enjoy the video.
In this video we'll be showing you how to replace the air temperature door actuator on this '98 Explorer. Same as most Explorers, the Mountaineers and Rangers, this part does fit Expedition and Navigator, and it's probably a similar procedure, but it may be a little different. The only tools you'll need are an 8 mm socket with a ratchet, and an 8 mm wrench, and a plain flat-blade screwdriver.
Open up your glove box, and on each side of your glove box you just push. You can see right back here, there's just little cushions that hold your glove box up. Okay, then your glove box just goes down. Right here you can see this is your actuator. You want to unplug by pushing up on a tab and pulling the clip out. This is the little tab right here, bent on the bottom. You can see here I have my replacement, and you see there's two bolts that go right here, easy enough to see, right there and there. And then there's two spots here. This one's on a post; this one has a bolt in it. And you can see that that one's directly behind your plug. So you take your wrench and just go straight back over the plug, and then you can actually feel if your wrench goes down too far. You know you're not on your bolt. Get it up on top and then just slowly turn until you're on. You're doing it blind, but you're loosening up the bolt.
We'll speed it up here a little bit because you don't need to see me turning that wrench the whole time. At one point I do actually see right here I'm getting the bolt out. Then for the front ones, I loosen them with the ratchet a little bit, and then I do switch over to a wrench. It's just a little easier. At the front there's actually less clearance above, so it's harder to get a socket and ratchet on there. Then you just lift it up and out.
You can actually test your actuator. With the key on, what you can do is -this is the actuator right there- and when you turn your key on and rotate your temperature control knob, you can watch and you can see that little post rotating. If you think about it, that's what controls the door. This actuator actually works fine, so we'll actually put it back into the vehicle, but I want to show you the 1A Auto ones as a comparison first.
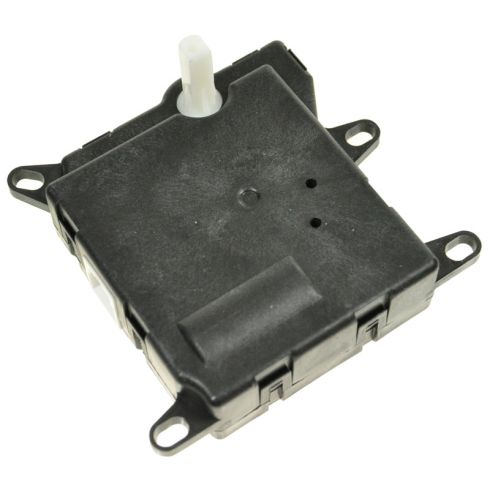
Just another note is that if you pull your actuator out and it is broken, it doesn't work, you want to make sure that you get your new actuator to the same position before you put it in, because obviously the post will not slide down into the door correctly unless it's in the same position. Just a quick side-by-side here of the two actuators. The black one is the new one from 1A Auto. You can see they're all the same. They have all the same mounting points; the connector where they plug in is all going to be the same. And you can see here as I plug in the new one from 1A Auto, it will actually take its position. You can see the actuator. Again here the key is still on, and that control's in a different spot, so the actuator takes that position right by itself with the key on.
Now to go and reinstall. I'll just unplug the new one, and since this one is still in good shape, we'll go and reinstall it. Put it up in. We want to get it going straight down and in, and then re-bolt it. Obviously the most difficult one to replace is going to be the back one, and I just put it in there and kind of work it with my two forefingers until it's in. So you're going to feel for the hole back there, put it down in, and then get it started with your forefingers. We'll speed it up again - watch me fly with that ratchet. Then get the other two bolts in the front and use the wrench to get them tight. They don't have to be extremely tight, just nice and firm, and then put the glove box up. Pull on the sides to get them up past the edge of the dash, push it in there, close it up, and you should be all set.
We hope this helps you out. Brought to you by www.1AAuto.com, your source for quality replacement parts and the best service on the internet. Please feel free to call us toll free 888-844-3393. We're the company that's here for you on the internet and in person.
Shop Products
Ford Mazda Lincoln Mercury HVAC Blend Door Actuator TRQ HCA40126
Part Details:
- 4
- Plastic
- No
- Rotary

How to Replace HVAC Control Unit 2005-10 Chrysler 300
How to repair, install, fix, change or replace a bad or broken heater control panel on 05, 06, 07, 08, 09, 10 Chrysler 300
