How to Replace Tail Light Circuit Board 1997-2005 Chevy Venture
Created on: 2011-02-03
This video shows how to remove the tail light and the circuit board on the 97-05 Chevy Venture
-
step 1 :Removing the Taillight Connector Plate
- Remove the T30 bolts from the taillight.
- Pull the taillight out.
- Pull the clip on the harness free from the assembly.
- Pry back the tabs and pop the plate out.
- Disconnect the harness.
-
step 2 :Replacing the Taillight Connector Plate
- Put the two double filament bulbs into the top and bottom socket on the new connector plate.
- Put the single filament in the center spots on the new connector plate.
- Push the connector plate back into the taillight.
- Connect the harness.
- Clip the harness back to the assembly.
- Push the taillight into place.
- Replace the T30 bolts.
Brought to you by 1AAuto.com, your source for quality replacement parts and the best service on the Internet.
Hi, I'm Mike Green. I'm one of the owners of 1A Auto. I want to help you save time and money repairing or maintaining your vehicle. I'm going to use my 20-plus years experience restoring and repairing cars and trucks like this to show you the correct way to install parts from 1AAuto.com. The right parts installed correctly, that's going to save you time and money. Thank you, and enjoy the video.
In this video we'll be replacing the taillight connector plate on this '99 Venture, same as a '97 to '05 Venture as well as the other GM minivans, the Pontiac Montana, Olds Silhouette. Only tool you'll need is a T-30 Torx driver.
Okay, so inside your taillight is this connector plate. And a lot of times what goes wrong is it's got a seal around the outside. Either if your taillight gets cracked and obviously, if your taillight gets cracked, you should think about replacing the whole lens or this seal goes bad and water gets in here and corrodes the contacts. Okay, so to replace it Okay, so here's a close-up of the T-30 Torx bit. That's what it looks like. Like I said, there is also a screwdriver style. You can use either one. And I'll start loosening those up, and we'll hit a little bit of fast-forward here so you don't have to just watch me doing this. Once you have those bolts loosened up, just pull, and your bolts are probably going to fly out like that. Okay, so here's the back of that connector plate, and probably just want to pull this clip off the harness. And then you're going to want to take the whole plate out. So there's four tabs, one, two, three, and four. Okay, so you just pull the tab out, pull the tab out. Pull the plate up, this tab, and this tab, and then pull the plate up.
Okay, see, there's all your bulbs. Obviously, this is how you would change the light bulbs, and you'll be able to tell once you get to this point, you'll probably see some corrosion coming up out of there. And then to unhook your harness, there's a thumb tab right here. Pull up, take your harness off. Okay, it does matter what bulbs you use. The top yeah, top and bottom are double-filament bulbs, and the two middle ones are single-filament. So I would just transfer them write to each one. And obviously, you'll want to put in new bulbs if you have a corrosion problem. The dual-filament bulbs look like they're 3057-Ks, and then the single-filaments are probably 3054s. The single-filaments are 3156-Ks. Okay, so put your bulbs in. You can either connect that now, or you can do it afterwards. And the shape of your taillight makes it obvious which way this goes. Again, if your taillight is cracked or broken, you want to replace that. Then this just presses right in. And you'll need to press it firmly because you want to make sure it seals.
I'll put it right down in the van. Press them in. It may take some trying. I found that locking this bottom corner one first was the best way to go. But the harder it is to lock, the better because you know it's in there nice and firm and sealing well. Okay, so now reconnect our harness. Okay. And then reclip the harness to the taillight. Install. Okay, and we'll fast-forward through putting in those screws, and when you tighten them up, you want to tighten them up firm but not too tight.
We hope this helps you out. Brought to you by www.1AAuto.com,your source for quality replacement parts and the best service on the Internet. Please feel free to call us toll-free, 888-844-3393.We're the company that's here for you on the Internet and in person.
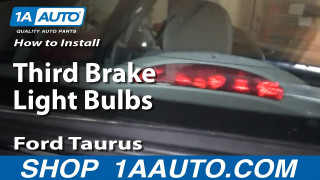
How To Replace Third Brake Light Bulbs 1996-2007 Ford Taurus
This video from 1A Auto shows you how to replace the third brake light bulbs on your 96-07 Ford Taurus. Save money and do it yourself!
