How to Replace Tail Light 1999-2009 Ford Crown Victoria
Created on: 2011-02-26
How to install, repair, fix, change or replace a broken, damaged, burned out, cracked, faded, cloudy or chipped taillight on Ford Crown Victoria, years 99, 00, 01, 02, 03, 04, 05, 06, 07, 08, and 09.
-
step 1 :Removing the Taillight Assembly
- Twist off the plastic clip behind the taillight.
- Pull the side insulation panel off.
- Pull the insulation panel behind the taillight back.
- Remove the three 11mm nuts on the back of the taillight.
- Pull the taillight forward.
-
step 2 :Replacing a Bulb
- Twist out the socket.
- Pull the bulbs straight out.
- Push the new bulb into place.
- Twist the socket back into place.
-
step 3 :Replacing the Taillight Assembly
- Twist the sockets into the new taillight assembly.
- Line up the taillight and push it into place.
- Replace the three 11mm nuts.
- Put the insulation panel back into place.
- Twist the plastic clip back into place.
Tools needed
-
Ratchet
11mm Socket
Brought to you by 1AAuto.com, your source for quality auto replacement parts and the bets service on the internet.
Hi, I'm Mike Green. I'm one of the owners of 1A Auto. I want to help you save time and money repairing and maintaining your vehicle. I'm going to use my 20 plus years experience restoring and repairing cars and trucks like this to show you the correct way to install parts from 1AAuto.com. The right parts installed correctly, that's going to save you time and money. Thank you and enjoy the video.
In this video, we're going to show you how to remove your taillight on this 2004 Crown Victoria, same as any '99 to '05. Only tool you'll need is an 11 millimeter socket and ratchet or a wrench. We'll show you both how to replace the whole taillight assembly if you've got one broken and also just how to replace the bulbs. It's all pretty much included.
You'll want to open the trunk up. Back in here, there's a plastic knob that you twist off. Pull your side panel out and you pull this panel back. Now, you can see three studs. One here and then two back over there. You want to remove those three and they look like 11 millimeter bolts. We're just going to hit fast forward here as I'm removing those three 11 millimeter nuts. Once those three bolts are out, then the light comes forward. If you're looking to change the bulbs, you just twist these out. Okay. If you're looking to change the whole light, obviously you just pull that clip off and the whole light comes off. 1A Auto sells these taillights. It's the exact replacement of the original. Again, the bulbs, they just pull out in the sockets.
To reinstall, putt one of your lights back in. Push this little clip back on to the back of the light here. Make sure the studs, there are little alignment, then alignment in here, an alignment and up here. Make sure that those are going in. Everything should go in fine. Now, we just put the bolts back on. Okay, we'll fast forward through this again. Not much to it. Just take off those three nuts, pull the light out, twist out your bulbs, replace the taillight if you need to and then put the bolts back on. Tighten them snug and then put your side panels and stuff back together.
We hope this helps you out. Brought to you by www.1AAuto.com, your source for quality auto replacement parts and the bets service on the internet. Please feel free to call us toll-free, 888-844-3393. We're the company that's here for you on the internet and in person.
Shop Products
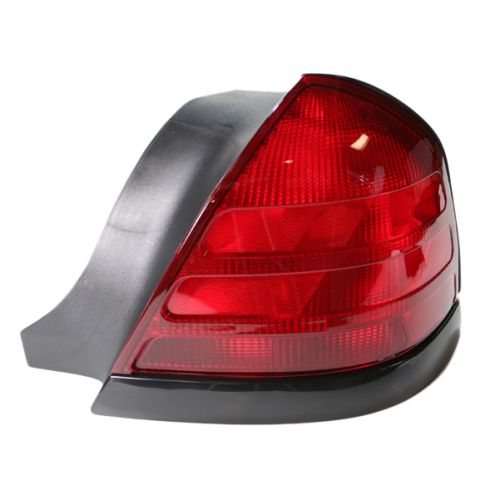
Ford Crown Victoria Passenger Side Tail Light TRQ LTA79197
Part Details:
- Features and Benefits
- Red
- Black Bezel

How to Replace Taillight Bulbs 2007-14 Toyota FJ Cruiser
Check out this video from 1A Auto to learn how to replace the bulbs in the tail light assembly on your 07-14 Toyota FJ Cruiser!
