How to Replace Tail Light 1998-2001 Volkswagen Passat
Created on: 2012-01-18
Watch this video to learn how to replace the tail lights or bulbs on your 98-01 Volkswagen Passat. 1A Auto shows you how to do it yourself!
-
step 1 :Changing a Bulb
- Pull the trim out from behind the taillight.
- Push the tabs on the connector plate and pull it out.
- Twist the bulb out.
- Twist the new bulb in.
- Replace the connector plate.
-
step 2 :Removing the Taillight Assembly
- Remove the connector plate.
- Remove the three 8mm nuts.
- Pull the taillight out and off.
-
step 3 :Replacing the Taillight Assembly
- Line up the taillight and press it into place.
- Replace the three 8mm nuts.
- Push the connector plate into place.
- Replace the trim.
Tools needed
-
8mm Socket
Ratchet
Brought to you by 1AAuto.com, your source for quality replacement parts and the best service on the internet.
Hi, I'm Mike from 1A Auto. I hope this how-to video helps you out. Next time you need parts for your vehicle, think of 1AAuto.com. Thanks.
In this video I'm going to show you how to service a tail light, both changing the bulbs as well as changing the entire tail light if you break one. This is a 2001 Passat, which is the earlier style for 2001, and it works for 1998 to 2001. The only tool you'll need is either an 8mm wrench or a socket with a ratchet.
To service the tail light on one of these vehicles you can come around to the trunk. On the passenger side, if you've never serviced it before, you might have to break away, there will probably be a perforation to break away. Pull this door out. Once you have that out, then you can see right back in here the tail light connector plate. Pull that out. If you're just looking to service the bulbs, pull them out counterclockwise and put them back in.
If you need to replace the whole tail light assembly, then there's three 8mm bolts. There's two on the outside, one there and one there, and then one on the inside right there. You just reach in with an 8mm wrench. Once you loosen the nuts a little bit they tend to twist right off with your fingers. You're just going to do that for all three. Once those are undone, and the light sticks a little bit, it comes right out. Here's the new replacement from 1A Auto. Even though my original one was fine I just want to show you this, makes a great replacement. It's going to bolt right in if you've broken your tail light. I get it in. Make sure you've got all the studs lined up. Then start your nuts on.
I'm going to kind of hit fast forward here. All I'm doing is reaching in there and starting those 8mm nuts on to the studs, basically hand tightening them, and then reaching in with my wrench and tightening them up firm. You don't have to have them extremely tight, but they need to be tight enough to press the sponge seal to the body.
Once you get that you can put your plate back in, top up in first. Make sure the bulbs go in. Press it right in. Then you just put this back in place. Here on the other side, take this panel out. Reach back in here. Feel for the larger tabs; squeeze them. Pull your plate out. Then you're going to have to just manipulate it around a little bit. Push it down and then kind of back up and out. Again, you get to your plate just like before. Just back down in. Get that lined up and back in.
We hope this helps you out. Brought to you by www.1AAuto.com. Your source for quality replacement parts and the best service on the internet. Please feel free to call us toll free: (888) 844-3393. We're the company that's here for you on the internet and in person.
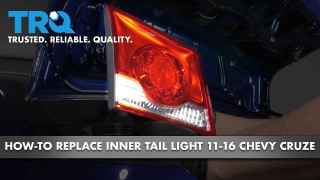
How to Replace Inner Tail Light 2011-16 Chevy Cruze
For one reason or another, you may find yourself needing to replace more than just a bulb. Broken or hazy tail lights reduce your visibility to other drivers. TRQ direct fit tail light assemblies are an affordable option that’s easy to do yourself! How to replace the inner tail light housing on your 2011-16 Chevy Cruze.
