
How to Replace Tail Light 2004-06 Nissan Sentra
Created on: 2012-09-20
Watch this video to learn how you can replace the tail lights on your 02-06 Nissan Sentra. 1A Auto will show you how it's done!
-
step 1 :Changing a Bulb
- Pry out the clip behind the taillight.
- Pull the insulation down.
- Twist the sockets counterclockwise.
- Push the bulb in and twist counterclockwise to remove.
- Push a new bulb in clockwise.
- Twist the socket back in clockwise.
-
step 2 :Removing the Taillight Assembly
- Disconnect the taillight harness.
- Remove the harness clips from the car.
- Remove the four 8mm nuts.
- Push the taillight out and off.
- Scrape off the seal.
-
step 3 :Replacing the Taillight Assembly
- Replace the seal starting at the bottom.
- Line up the taillight and push it into place.
- Replace the four 8mm nuts.
- Re-clip the harness to the car.
- Reconnect the harness.
- Push the insulation into place.
- Replace the clip.
Tools needed
-
Socket Extensions
Flat Blade Screwdriver
Putty Knife
8mm Socket
Ratchet
Brought to you by 1AAuto.com, your source for quality replacement parts and the best service on the internet.
Hi. I'm Mike from 1A Auto. I hope this how to video helps you out and next time you need parts for your vehicle think of 1AAuto.com. Thanks.
In this video I'm going to show you have to service a taillight on this 2006 Nissan Sentra. This process is basically the same for any 2002 to 2006 Sentra. I'm going to show you both changing just the taillight bulbs if that's all you need to do as well as changing the whole assembly if you've broken a taillight. If your just changing a bulb you may not need any tools or maybe just a flat blade screwdriver. If you're going to change the whole assembly you're going to need a flat blade screwdriver and a 8 mm socket with ratchet and extension or an 8 mm wrench will work as well. You will also need a putty knife.
To service taillight, if you're just going to change a bulb or if you need to change the whole entire light right back here you will see a little clip. Either use a screwdriver or just your fingernail and pry the center of it out and then pull the clip right out. Now you can take this and pull it back and see the back of your taillight. The bulbs you just grab, twist counter clockwise and pull the sockets out. Then the bulbs push in twisting counter clockwise and pull out. They go back in just by putting in and turn clockwise.
You want to disconnect the connection right here. Just press on a tab and pull and you also want to pull this clip off here. Then there's four 8mm nuts to remove here, one up higher here, and then this back there are two more right there. I'm just going to speed this up here as I remove those four nuts. Generally you just use an 8 mm wrench or a socket and ratchet with an extension. Once you loosen them up a little bit they usually come right off by hand. To remove the light there's actually kind of a sealer that holds, that seals the light and body so you basically just need to push real hard on the backside of your light or pull on the light itself. With some force it comes off. You will want to get as much of this stuff off as you can. I recommend a putty knife and break it off. I've got most of it off. It's not perfectly clean, but it's cleaner for sure.
New light from 1A Auto. You can see it's nice. If you had a broken light it's going to fix the problem for sure. It comes with the harness and everything. It also comes with a new seal. What I'm going to do is unroll the seal and I'm actually going to apply it to the body of the car right around the opening. I'm going to start at the bottom and I'm going to put it right at the edge of the opening. Here again we will speed up. Just put it around the edge of the opening. The tape or the paper you see on the seal just helps it so you don't get your fingers stuck to that seal. The seal's very sticky. Then I use a putty knife just to cut it off at the end and join it at the bottom because that's the most common place where leaks will happen is at the joint. You always want to join that down at the bottom.
You can see I've taken the paper off and I've got the seal right around. I'm going to take the new light. I'm just peaking down and making sure that the two bottom studs go in and the top ones go in and press it right on. You should be able to see a little bit of a gap around the edges just to make sure that the seal is catching. Now I'm going to put the four nuts back on.
I'm going to speed it up here as I put the four nuts back on the back that hold the taillight in place and basically what you want to do is you thread them all on by hand and then you tighten them by hand with your socket and extension. Then you just slowly tighten them up. You don't tighten one up all the way. Tighten one a little bit, then tighten the one across from it and then tighten another one and you want to tighten them up evenly probably two or three turns at a time until you get them tight. That just presses the seal nice and evenly. Now we can put our light back in and put this harness connector back there. Put our insulation back in place. Take our little clip and put it back in and lock it in place.
We hope this helps you out. It was brought to you by www.1AAuto.com your source for quality replacement parts and the best service on the internet. Please feel free to call us toll free 888-844-3393. We are the company with you on the internet and in person.
Shop Products


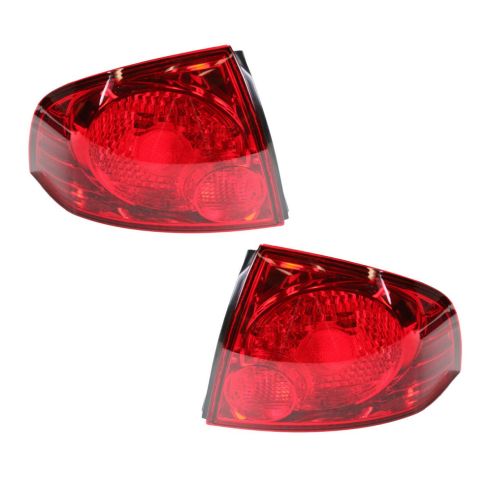
2004-06 Nissan Sentra Driver & Passenger Side Outer 2 Piece Tail Light Set DIY Solutions LHT07400
- 2 Piece
- (1) Passenger Side Outer Tail Light
- (1) Driver Side Outer Tail Light

How to Replace Back up Reverse Light 1998-2005 Volkswagen Beetle
This video shows how to change the reverse light bulbs and remove and install the reverse light housings yourself on the 98-05 Volkswagen Beetle

